Welcome to 2026. The workbench is still active. Shipping is now much more complex. I’ve had to restrict shipments to the US. I need to find a reliable way to calculate tariffs.
Some fun things I’ve done since the last post. I haven’t listed all of them. That will take a few posts, which I hope to do before any more years go by!
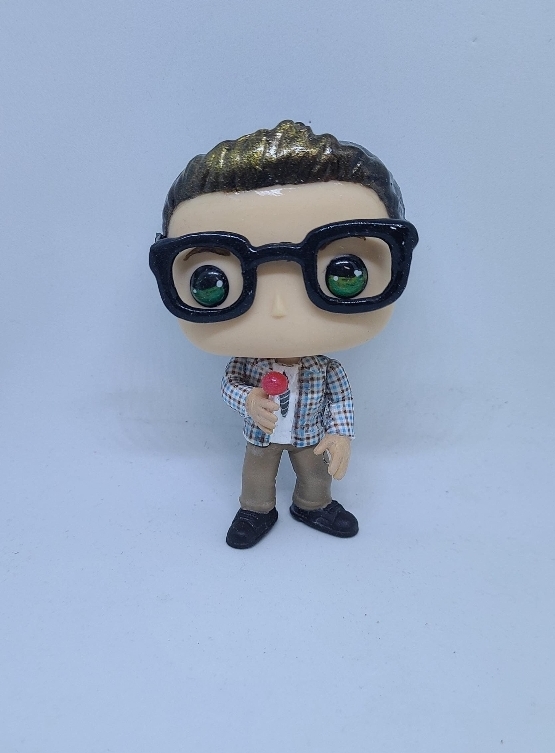
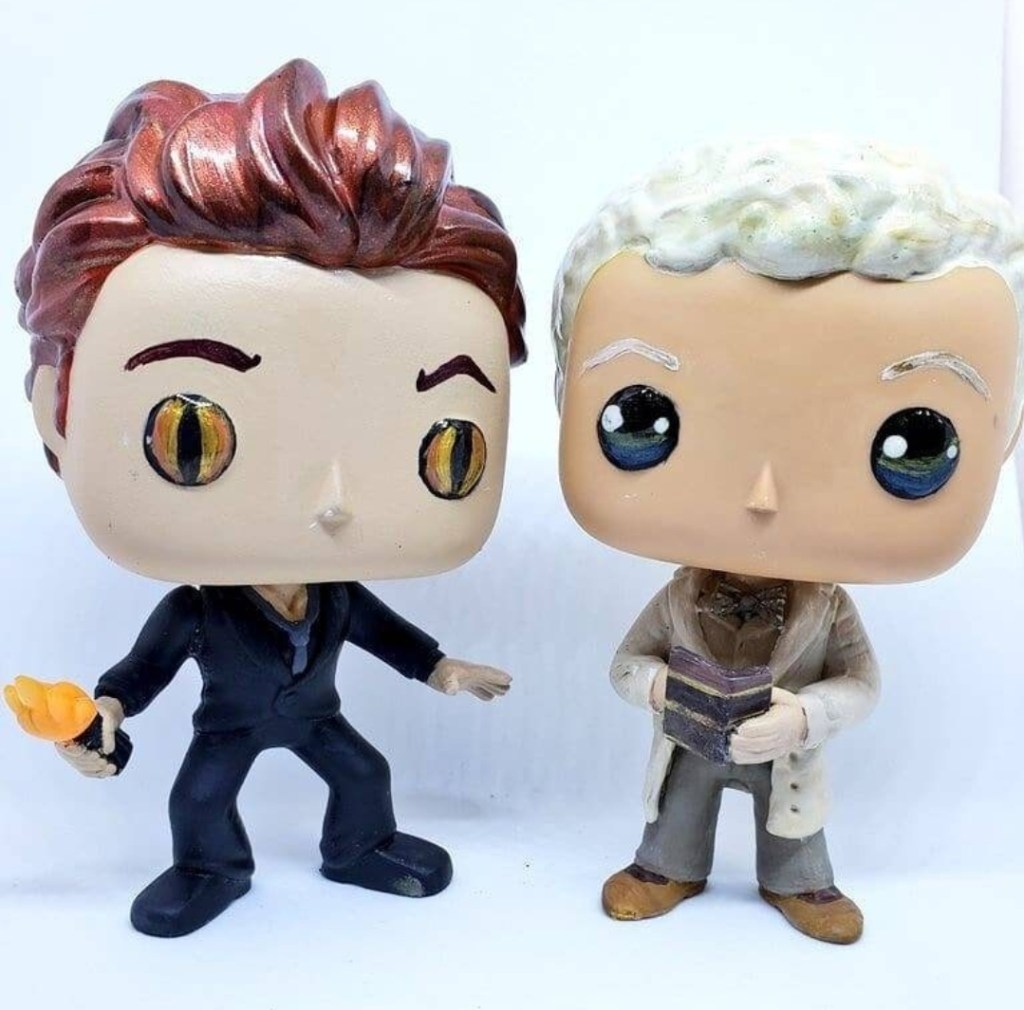
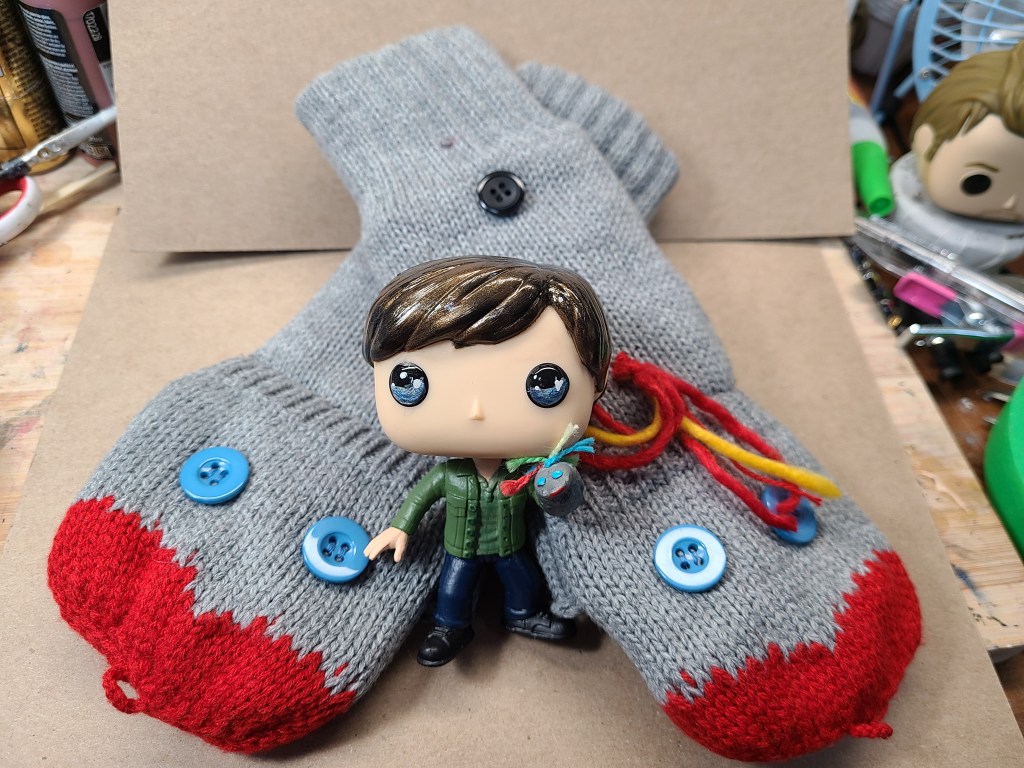
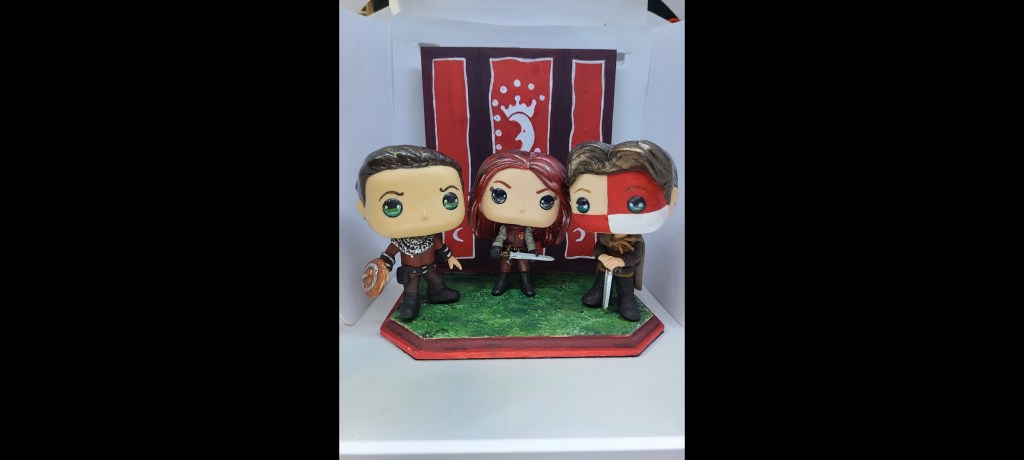
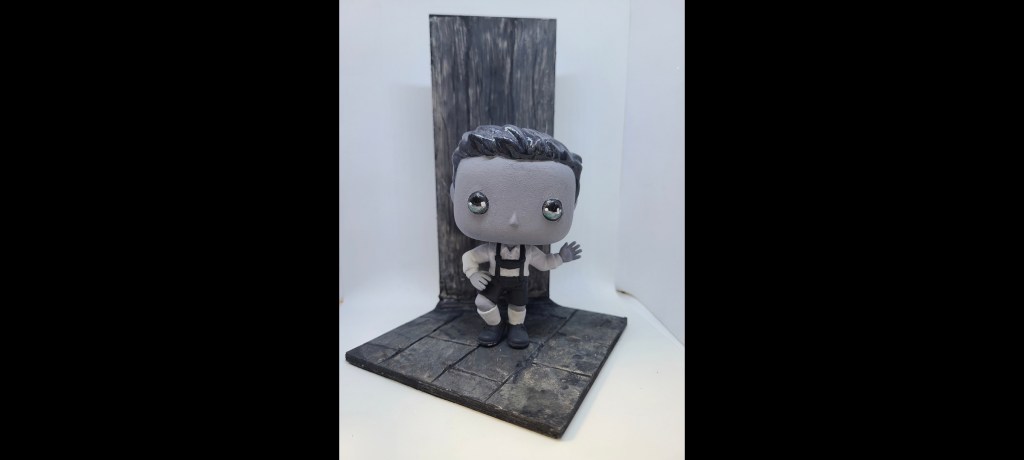
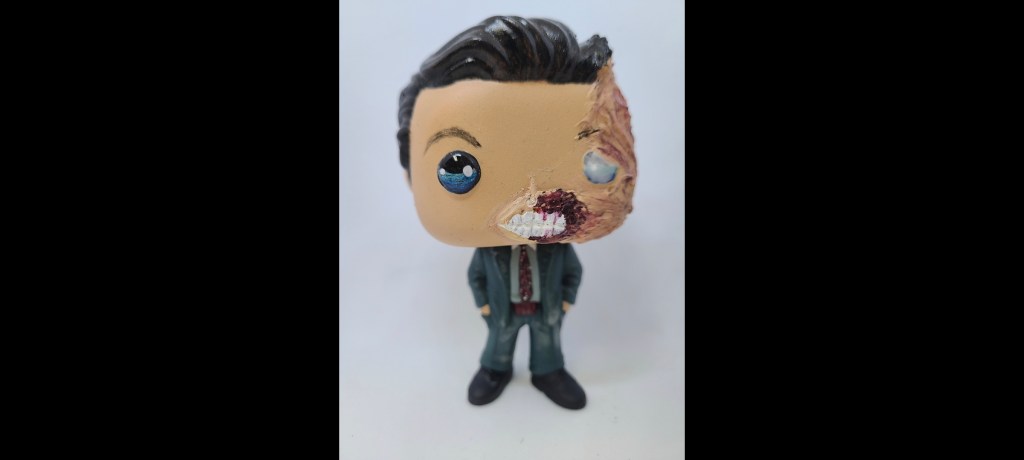
Dancing Dean and GarthRowena! Queen of hell and Witch complete with book of the dammed and hex bagSoldier Boy and Bacchus JensenSkeddalecki Sam and Young Sam – complete with greyhound shirtMetatron with his books and Charles De Mar from Better Off DeadEileen Leahy speaking to Sam on her tabletMint in package – with lollipopSoldier boy.. complete with lube!Crowley and AziraphaleMr Frizzles knows when you are a liiiiaaaarrrr!Abbadon with her “devil made me do it” shirtMoondor heroes! It’s good to be queenMonster Movie (picture is actually in colour)Gotham’s Two FaceOn my car, naked.. covered in bees!Crowley, complete with customizable demon deal!Jack Kline in all his innocence
At present in development:
Rowena and her throne diorama
Crowley and Rowena hell diorama
Camp Chitaqua Dean. Gotta love thigh holsters
Balthazar
Bobby in his wheelchair
I live for feedback! Let me know what you think and what you want to see next!
It’s been a while. A long while. A combination of life, health, brain and horrid computer that made doing anything a chore I wasn’t up to. Now I have a brand new built computer thanks to my Boy. Some brain help thanks to finally taking days off from work (10 this year is the most taken in 7 years!) and with those days off, some time to get things done that have been making me feel overwhelmed and therefore, since I couldn’t do it all, I didn’t do anything!
Over the next few weeks. I’ll be rearranging pictures, adding new ones, new tutorials and process videos. If you want to see something, let me know!! There will be more than Pops. there will be etching, vinyl, paper crafts, leather crafts. There will be kids things done with my creative assistant Lil-Bell. There will be good things, and you’ll see ALL the failures!
Not everything here will be in or for the store. Some will be for me, some will be experiments, some will be one off’s that may be for a commission or charity. Some that have been made and given away. I’m horrible about taking good photos before I send them away, so I’m hoping to be more consistent at that.
Below are my newest babies. Soldier Boy, Abbadon – The Devil Made Me Do It and Garth with Mr. Fizzles. There are others in progress that will be posted. Welcome to 2023. I hope we can spend some time together! ❤
I will never say there is a “right” way to do something (except for safety). Today I will show you my workbench set up. It’s right for ME, but you’ll find your own best set up. We’ll cover tools and layout today, Next post will cover accessories and supplies.
Layout
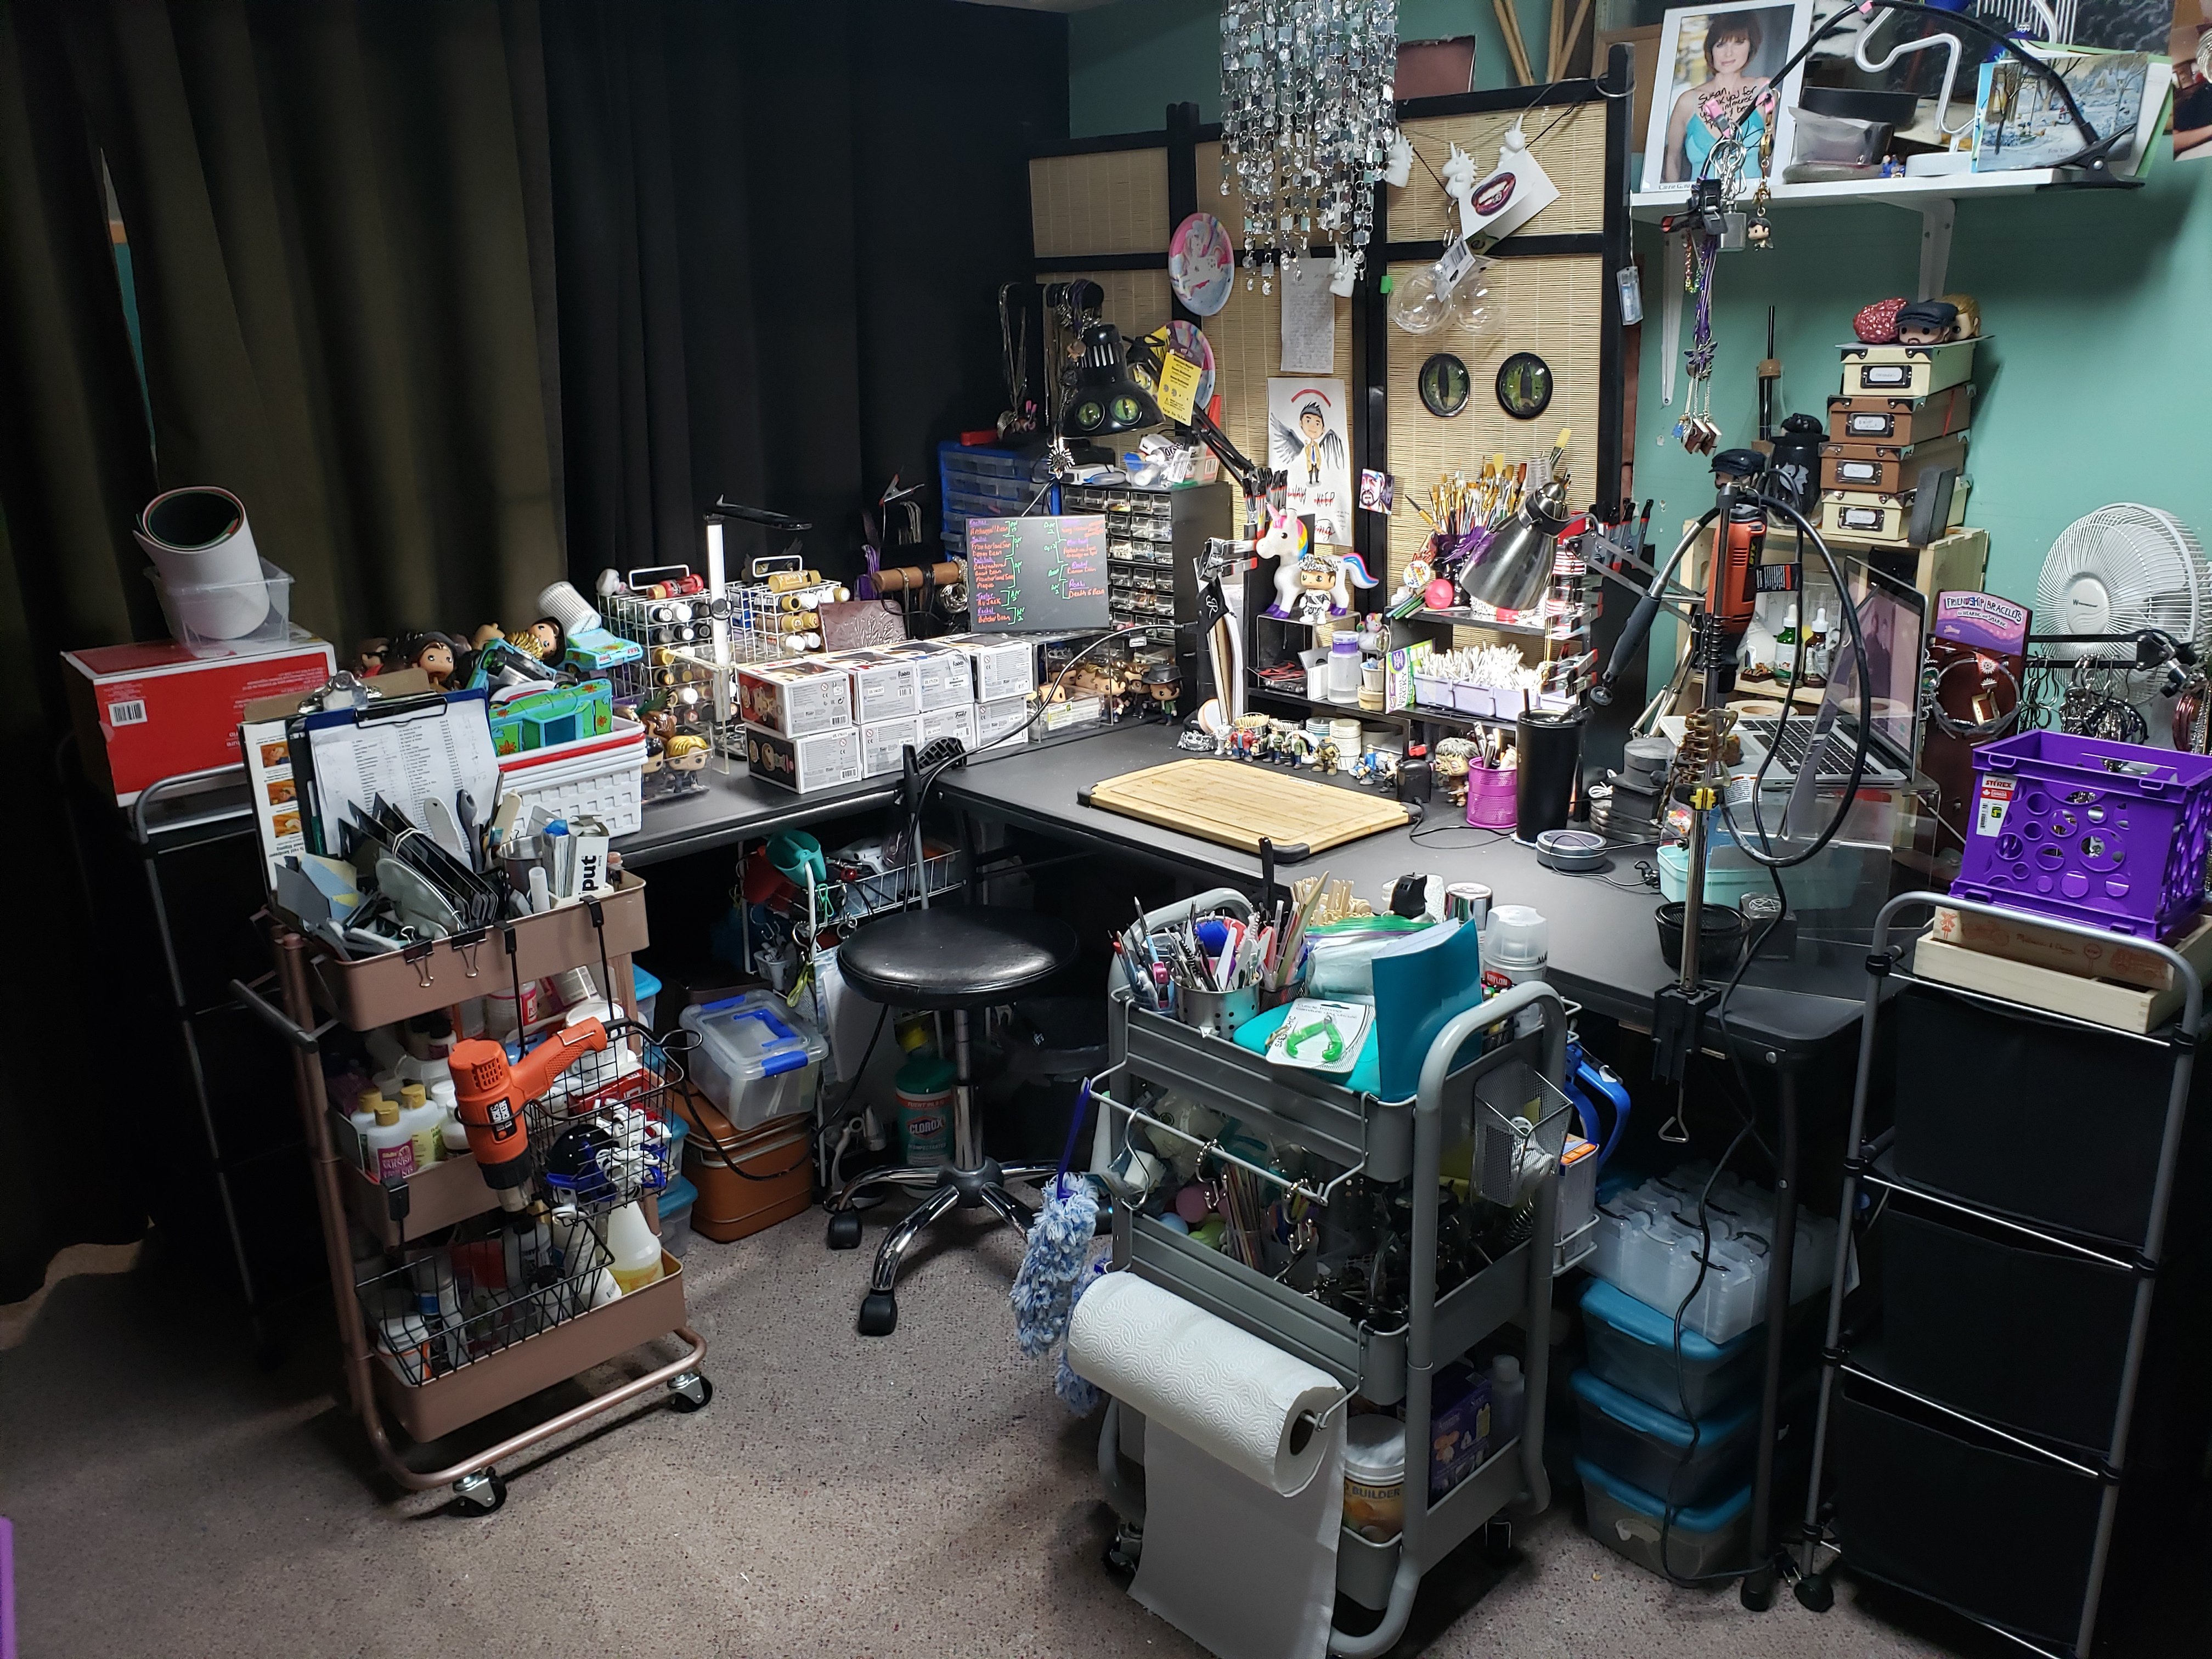
Wide view of the workbench.
I’ll start with the basic layout. I use an L shape comprised of two plastic tables. I also have a wooden tray table that is supposed to be put away at some point, but .. meh. The wooden table holds my Windows laptop, so it’s used for references and entertainment. Directly in front of where I sit is the cutting board that I work on 90% of the time in an effort to reduce the damage to the table. It’s easier to replace a cutting board. In front of that is the shelving that holds disposable supplies, brushes, acetone and such. Most importantly is my mascot, King Jensen, unicorn and Bacchus coin. Above are things that make me smile.
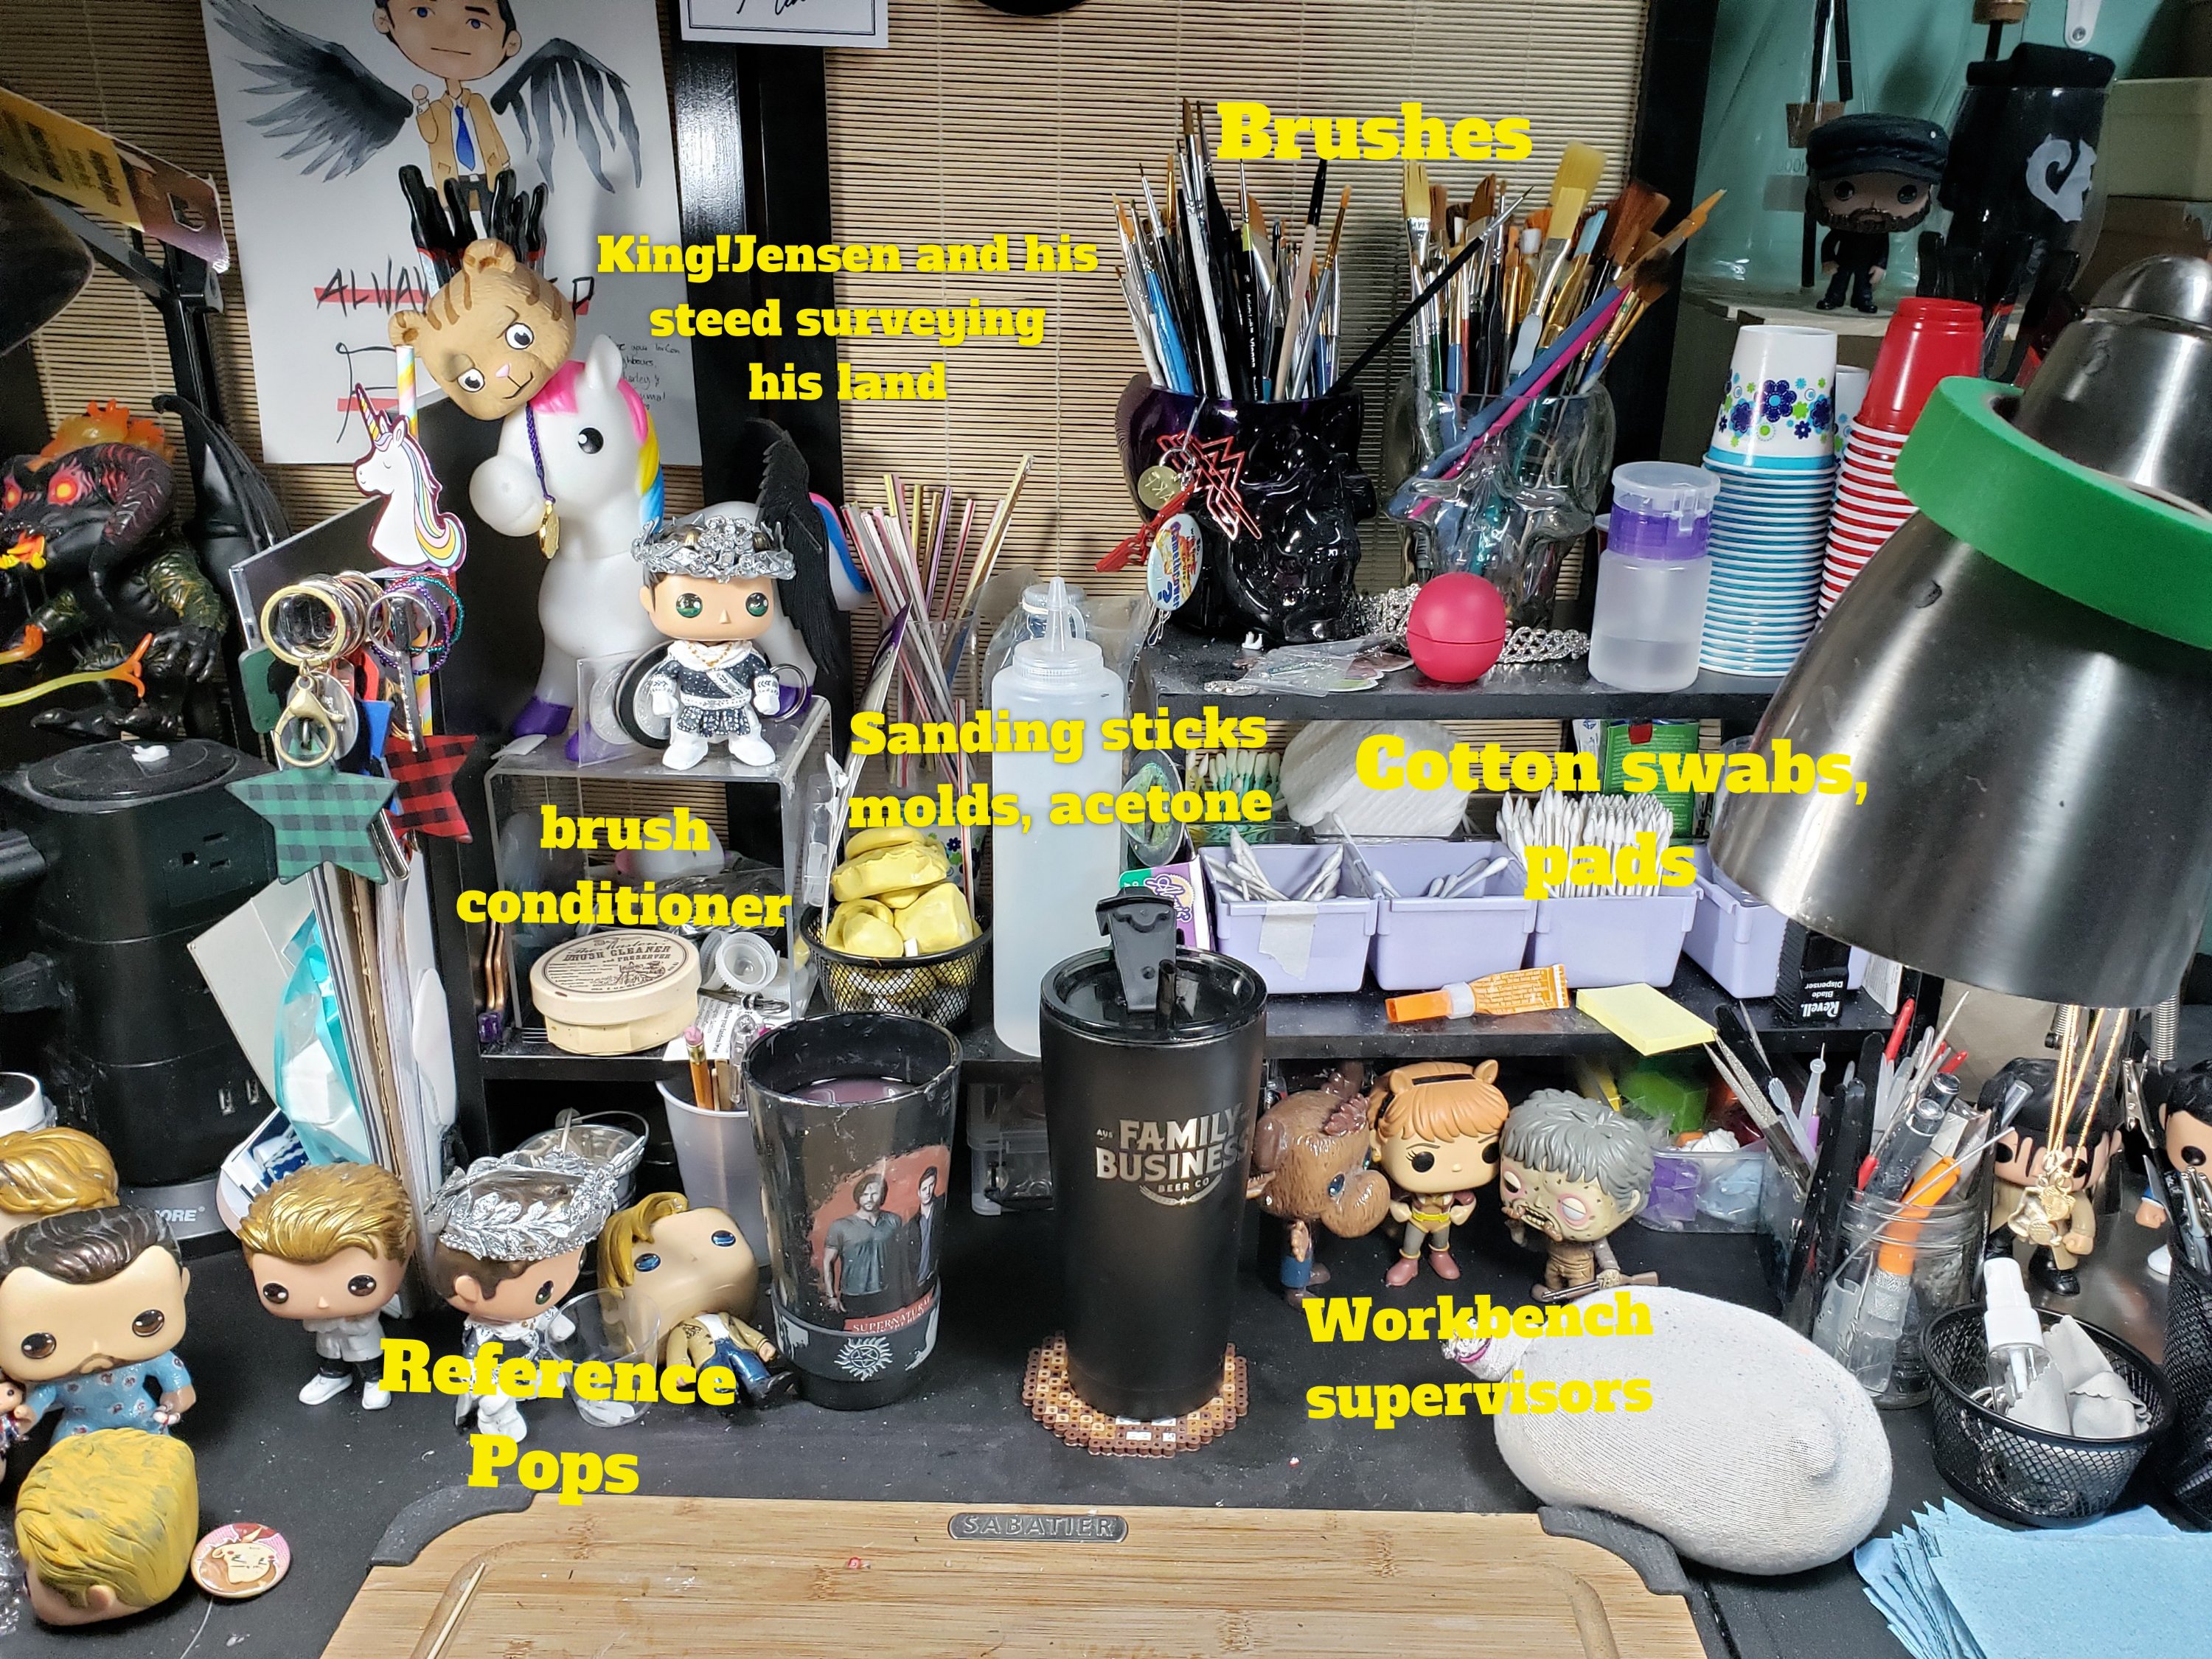
The heavy use area of the workbench. With the important things, like my winged unicorn impaling a bear/tiger while King!Jensen rides him
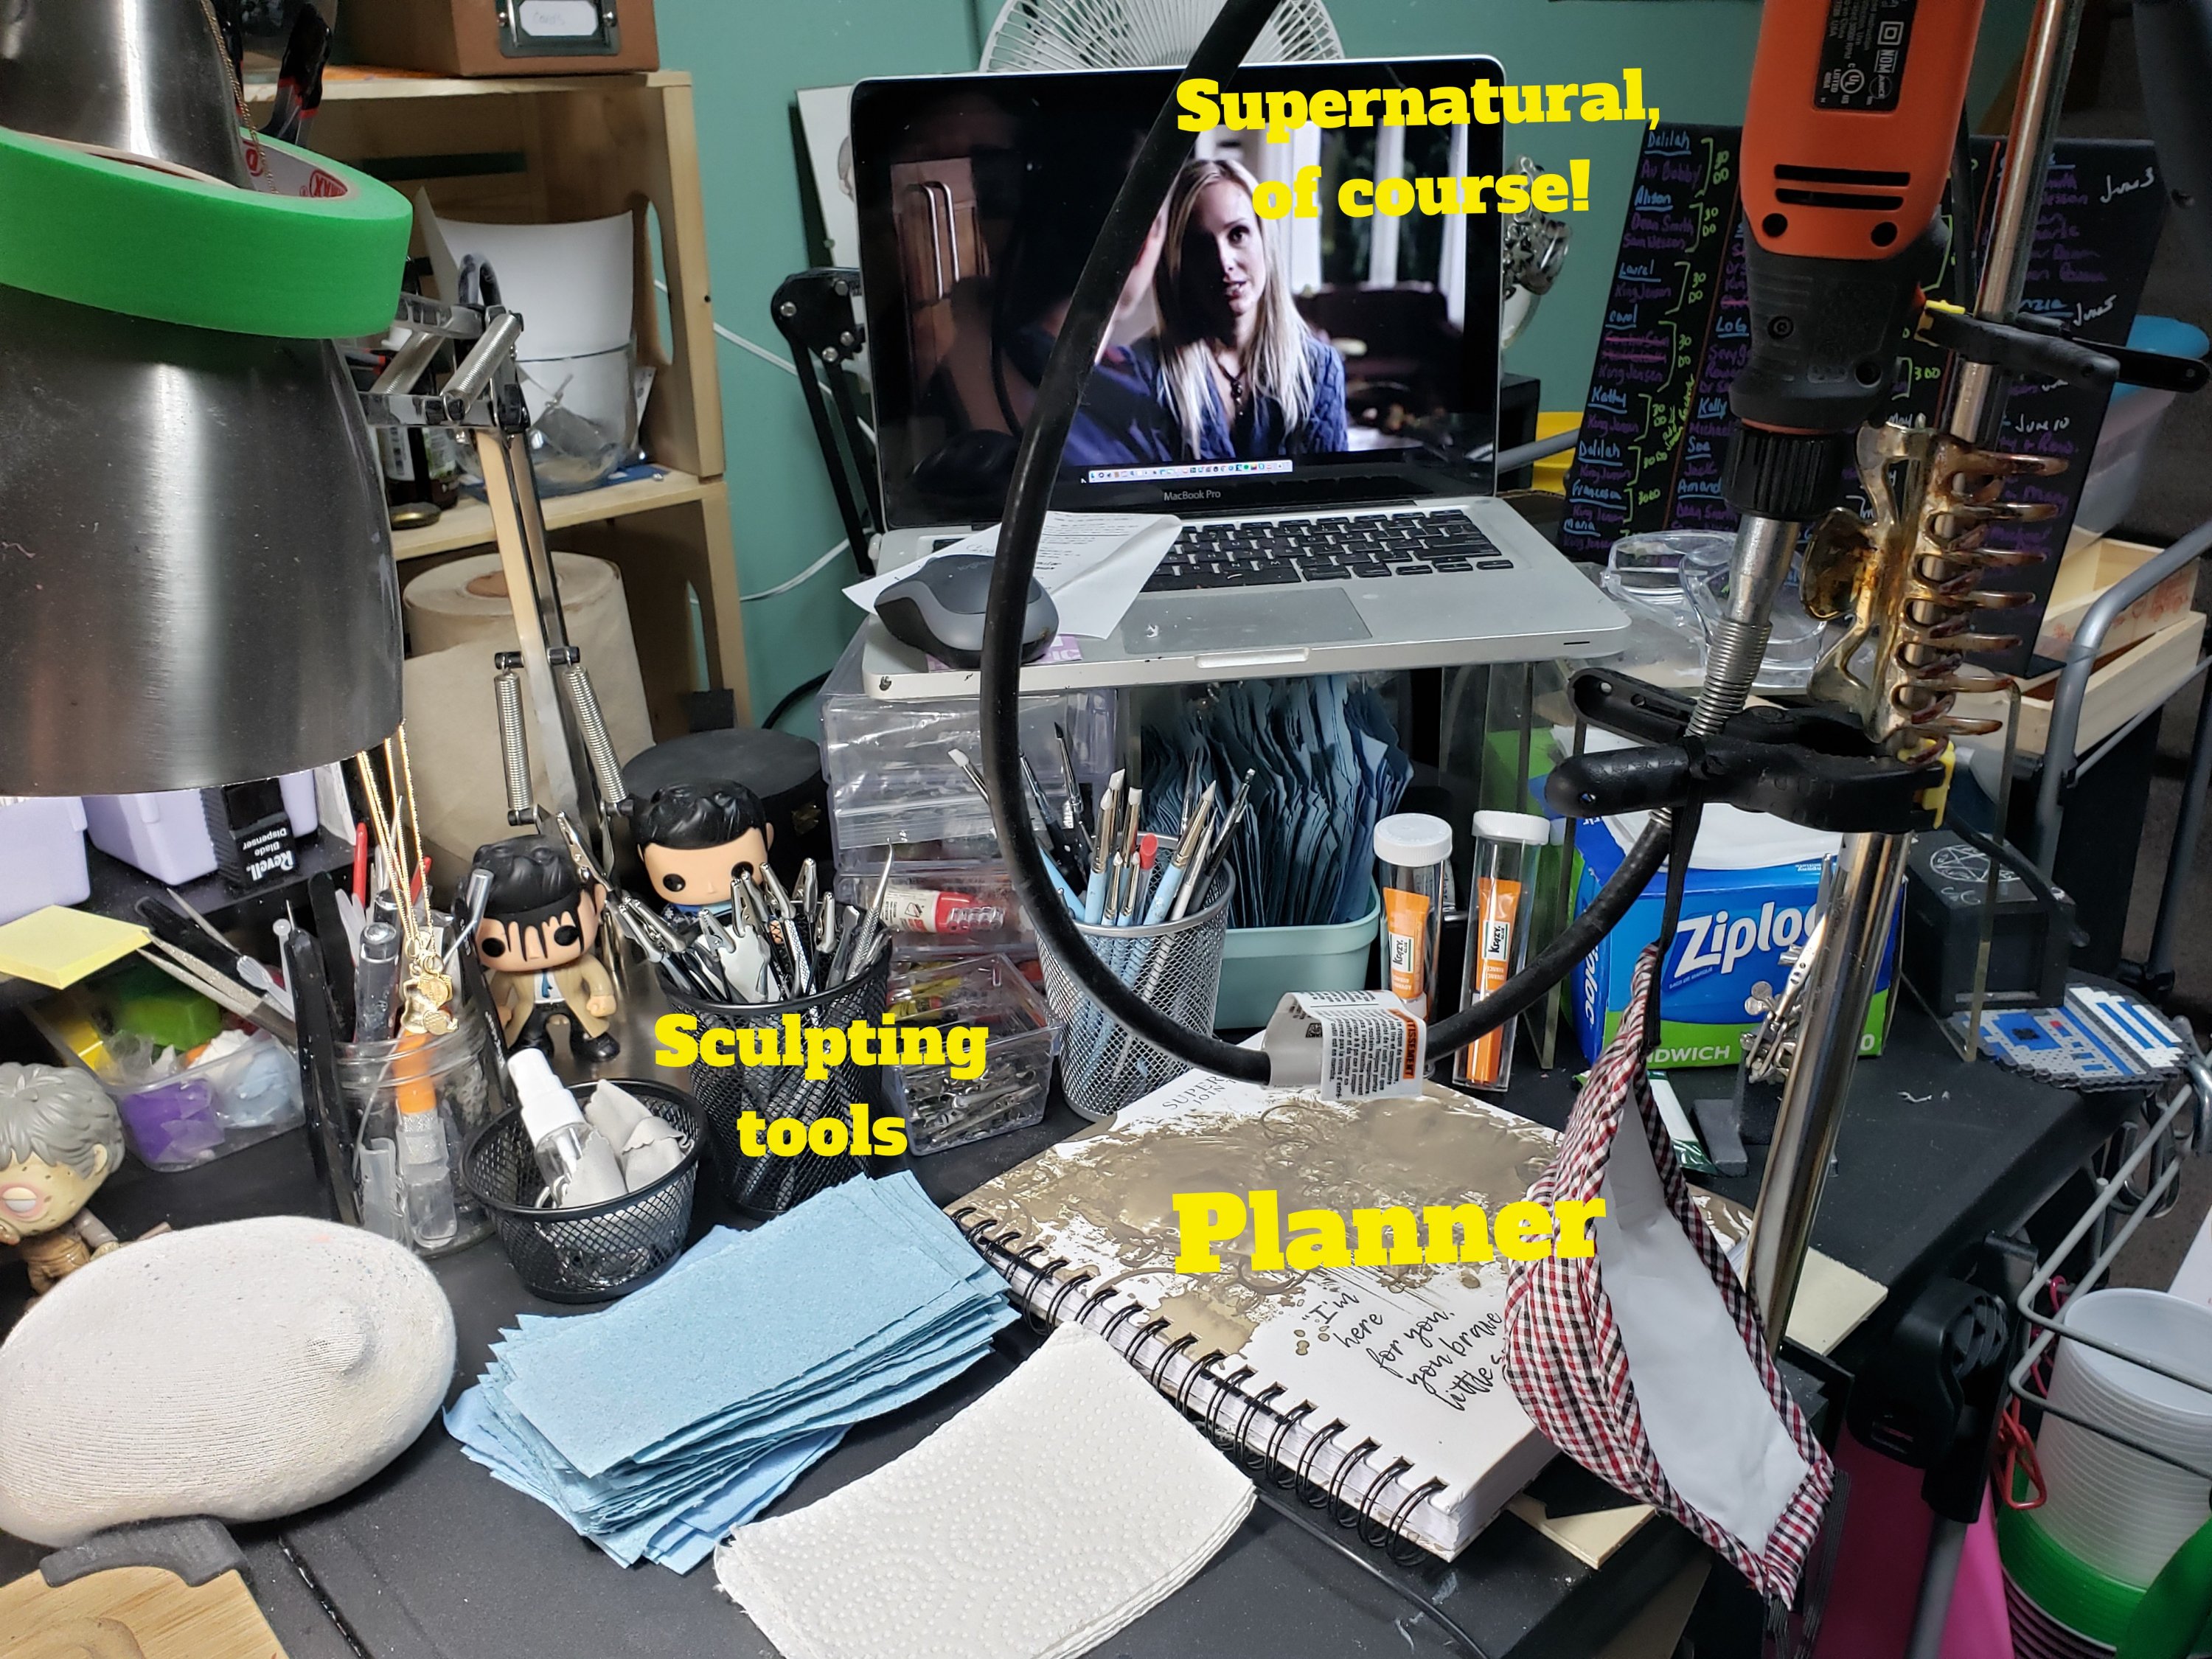
To my left is my planner, Mac (used for watching Supernatural while I work) and containers with sculpting tools, sharps, glue and my workbench list sorted by due dates. Below that is a set of drawers with plates (my palette at times), small tools, AKF raw materials, overflow paint and specialty paint (colour change, metal finish and such)
To the right. on hand thingsThe drawers that hold common things like plates, tools, akf and extra paint
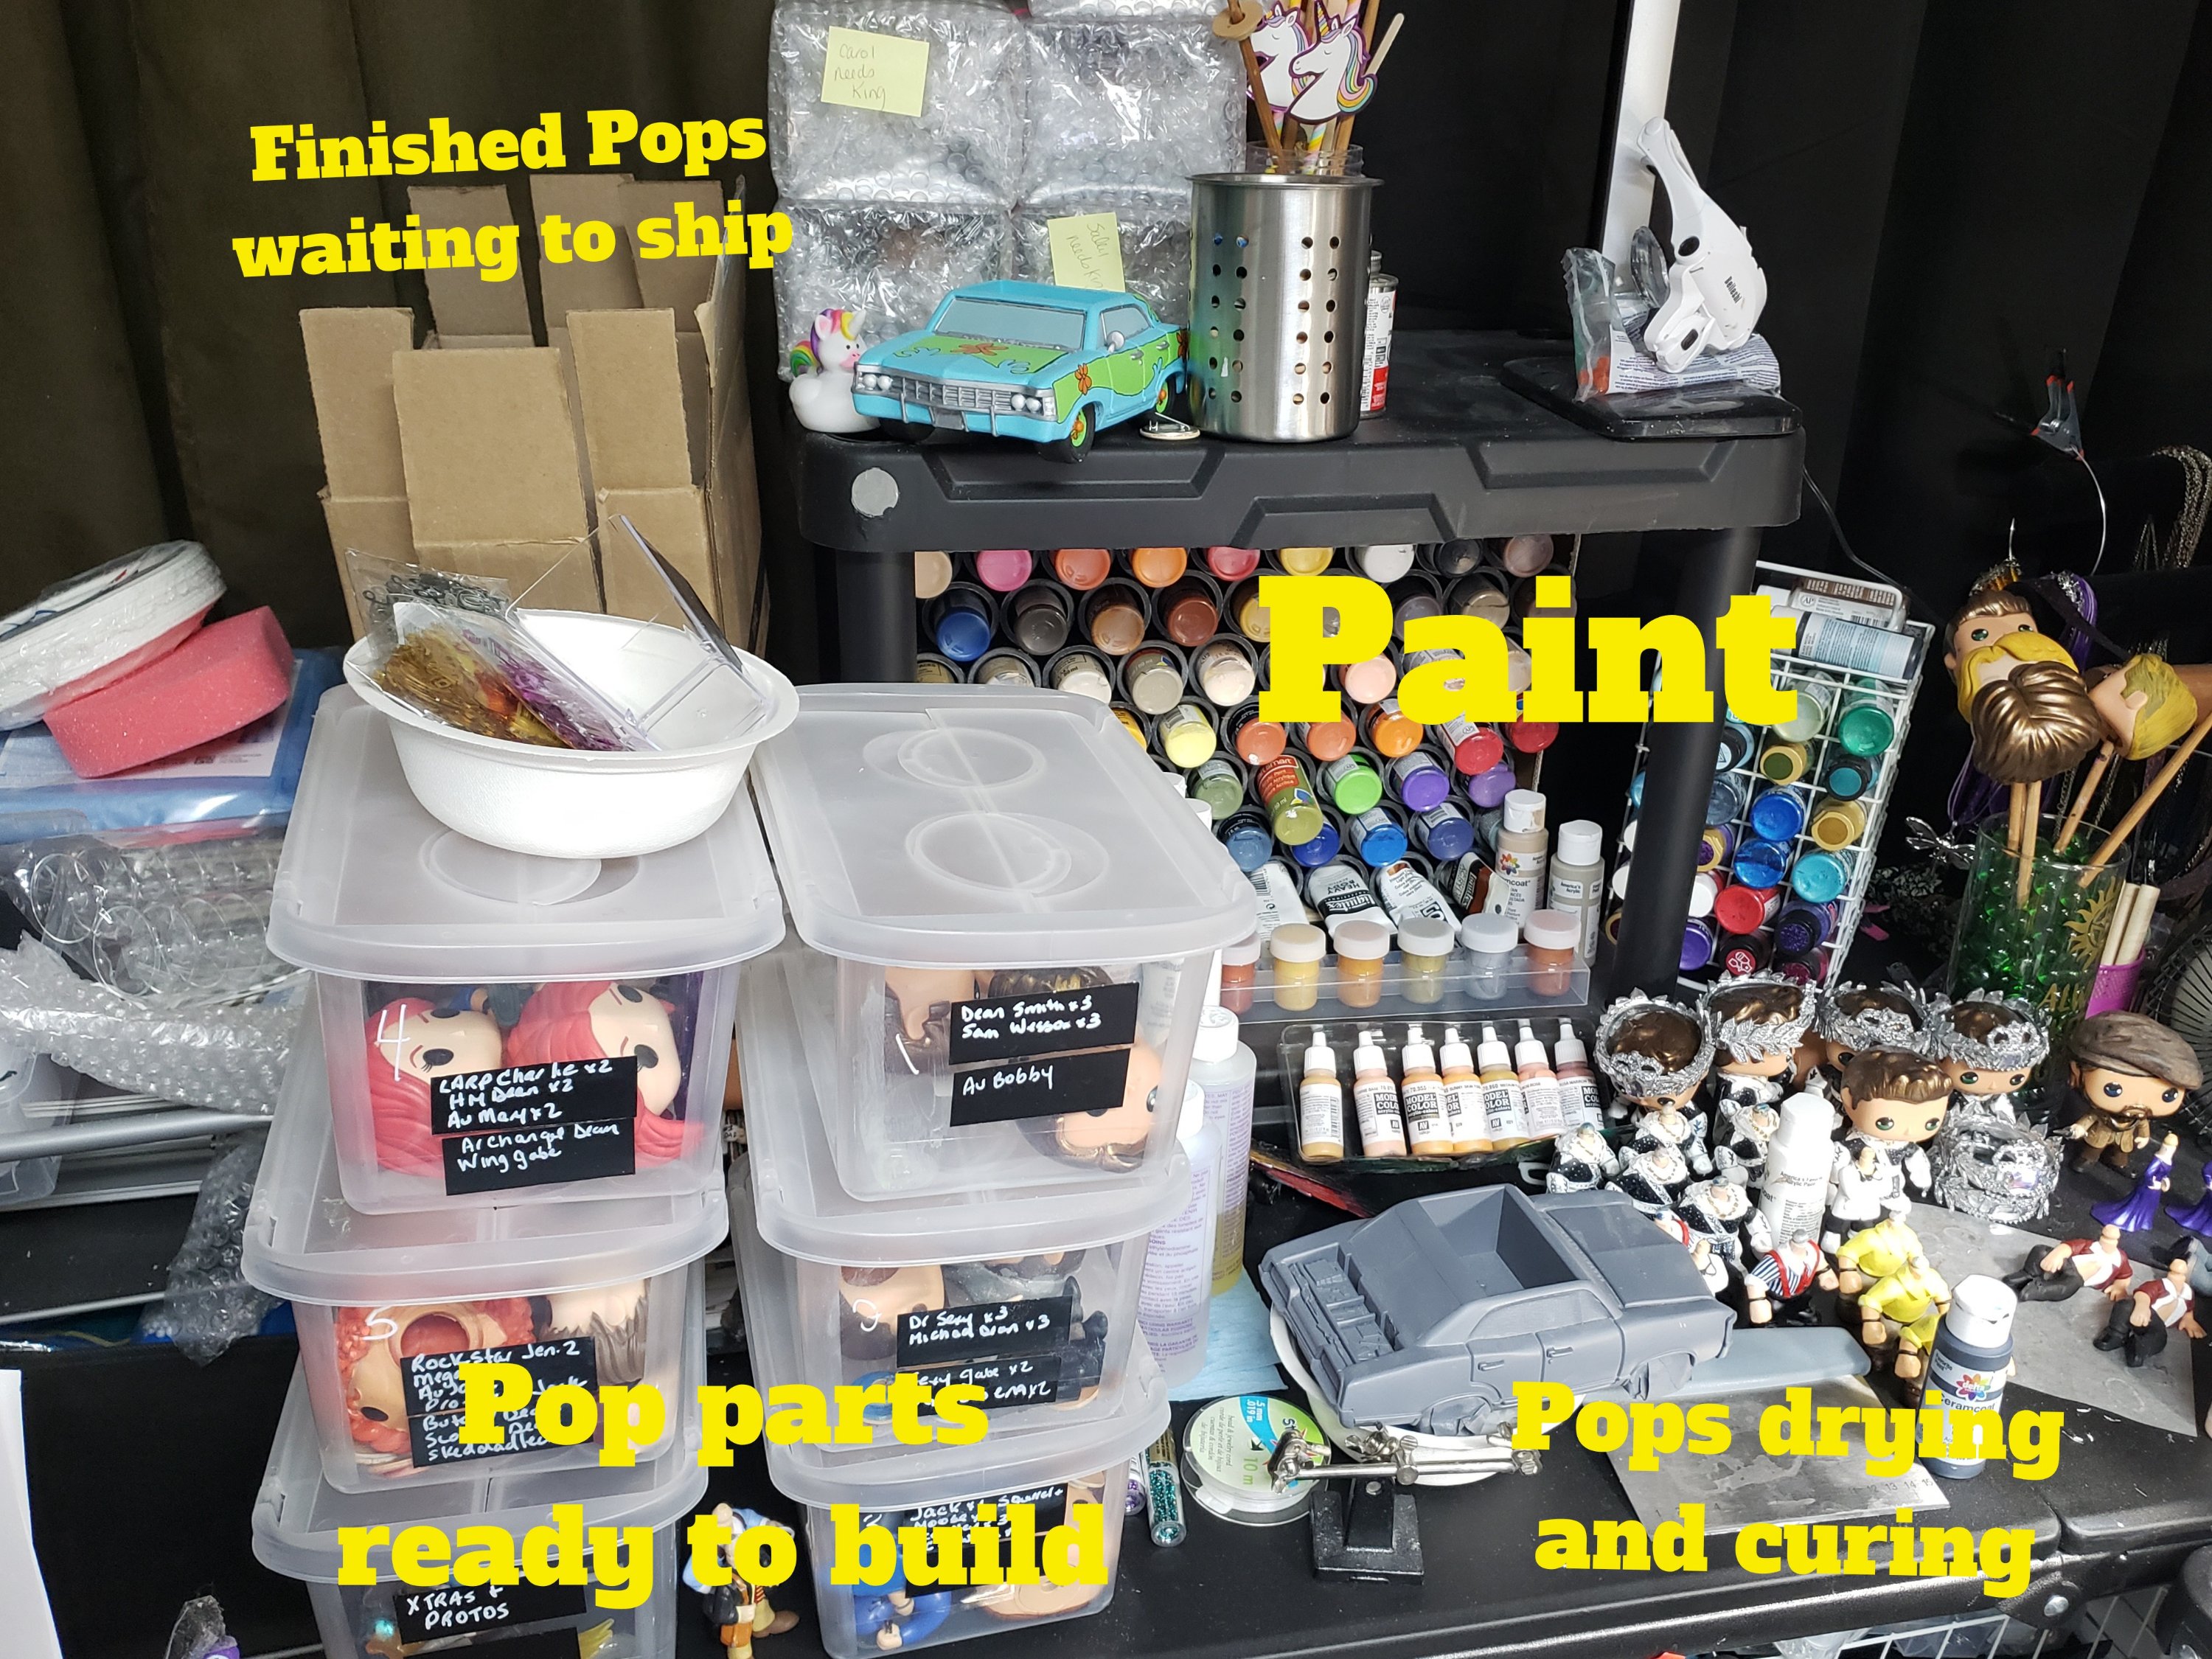
To my right will be broken into 2 areas. Pops and Jewelry/etc. For Pops, this is where the containers of pops on the go are stored and labelled. Weekly I go through new orders and gather the supplies (bodies) I need, break them down and sort. This lets me grab parts I need quickly. Also is my main paint storage, made from PVC pipe. I kinda love it. My metallic paints are in the separate holder for ease. Above that is a light, finished pops waiting for the rest of their orders and my bits for the Dremel.
To the left. Prep area, drying are and paint
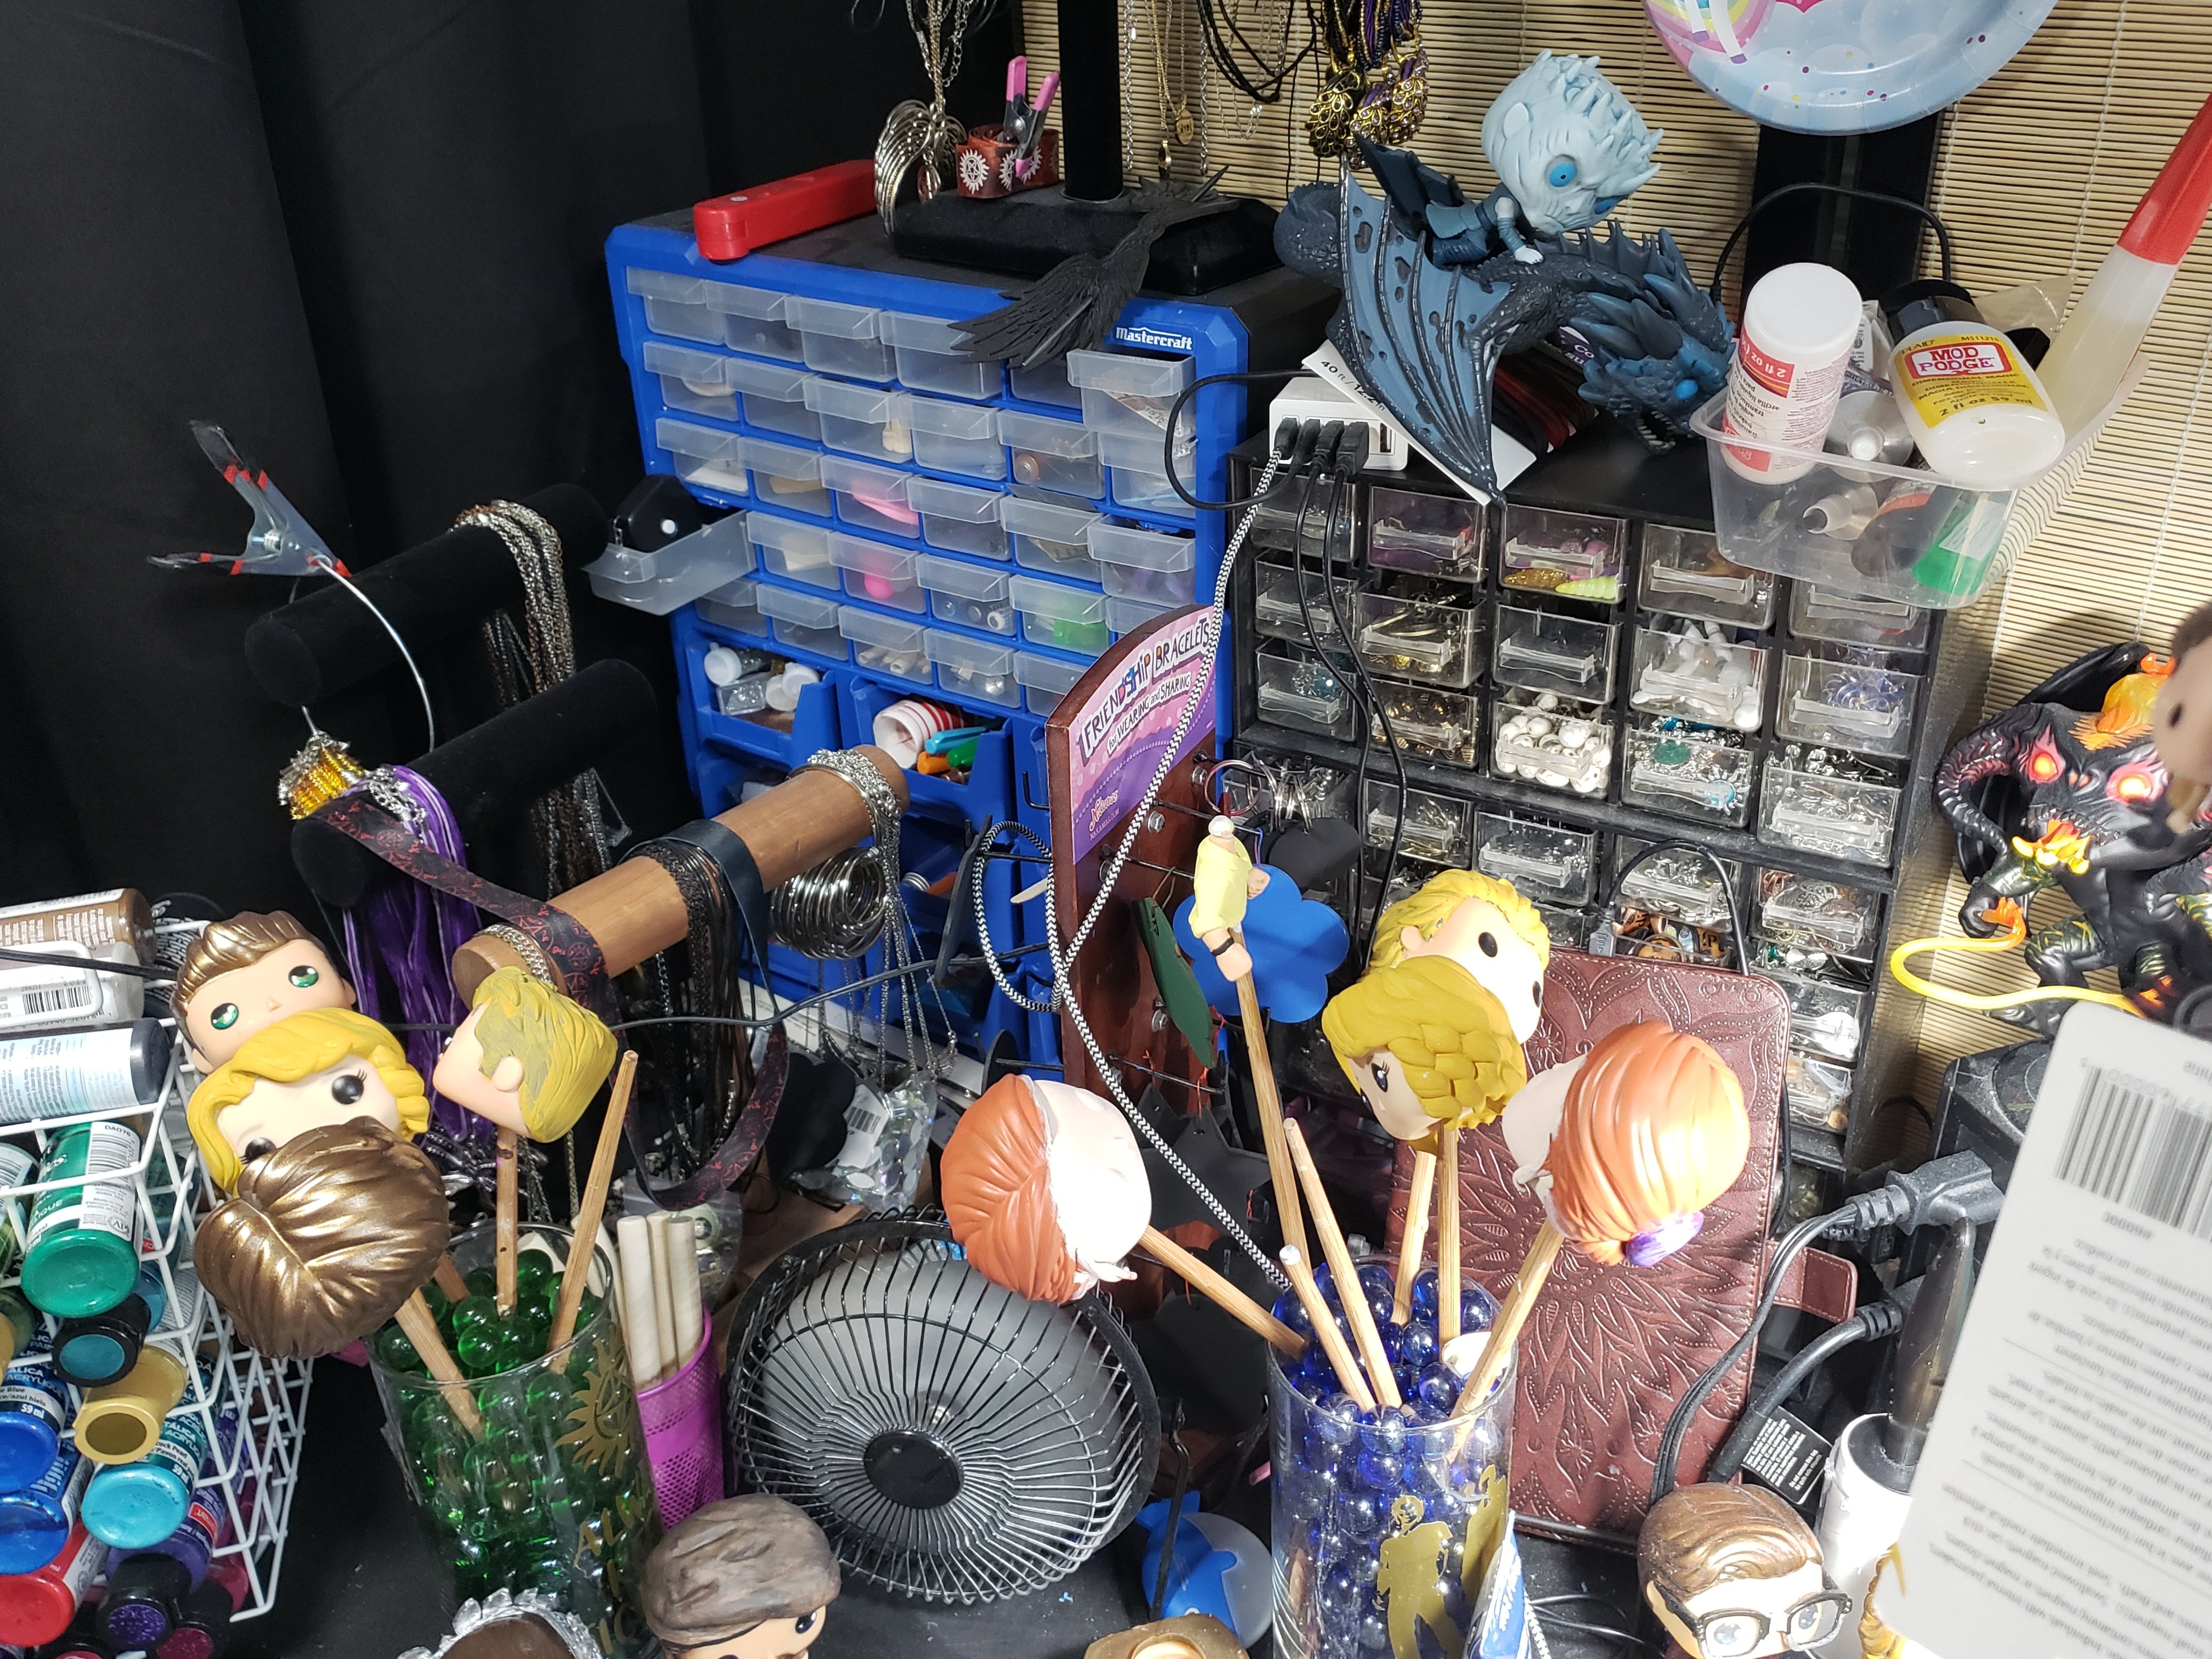
The Jewelry/etc area is in the corner. Holding the storage for charms, items in progress and stands to hold chains and leather strapping. There are other containers holding more supplies that are brought in as needed. This poor area has been neglected lately with the amount of pops on the workbench.
Jewelry area, cramped now as pops are taking over!
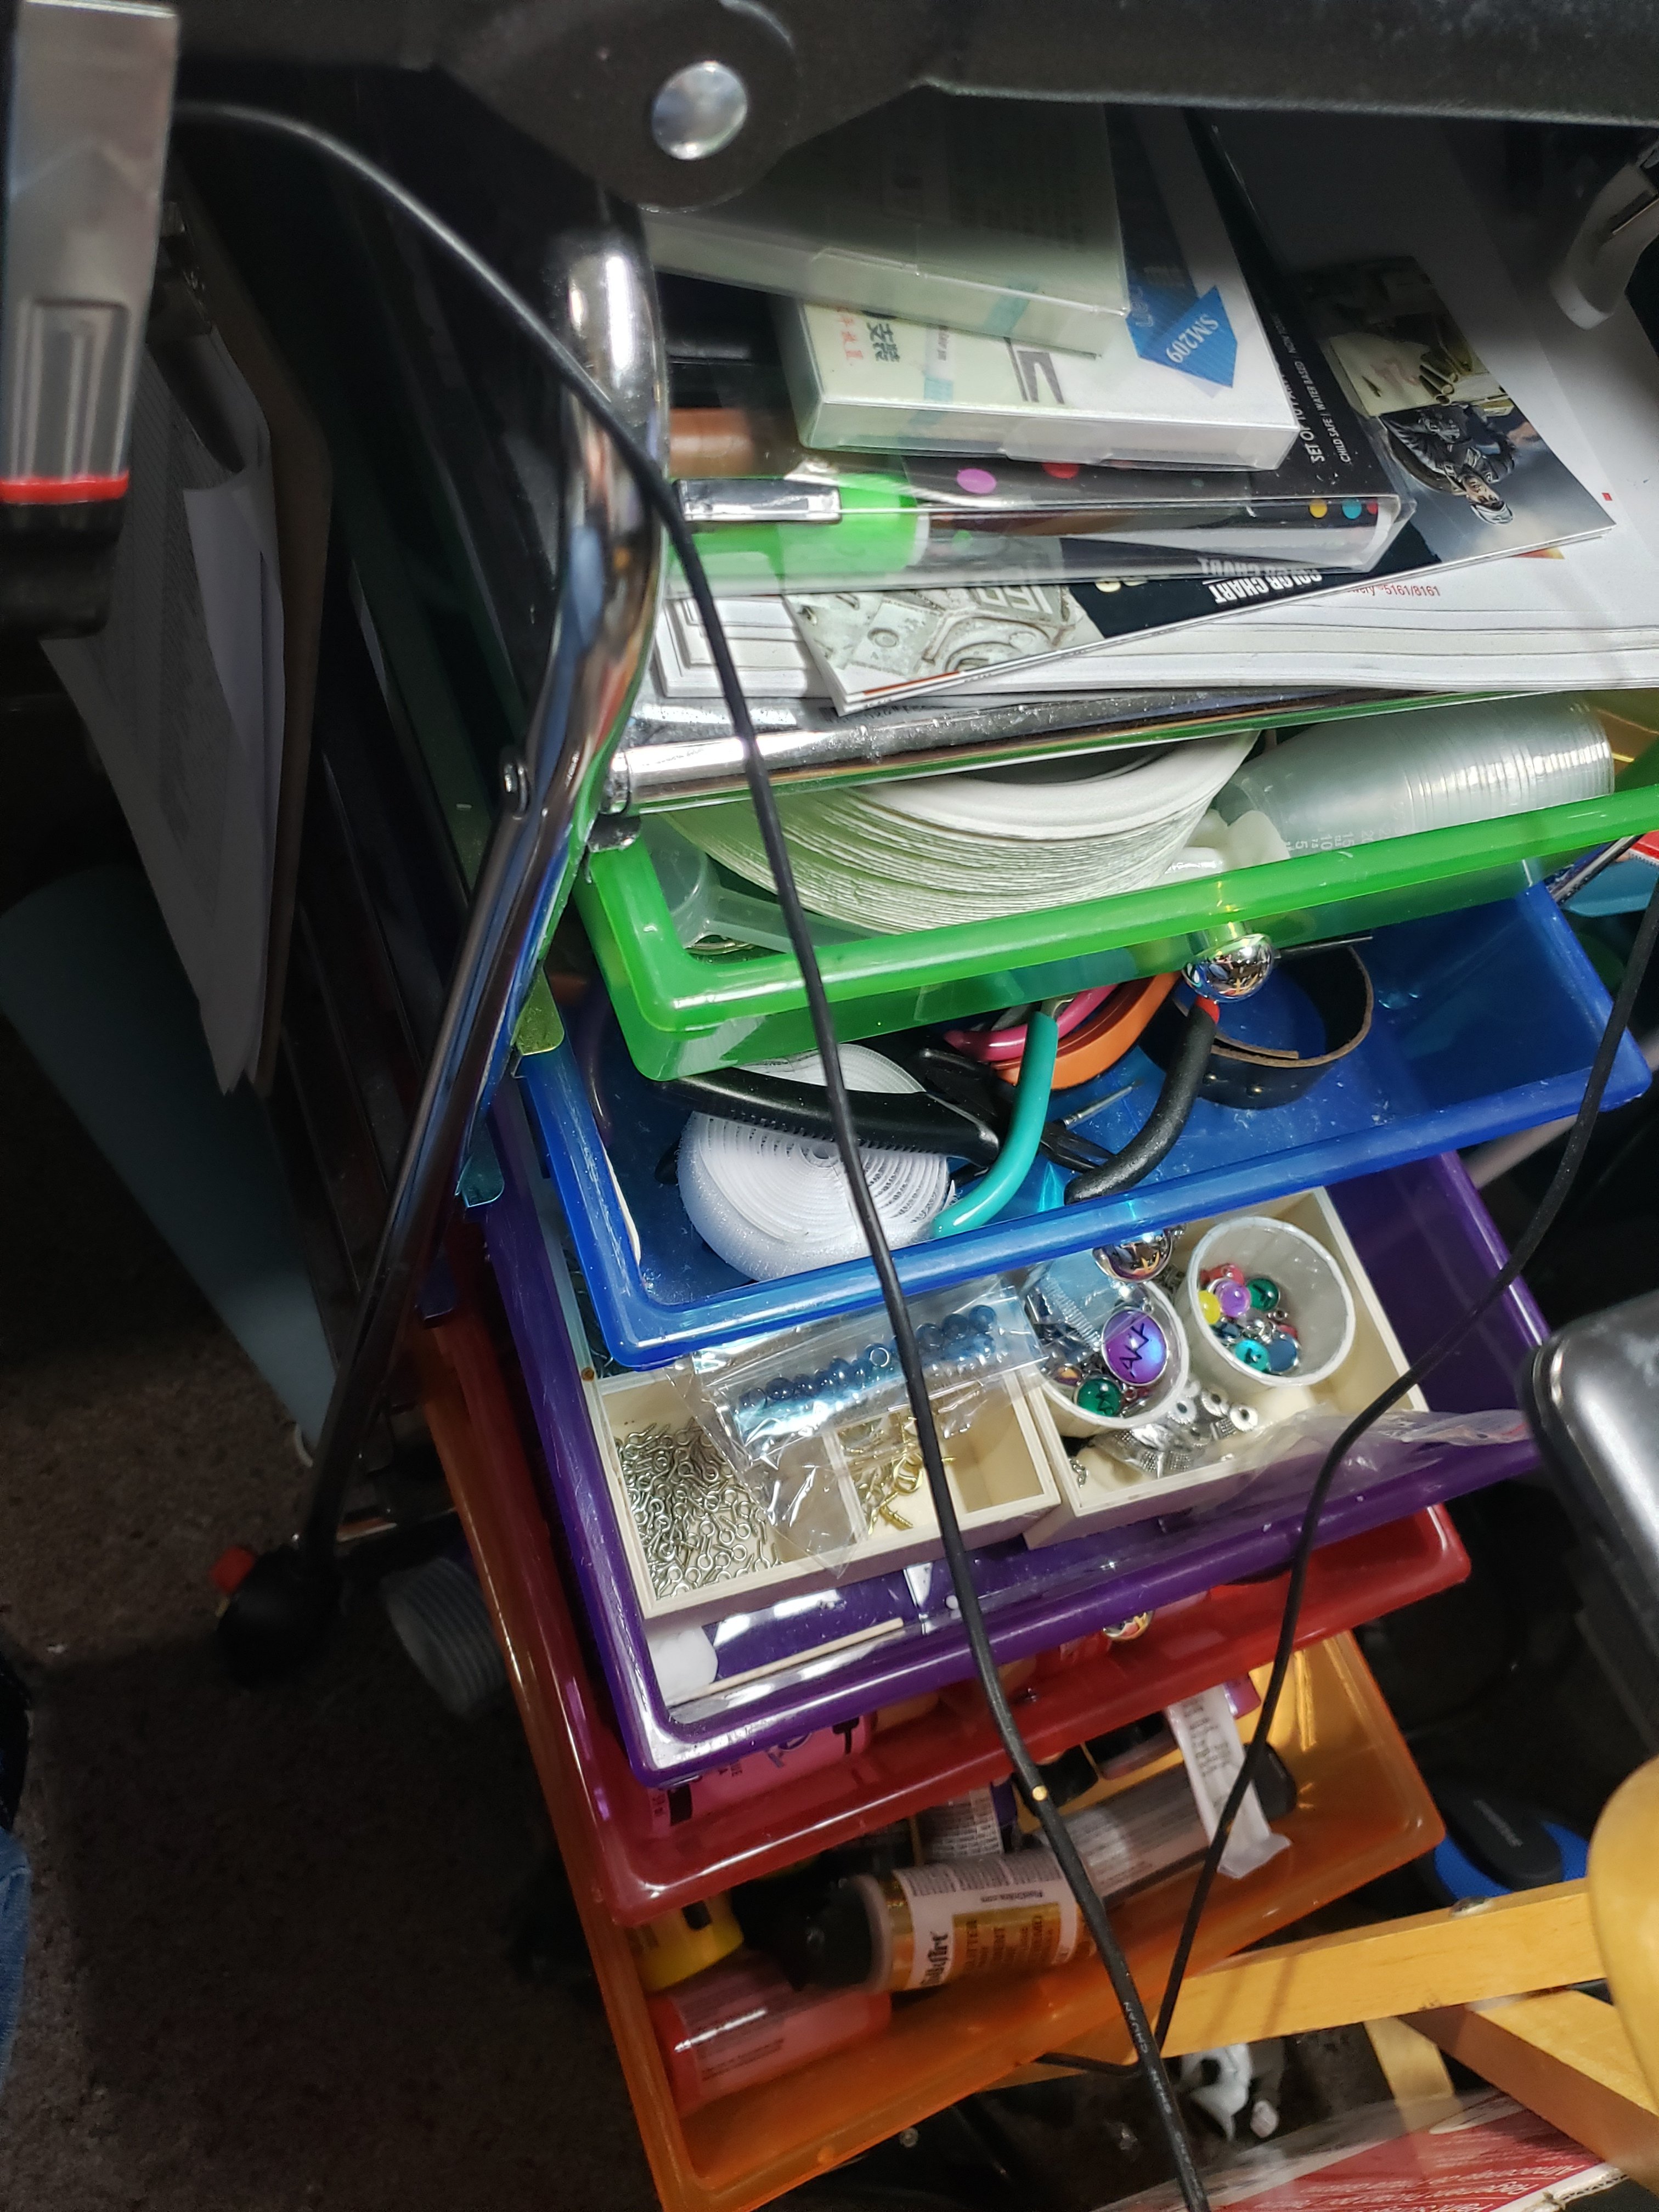
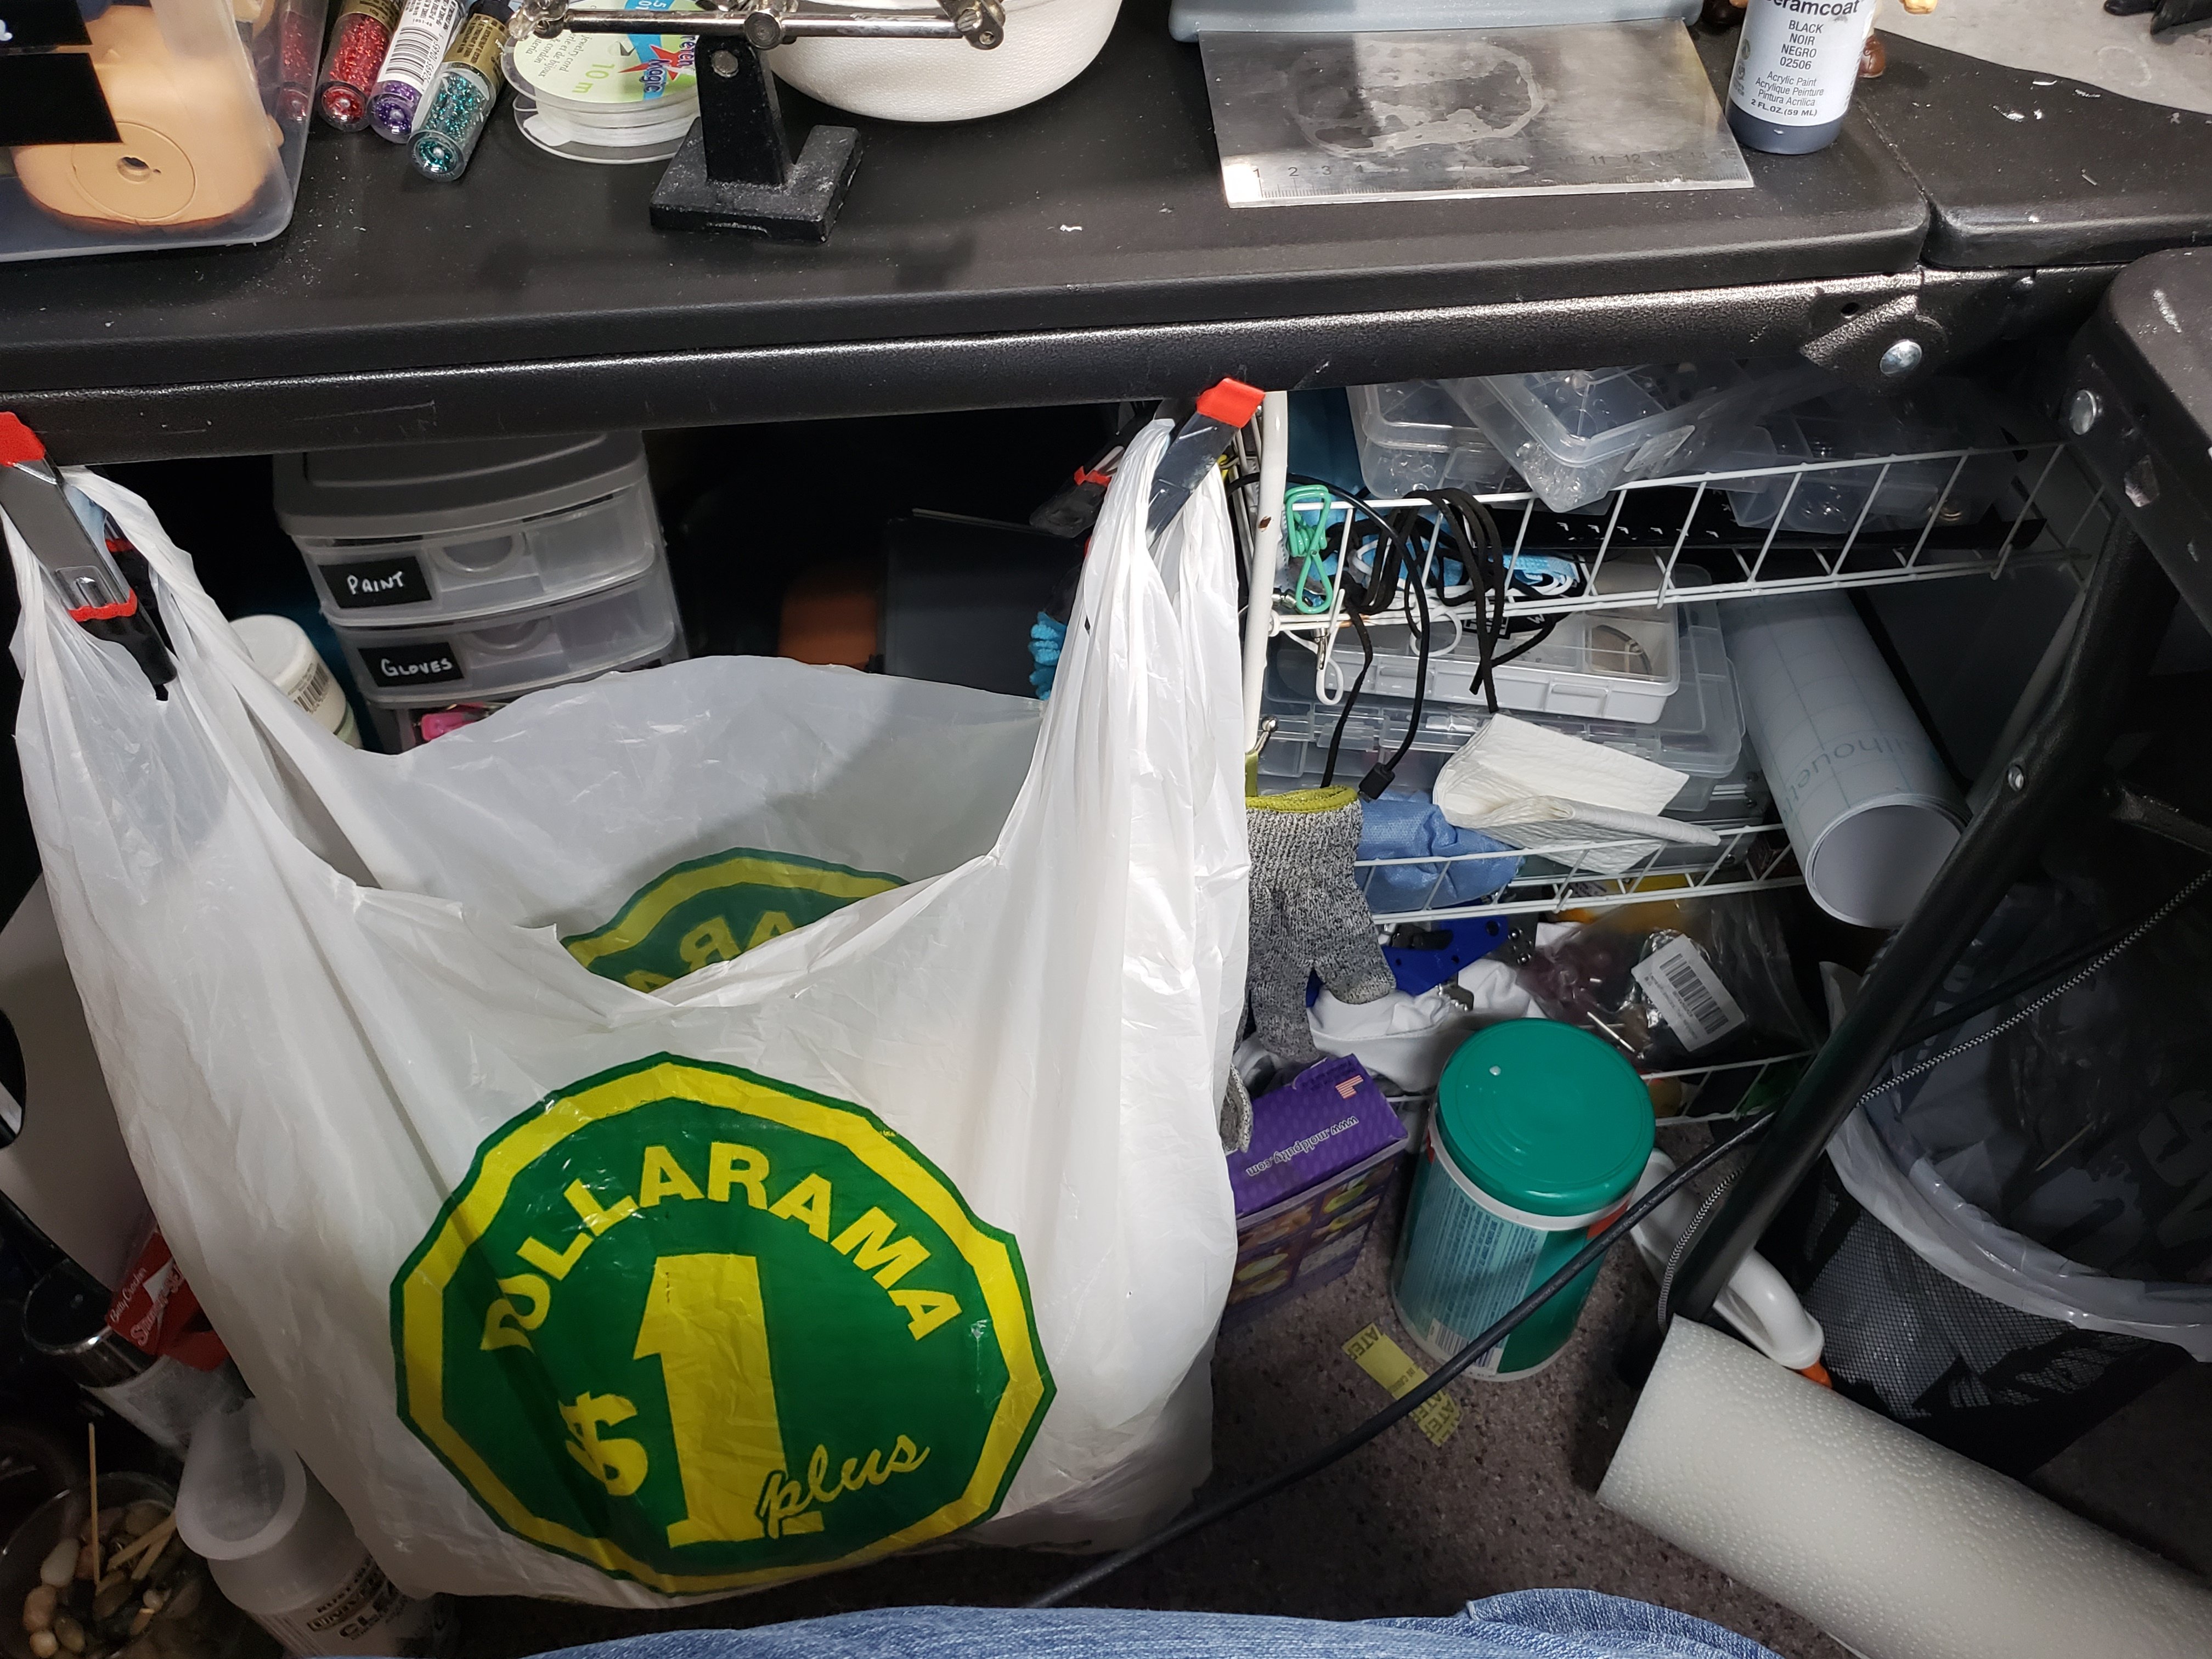
Below is …. well… stuff. It’s cabochon storage, Metal stamping supplies, wax seal supplies, polishing supplies and anything else I can’t find another place for.
Everything else. garbage bag, paints, metal stamping, cleaning, spray paints,
Tools
The first thing to know is NONE OF THE TOOLS ARE IMPERATIVE. They make things easier, but you can start with just basics and still do a good job. I’ll outline what I use most and why, but you’ll find what works for you. A lot of what I use are geared to mobility. Anything to ease my hands is helpful.
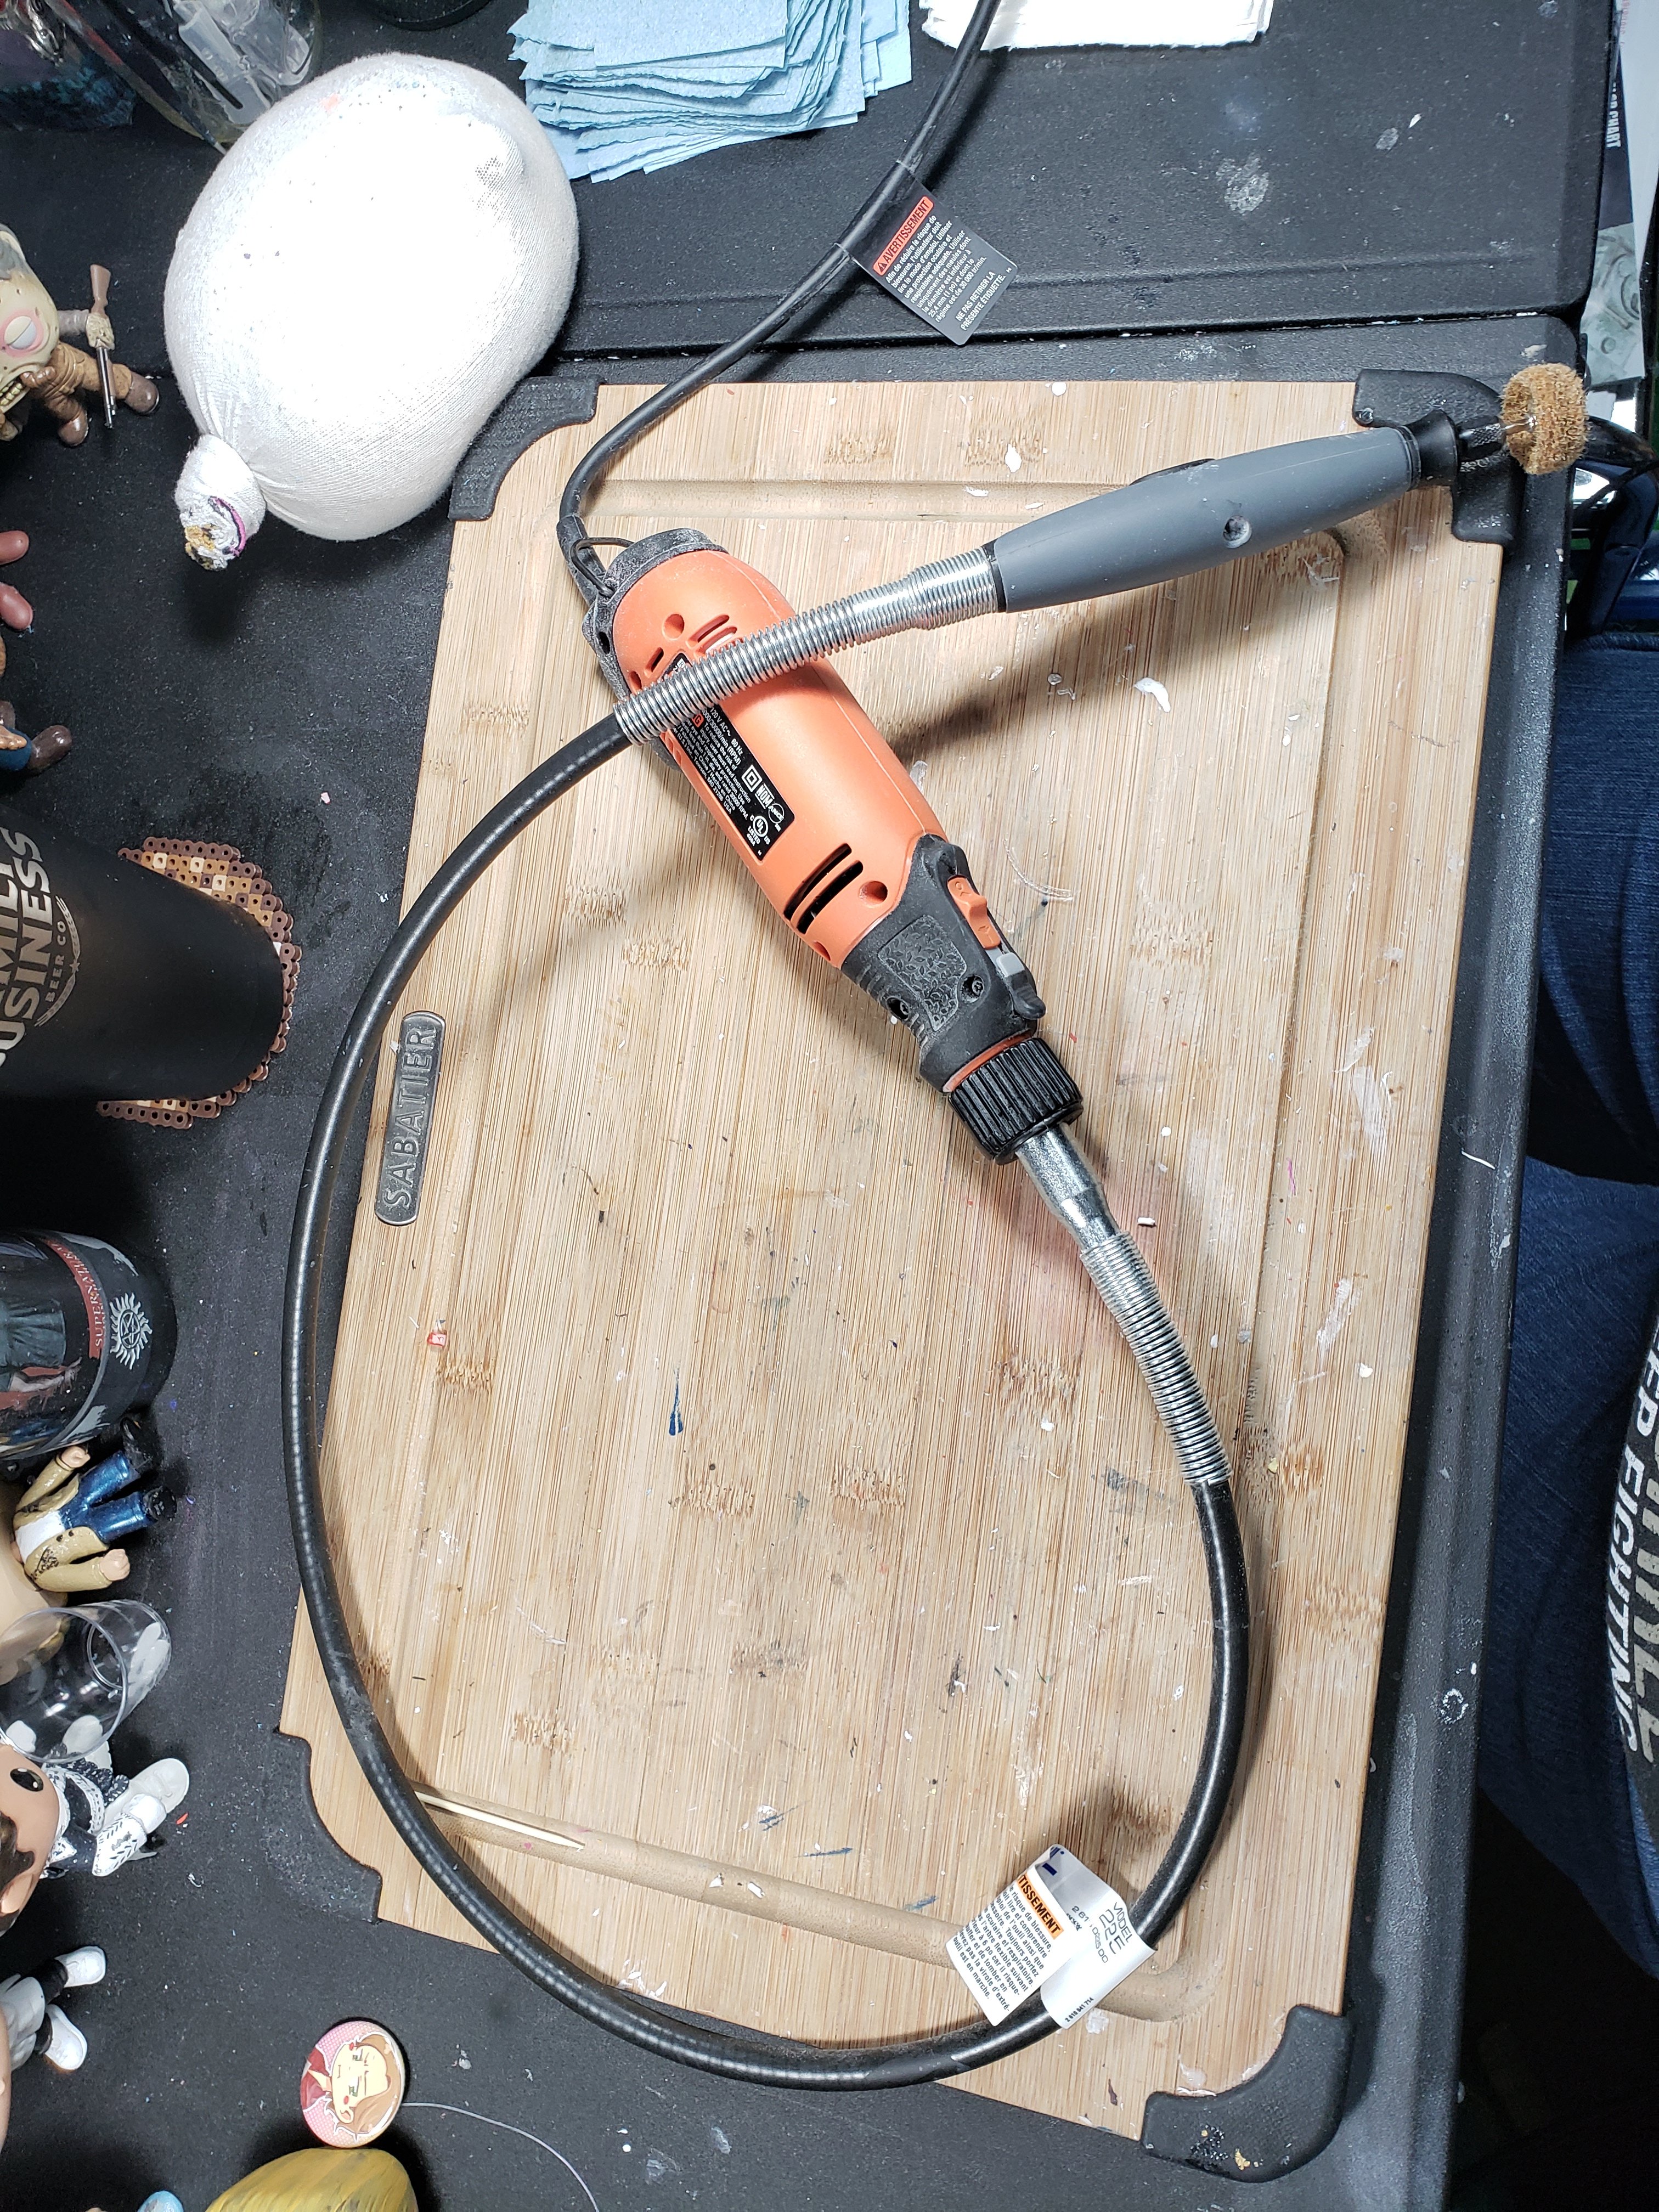
My Rotary Tool is one of the 2 most used items. With different heads it can cut, smooth, carve, polish, sand and makes quick work of a lot of the processes. I have an off name one, bought at Canadian Tire for about $40 (CDN) I splurged and bought a flex shaft attachment which is incredibly helpful. it allows easier movement and longer use without less hand strain. Most rotary tools have similar size of shaft so heads are often interchangeable, especially with different colletts.
Black and Decker Rotary tool and Dremel flex shaft attachment
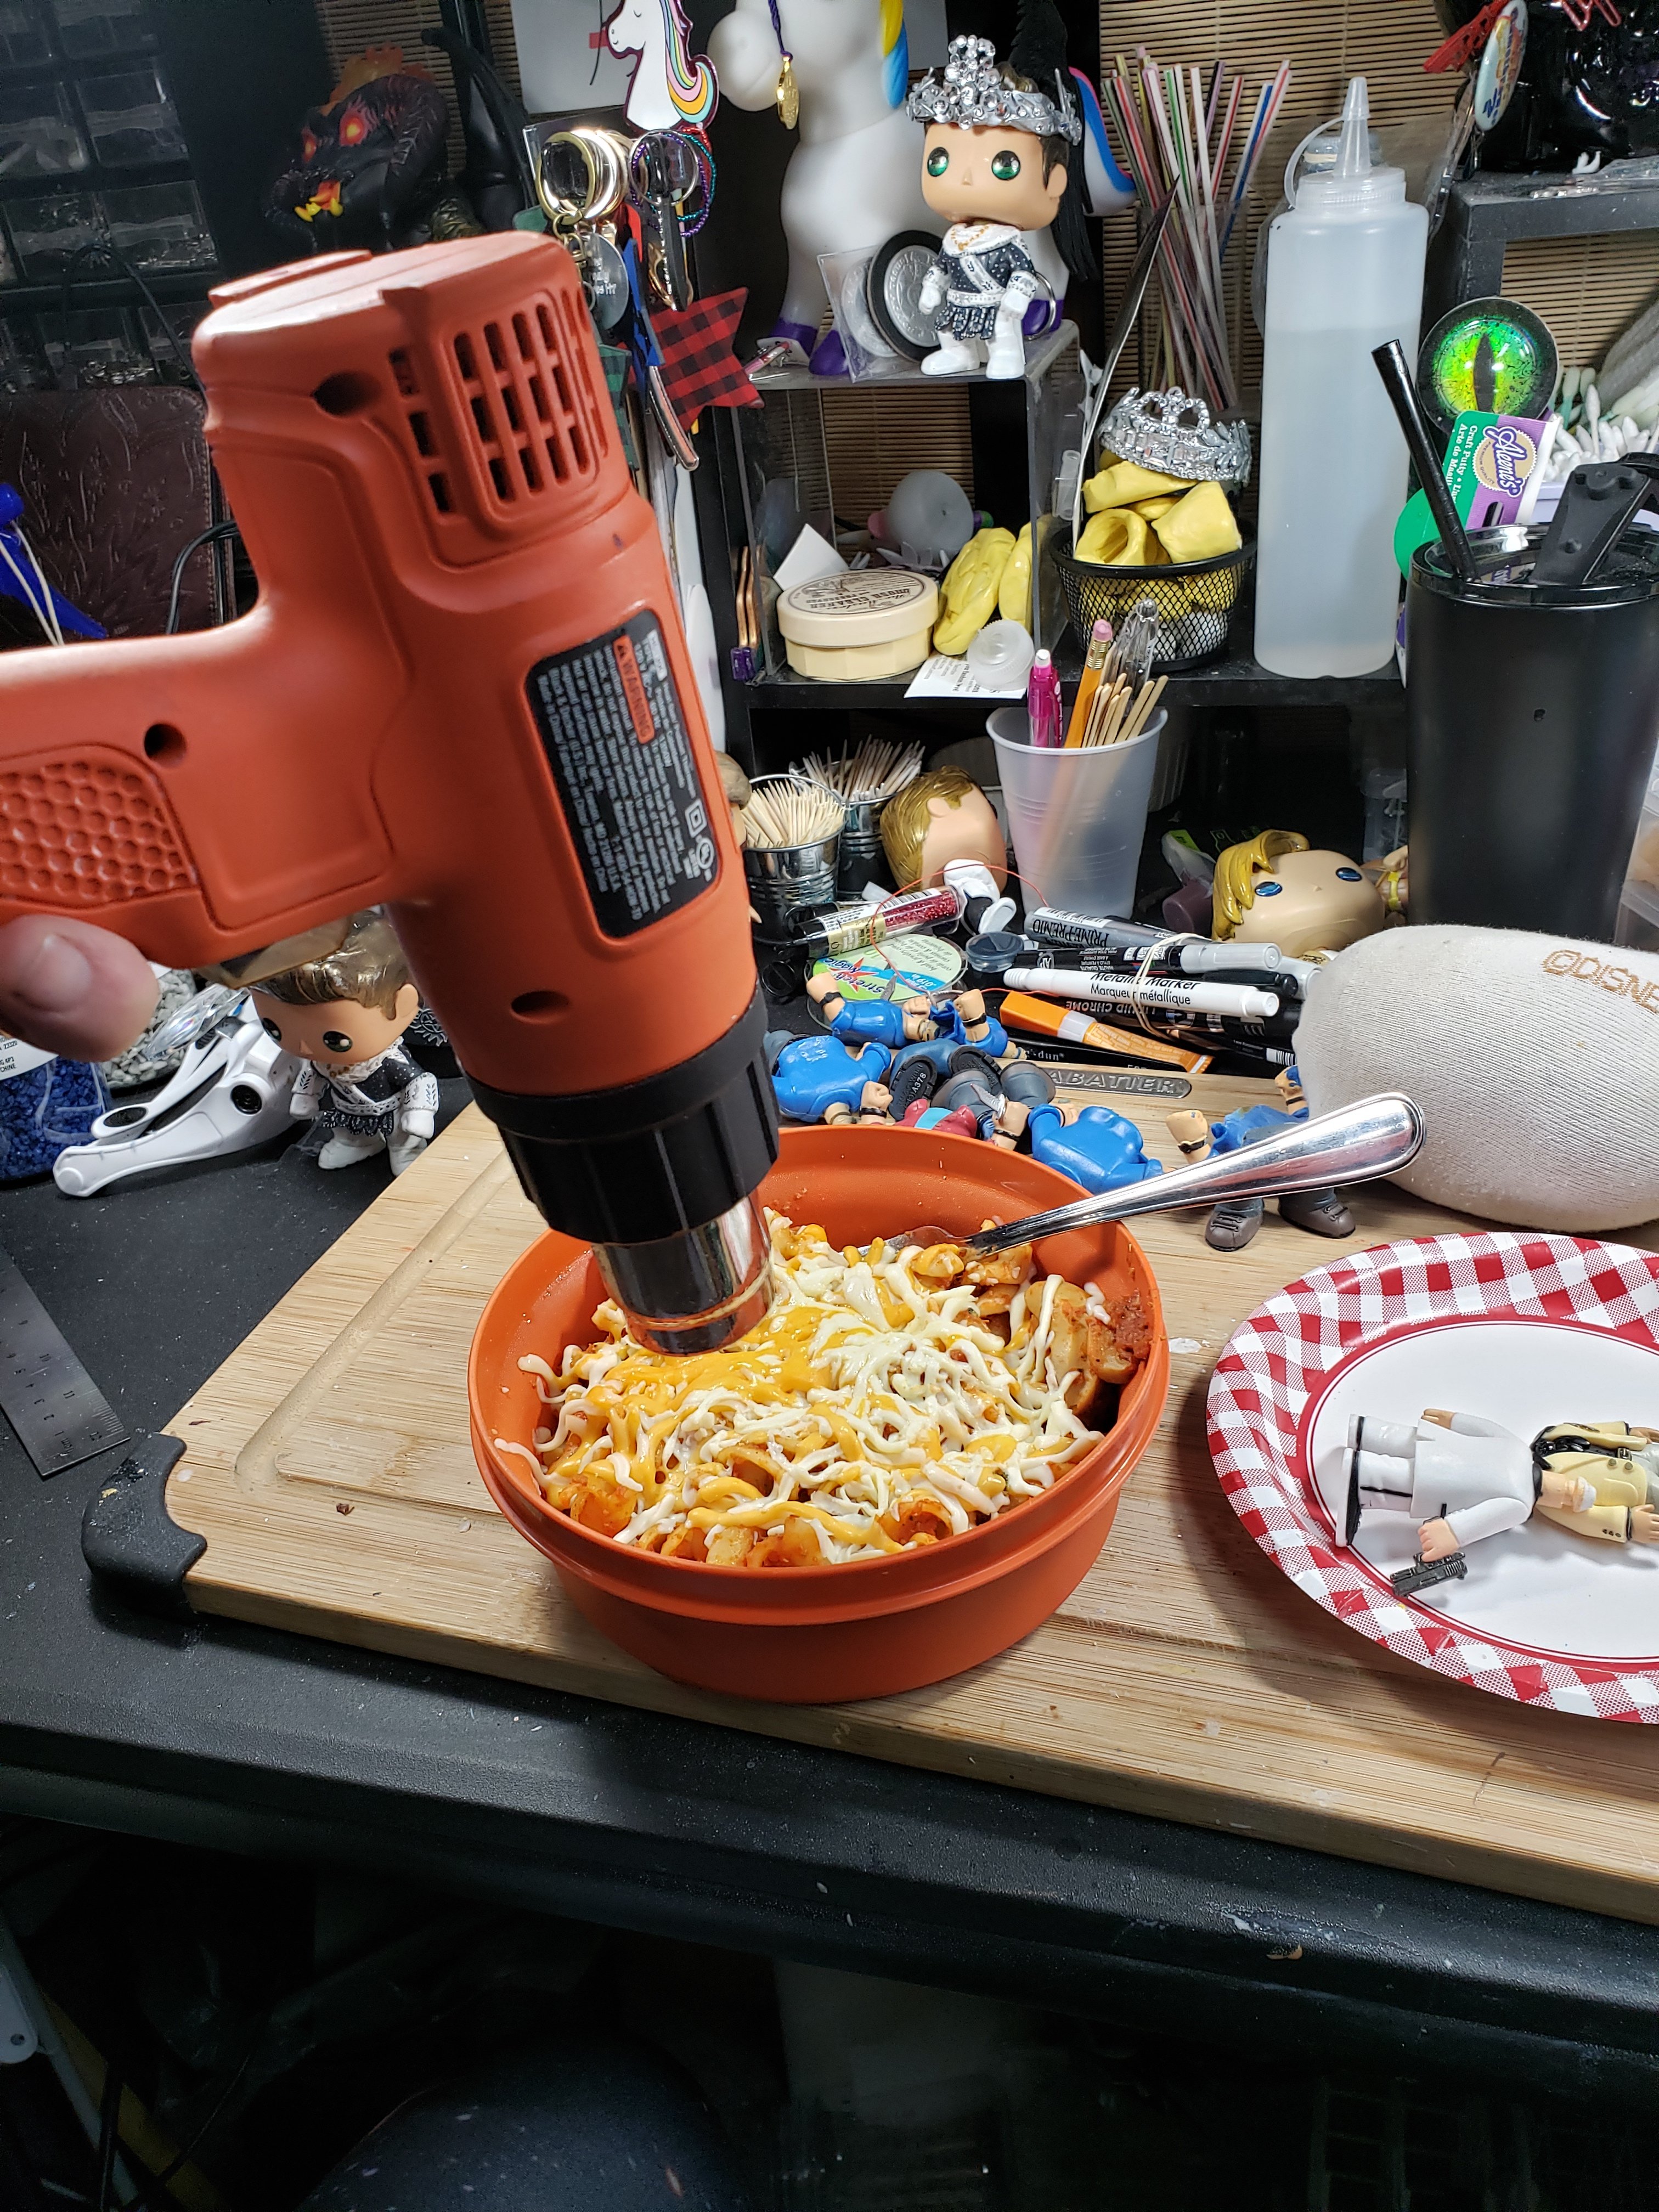
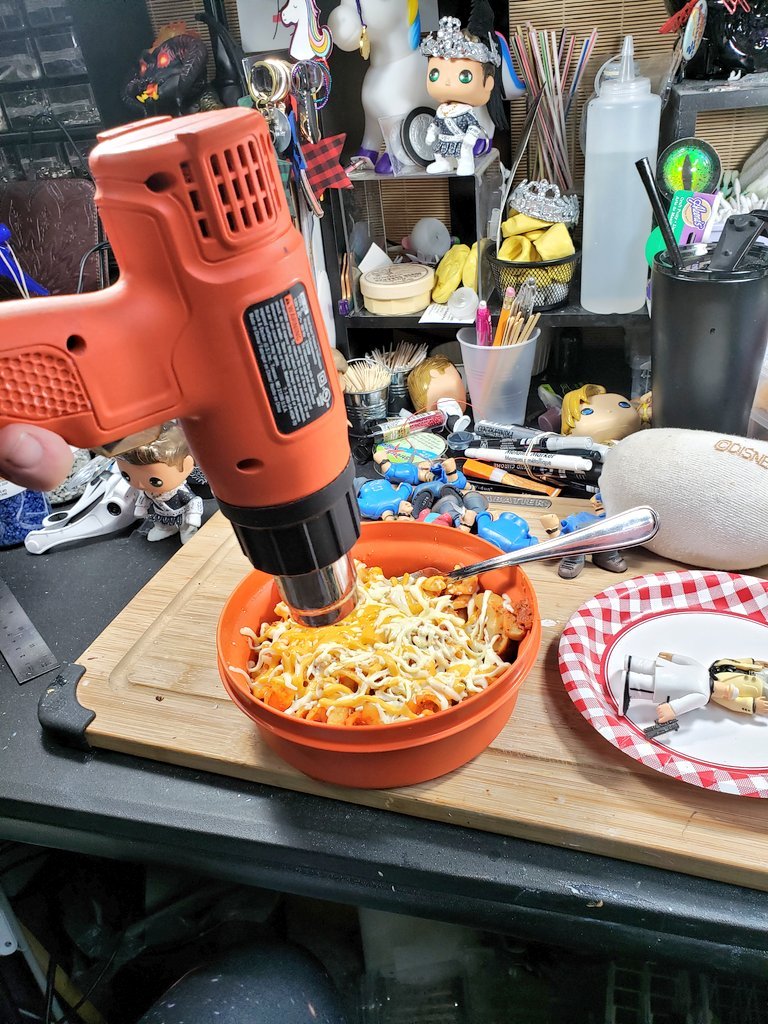
My Heat Gun is the 2nd of the 2 most used items. It cures polymer clay, heats pops to move arm/leg positions, softens glue to take them apart, heats plastic to form into shapes and occasionally heats up my lunch! I have a Black and Decker dual temp gun, but started with a craft heat gun meant to heat embossing powder that I bought at the craft store for 19.99 that worked just fine. The scale of what I do made it impractical but for most that, or even a good hair dryer may accomplish what you need. You can use an oven to cure sculpy and that works fine, I just don’t want to keep schlepping upstairs, so the heat gun is quicker and more direct for me.
Black and Decker heat gun doing important work!
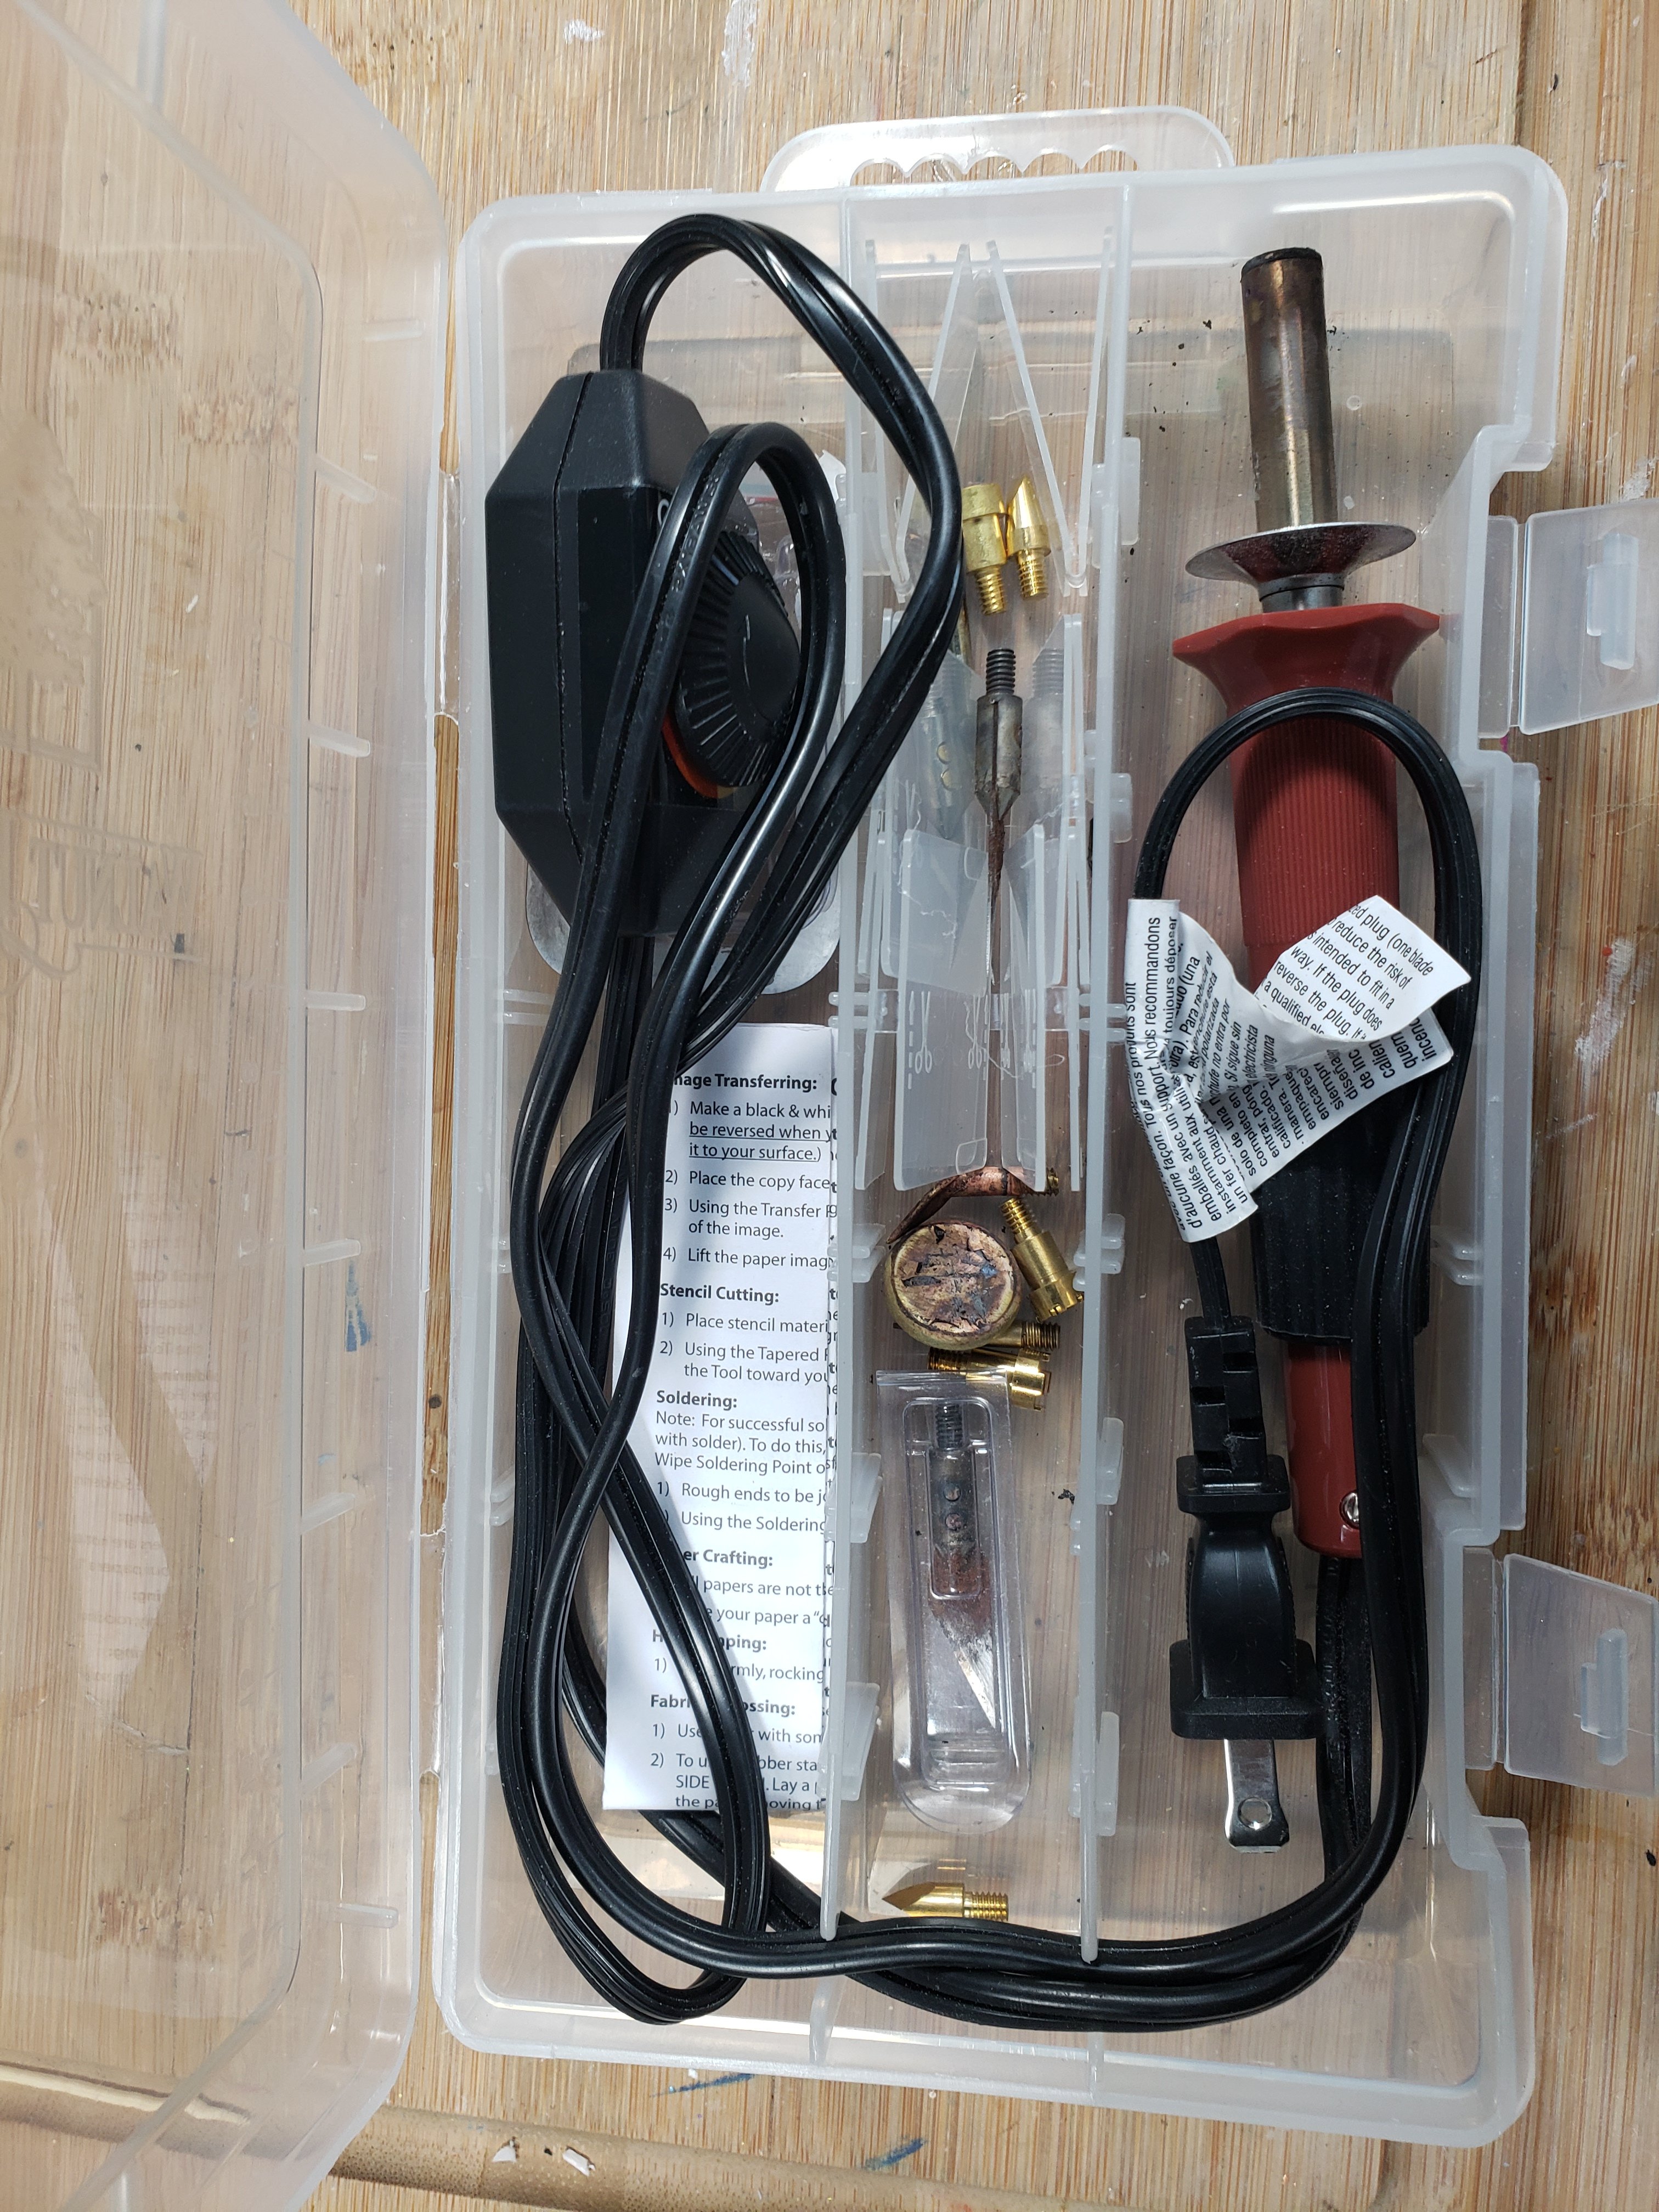
A Hot knife is something I use on occasion. It works when you need to cut your pop or plastic fairly detailed or neatly. The one I have can also burn wood and has a series of attachments. I don’t pull it out every day, but when I do it’s always a good time saver and helps with neat cuts.
Hot Knife/soldering iron/hot stamp. Useful but not used as often because of heat up/cool town time
A glue gun is handy for some, but I don’t use it often. Usually just for Sparkle the Manicorn to glue his hair down. The pros is that it is a quick hold, but often not strong enough for many items. It can help to tack things in place while you wait for the better glue to set. It can also be used to make designs, like on the Book of the Damned, to be painted over. For glue, I prefer Weldbond, E6000 or Super Glue, keeping in mind Super glue will dissolve paint, sometimes dries white and is not suitable for rhinestones as it will bubble the reflective backing.
Not a glue gun. It’s put away and I’m too lazy to dig it out right now.
These are the basics. There are others, knives, scrapers, clamps and such, but this is what I use on a daily basis. Again, to stress, you don’t need all this to start. You can boil your heads to get them off, use a hair dryer to soften glues/bend arms and sand by hand. Once you get the feel for customizing, you can decide if you want to invest in some tools. Feel free to leave a comment or question below!
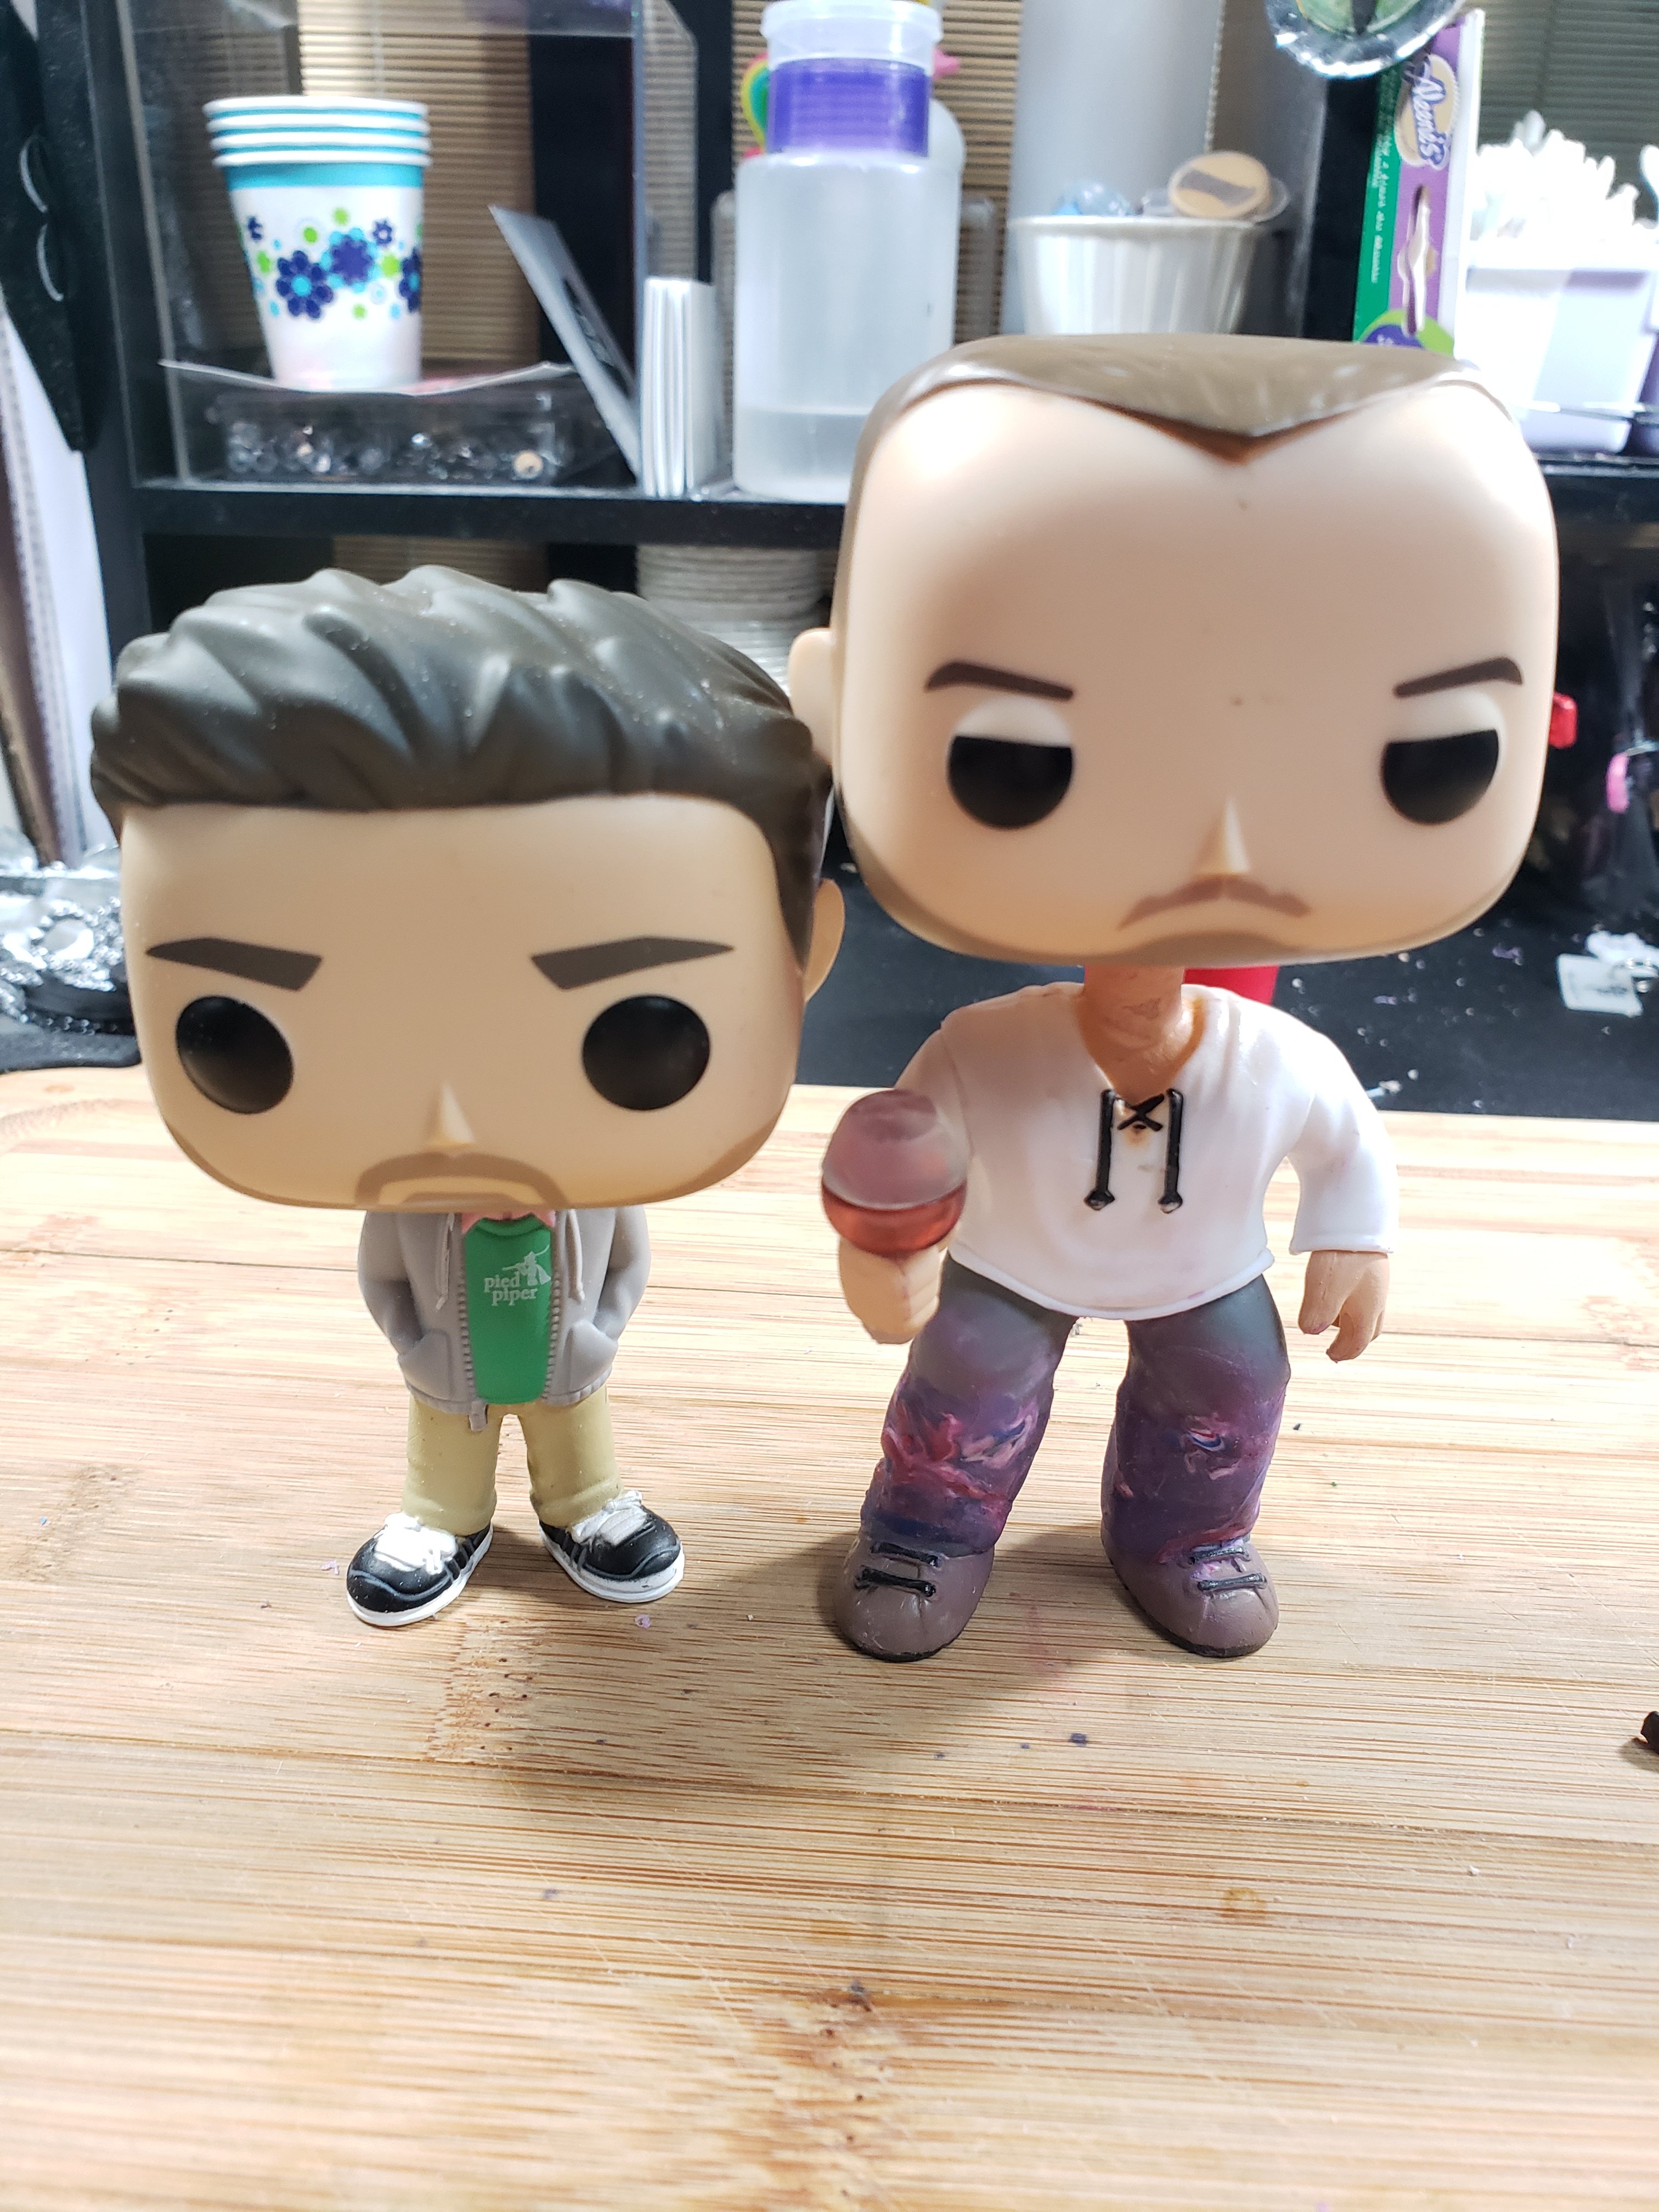
So… Once you’ve taken your pop apart. Now what? Pops get taken apart for a LOT of reasons. To sculpt and paint with more room, to interchange pop parts from different figures, to change positioning of limbs just to name a few. Once you’ve done your magic, you need to put them back together. Today we’ll focus on Frankensteining your pops into a whole being(ish). Kind of important, and sometimes tricky.
The Head
When you are just taking a pop apart to paint/sculpt and putting that head back on that body, there is little issue of fitting. Sometimes the neck piece gets warped, but generally the process is quite simple. If the head has the plug in, I heat the plug area to soften the hole and pop the neck back in. Here is where a heat gun shines as you can’t effectively boil the head once painted/sculpted.
Easy head to pop right back on
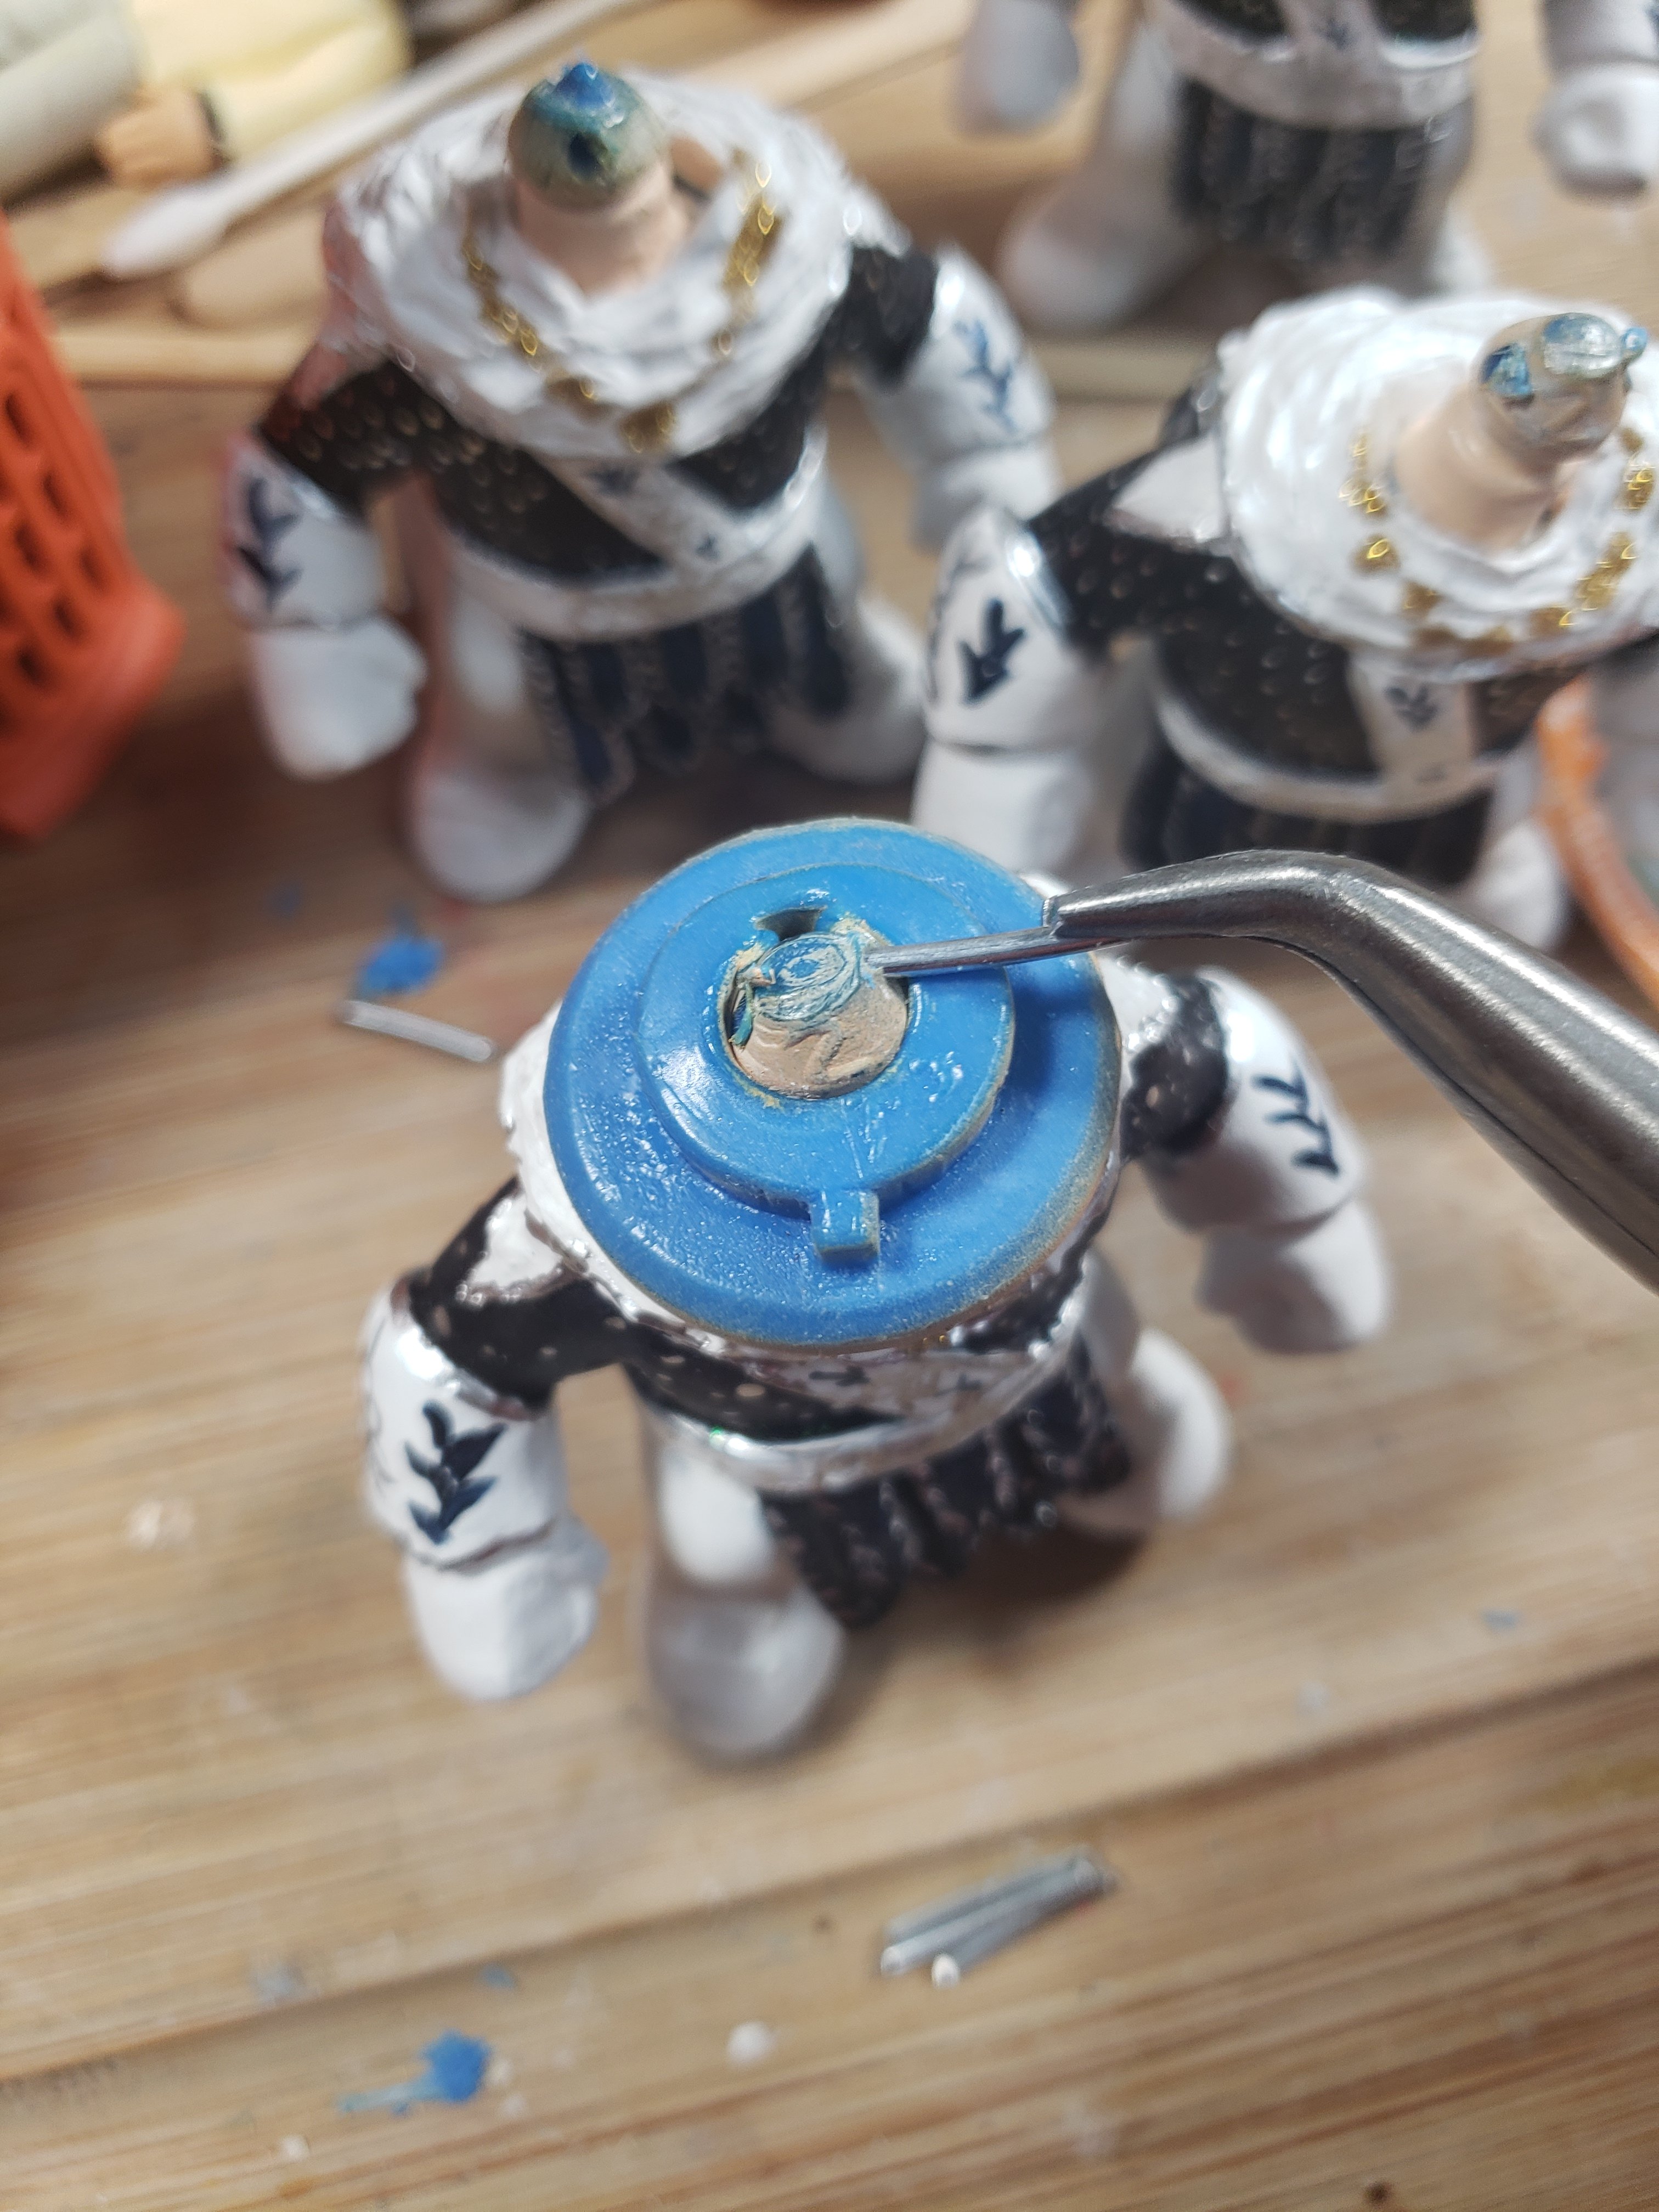
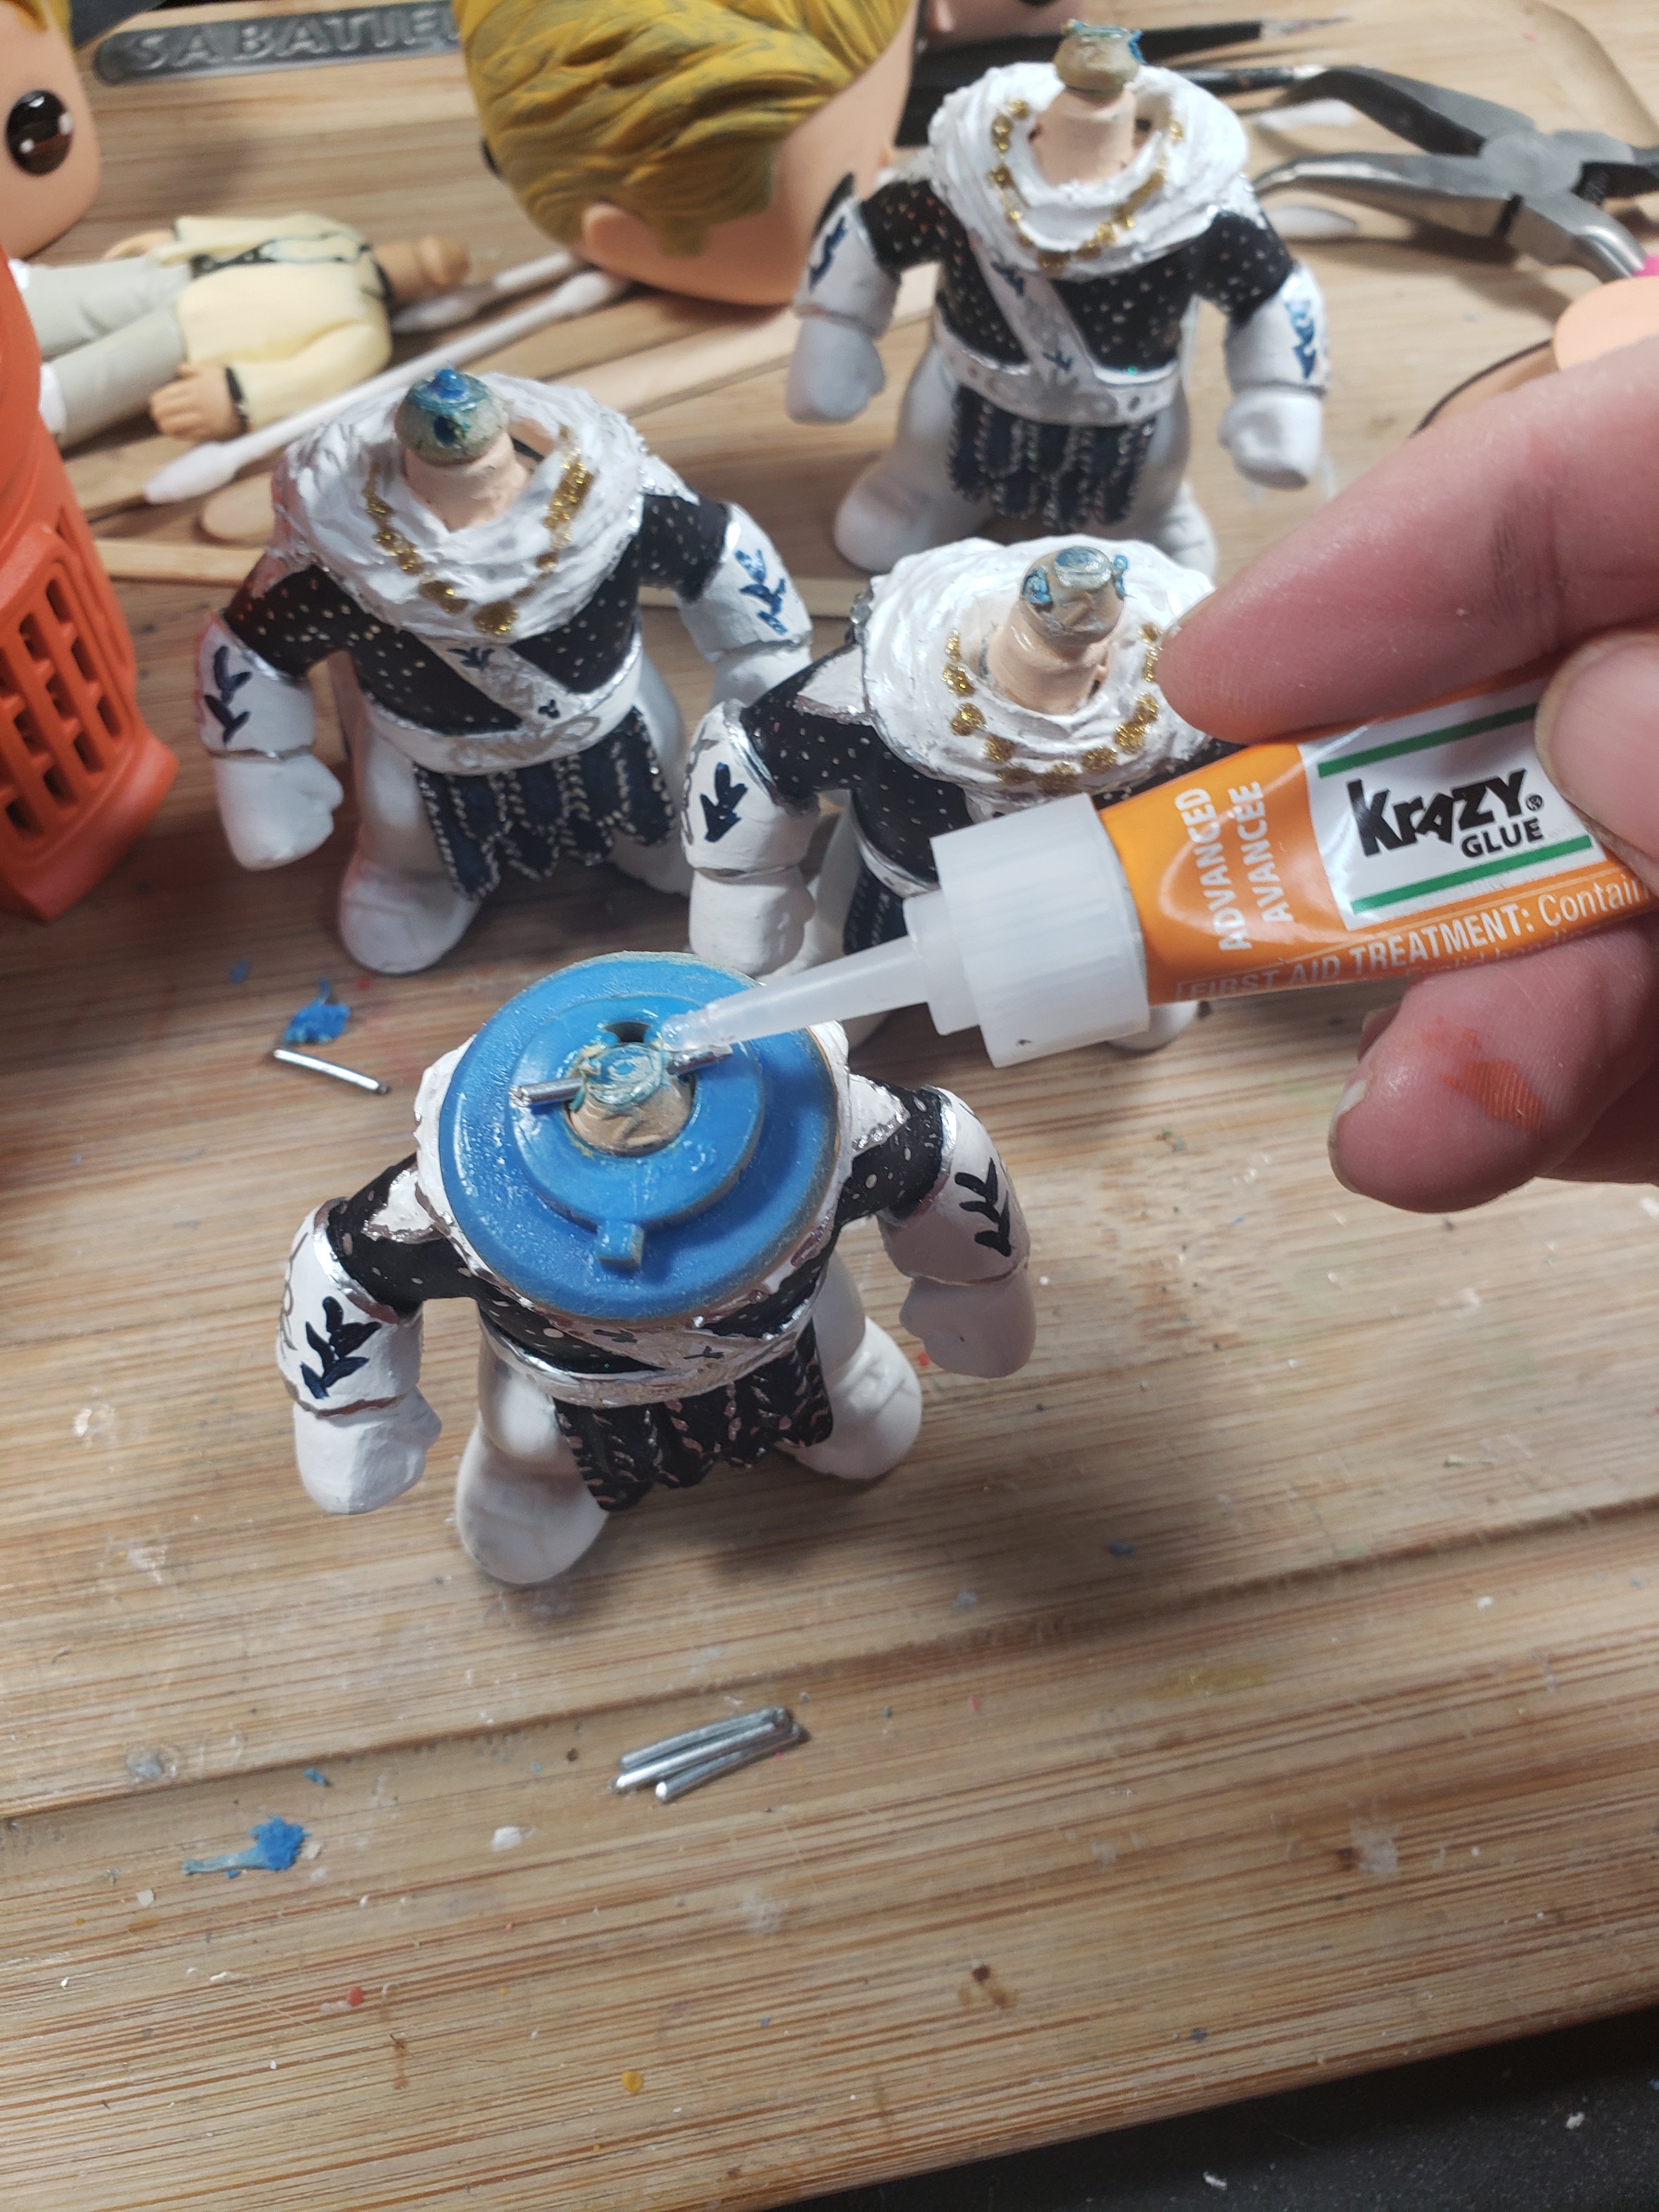
If it’s a different body for the head, sometimes you need to get creative. My most used way to ensure that the pops don’t lose their head is to use a wire anchor. This only works if the head plug is out of the head. Using a small drill, I drill out a hole in the neck piece (very phallic item, I must admit) that is just big enough for a piece of lower gauge wire to fit through. I can’t honestly tell you what gauge I use because it’s a dollar store roll of wire from the garden center. It’s difficult, but possible to bend if that helps. Then I soften the head plug, fit it onto the neck piece, and push the wire through to anchor the head plug in place, still allowing it to turn. I add a dab of glue CAREFULLY to the top of the neck piece/wire connection to secure it. Too much glue here will stop the head from turning.
Sadly, if the head plug won’t come out of the head, sometimes the best option is to glue it into place. Just make sure your head is positioned properly as you won’t be able to move it after.
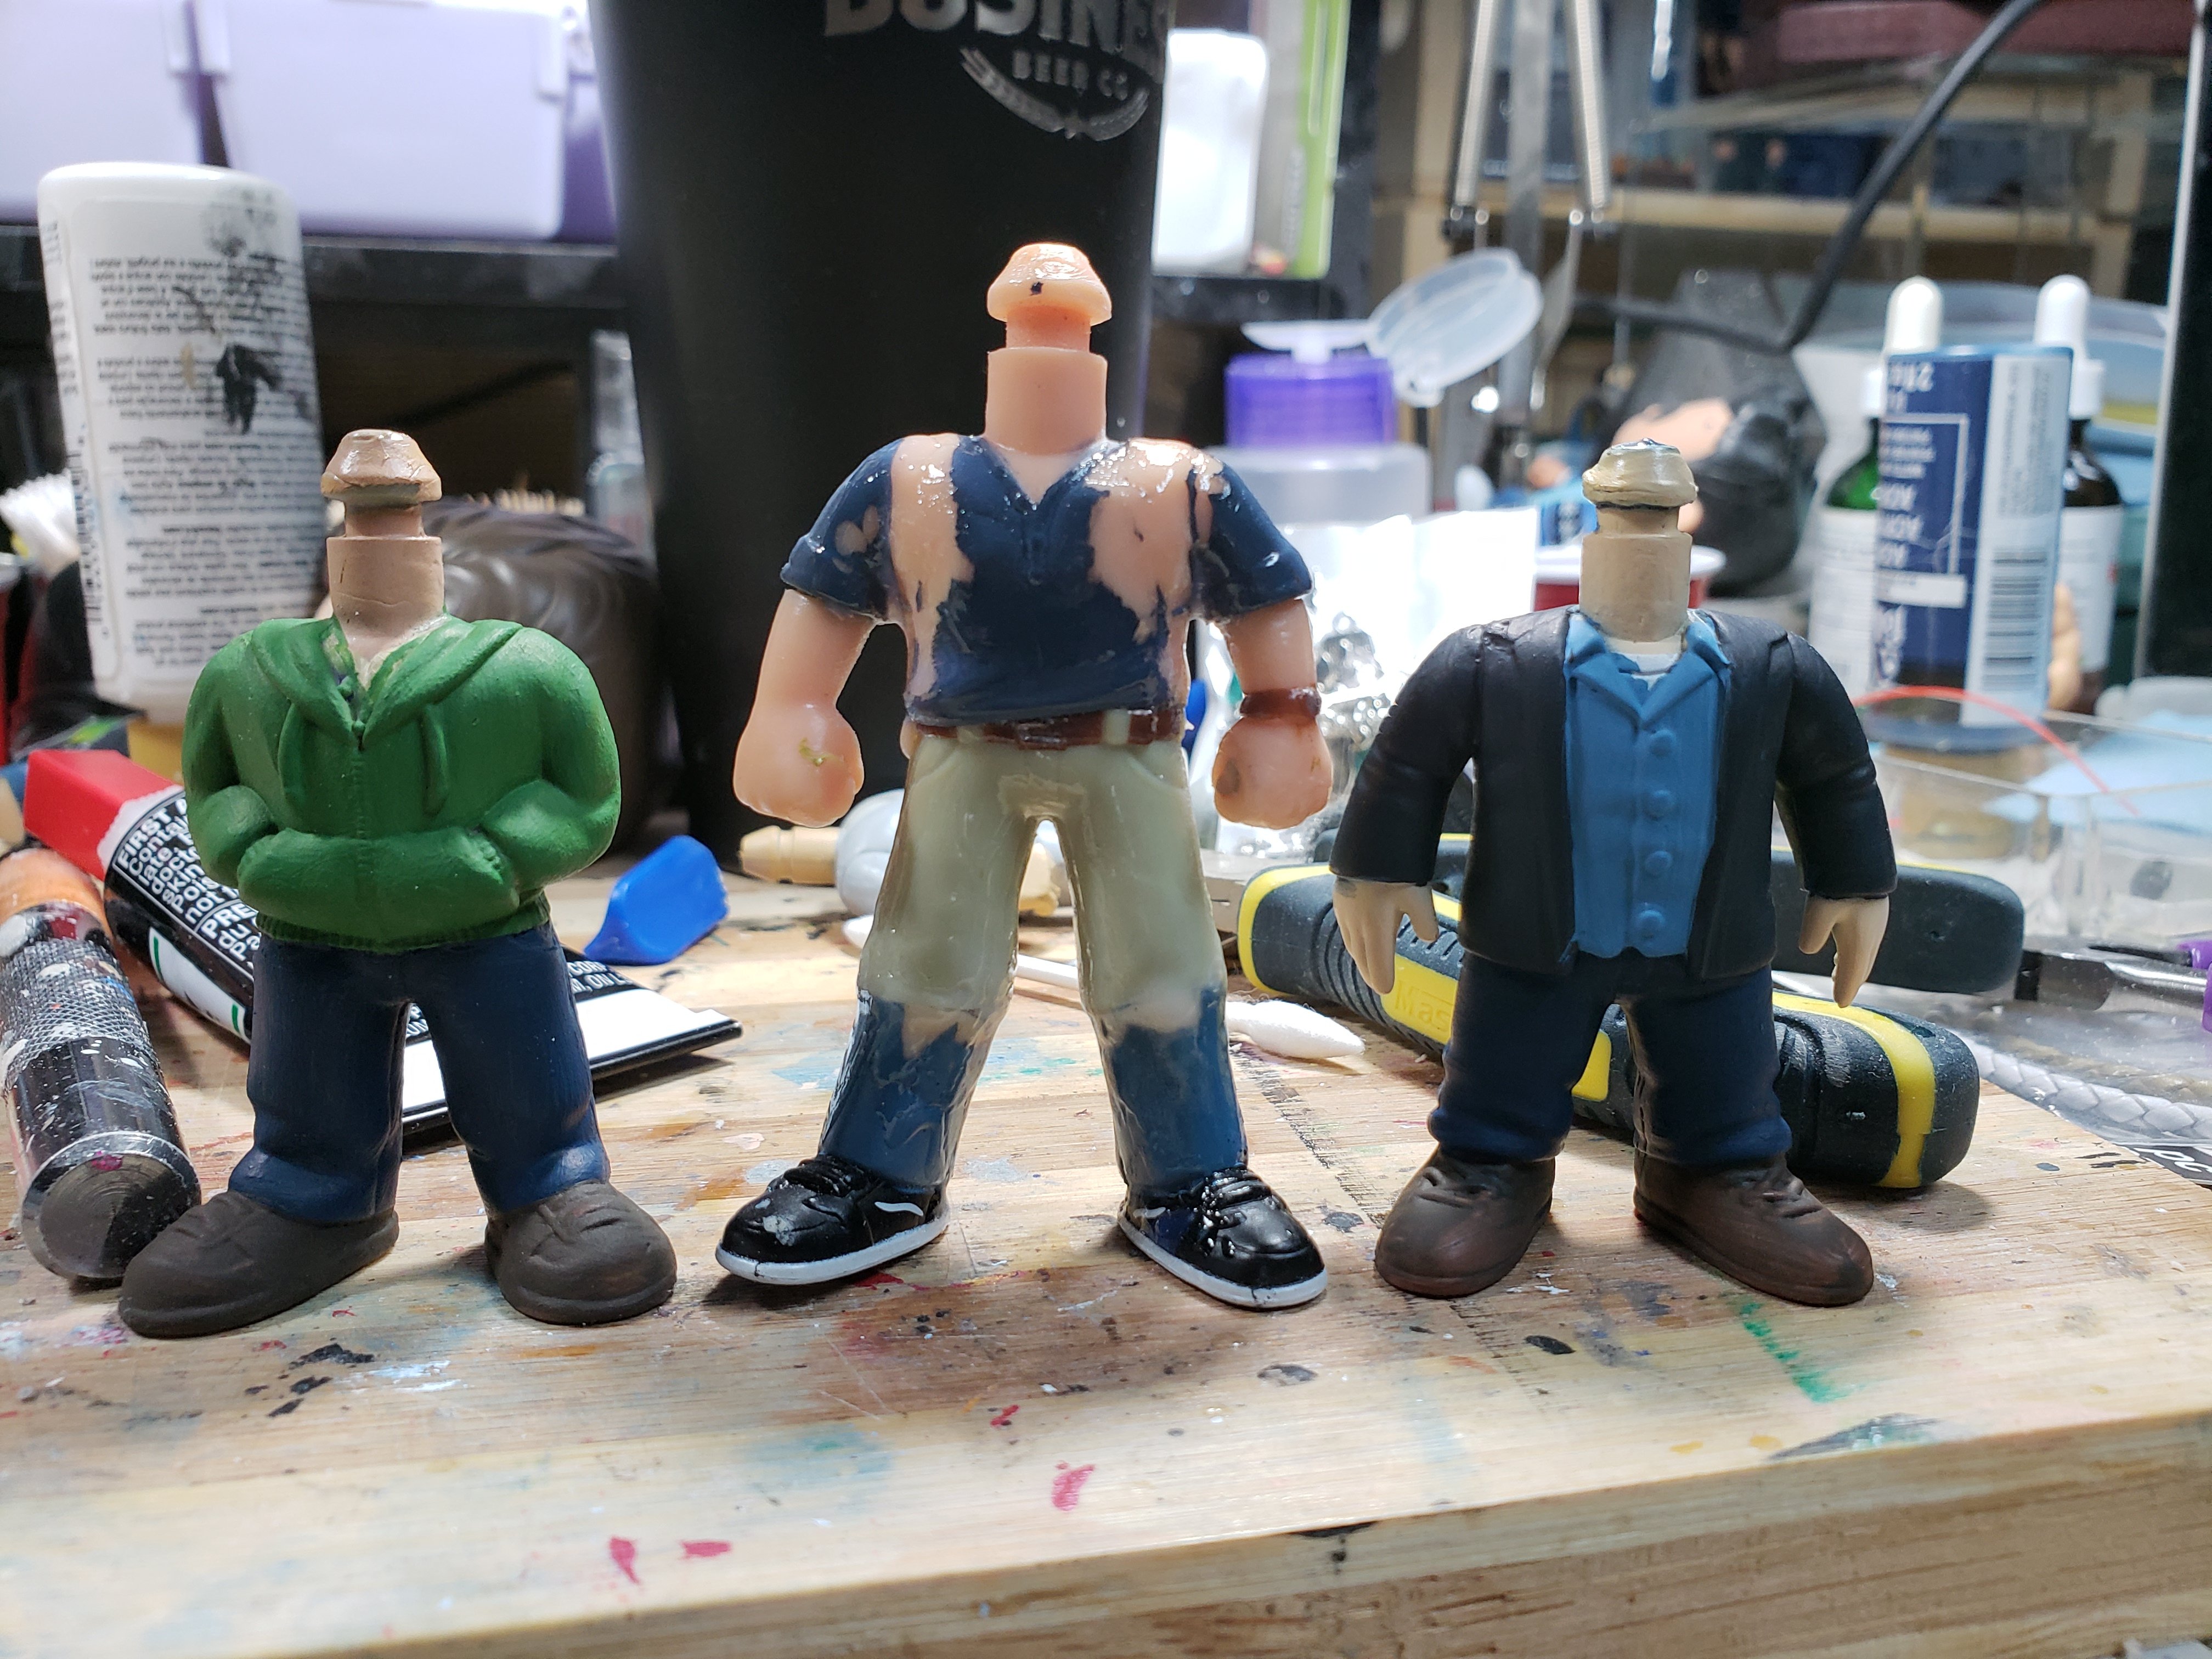
Arms
Arms are another piece that often need adjusting. The most common pop I change the arms for are Michael!Dean. His base (for now) has one arm with wide sleeves and one arm bent on his waist. I take both off, and sand down the wide sleeve (We’ll cover sanding and finishing in another post) of the straight arm. The bent arm is not used, and I fill in the hole in the body with sculpy, or milliput. I choose a straight hand that somewhat fits the look and sand it to match. Then the arm is dry fit, cutting the plug or widening the arm hole to fit tightly. I heat up the arm hole and plop some glue in and press the arm in. It’s important to hold REALLY tightly until the glue does an initial set so make sure you have some cotton swabs handy to dab the excess glue with your free hand. Once it’s set you can leave to fully dry. Once dry, they can be slightly heated to do a final positioning if needed. I recommend doing any major arm changes, like bending, before putting it back on the pop to avoid breaking the glue bond.
Don’t worry, they’re ‘armless.New arm and the full from removing the old arm
Most body attachments are just “Tab A into Tab B” situations. Occasionally you need to do flat cuts as outlined in the decapitation post. To attach these together I use wires to brace it from the inside. A dot of paint on one piece, carefully pressed into the other piece will give you placement of the holes for the wire. Drill, insert the wire, and test fit. Do any preliminary sanding you can to minimize what you have to do later. fill all holes with glue, insert the wire, glue the flat pieces and press together. Hold firmly until they stick, then tape/clamp them to dry. Once dry, do a final seal and fill the crack with the medium that will work best for that. Sometimes I use clay, milliput, resin, or liquid sculpy to fill depending on the texture I’m looking for and the strength that will be needed.
4 different pops went into this. They all fit!
Now your pop is whole! You can proceed with the steps needed to finish and make it yours! As always trial and error will be needed. I recommend trying to find really cheap pops you don’t care about (garage sales and thrift stores are great for this) so you can practice what works for you before you try the big one. I have messed up expensive pops, it may happen, but don’t let that deter you! Some of my mistakes have turned into my best work!
The fun part of customizing is taking everything apart (I may be lying.. it’s fun, but tiring on the hands) below, I’ll outline the steps I use to dismantle my Pop friends. There are other ways, I’m sure, but I’ll focus on the ways I’ve tried.
Just your pile of body parts..
Heat Gun.
This is my preferred method, but not always the most efficient. I use it most often because it’s something I can do at the workbench and I don’t have to haul everything upstairs to the kitchen. It also lets me focus the heat in areas so I don’t soften or damage any other areas. Lets go over the pros and cons I see with it.
My heat gun being shown in its a secondary use. Heating lunch.
Pros
For me, it’s ease. The heat gun is right at the work bench. I can reach behind me and have it in hand so I can melt and maneuver as needed without breaking my stride. I can cure polymer clay, soften the glue, remove arms, legs, feet, heads and separate torsos in minutes.
Cons
If you are not very careful, you can burn your pop, bubble the paint or downright melt fingers and noses off. With practice that becomes less likely, but always a possibility, especially if I’m rushing or distracted.
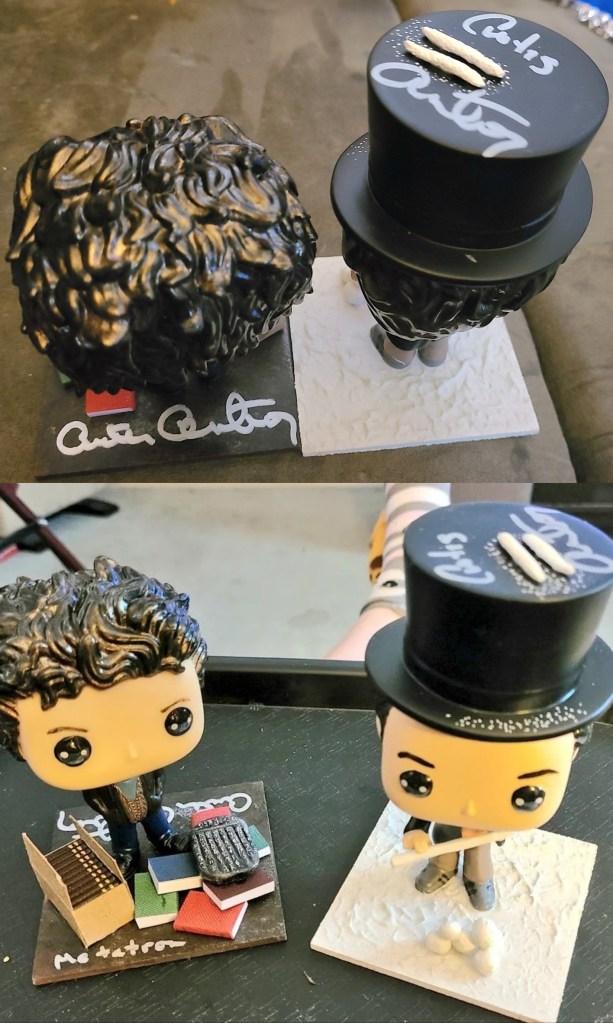
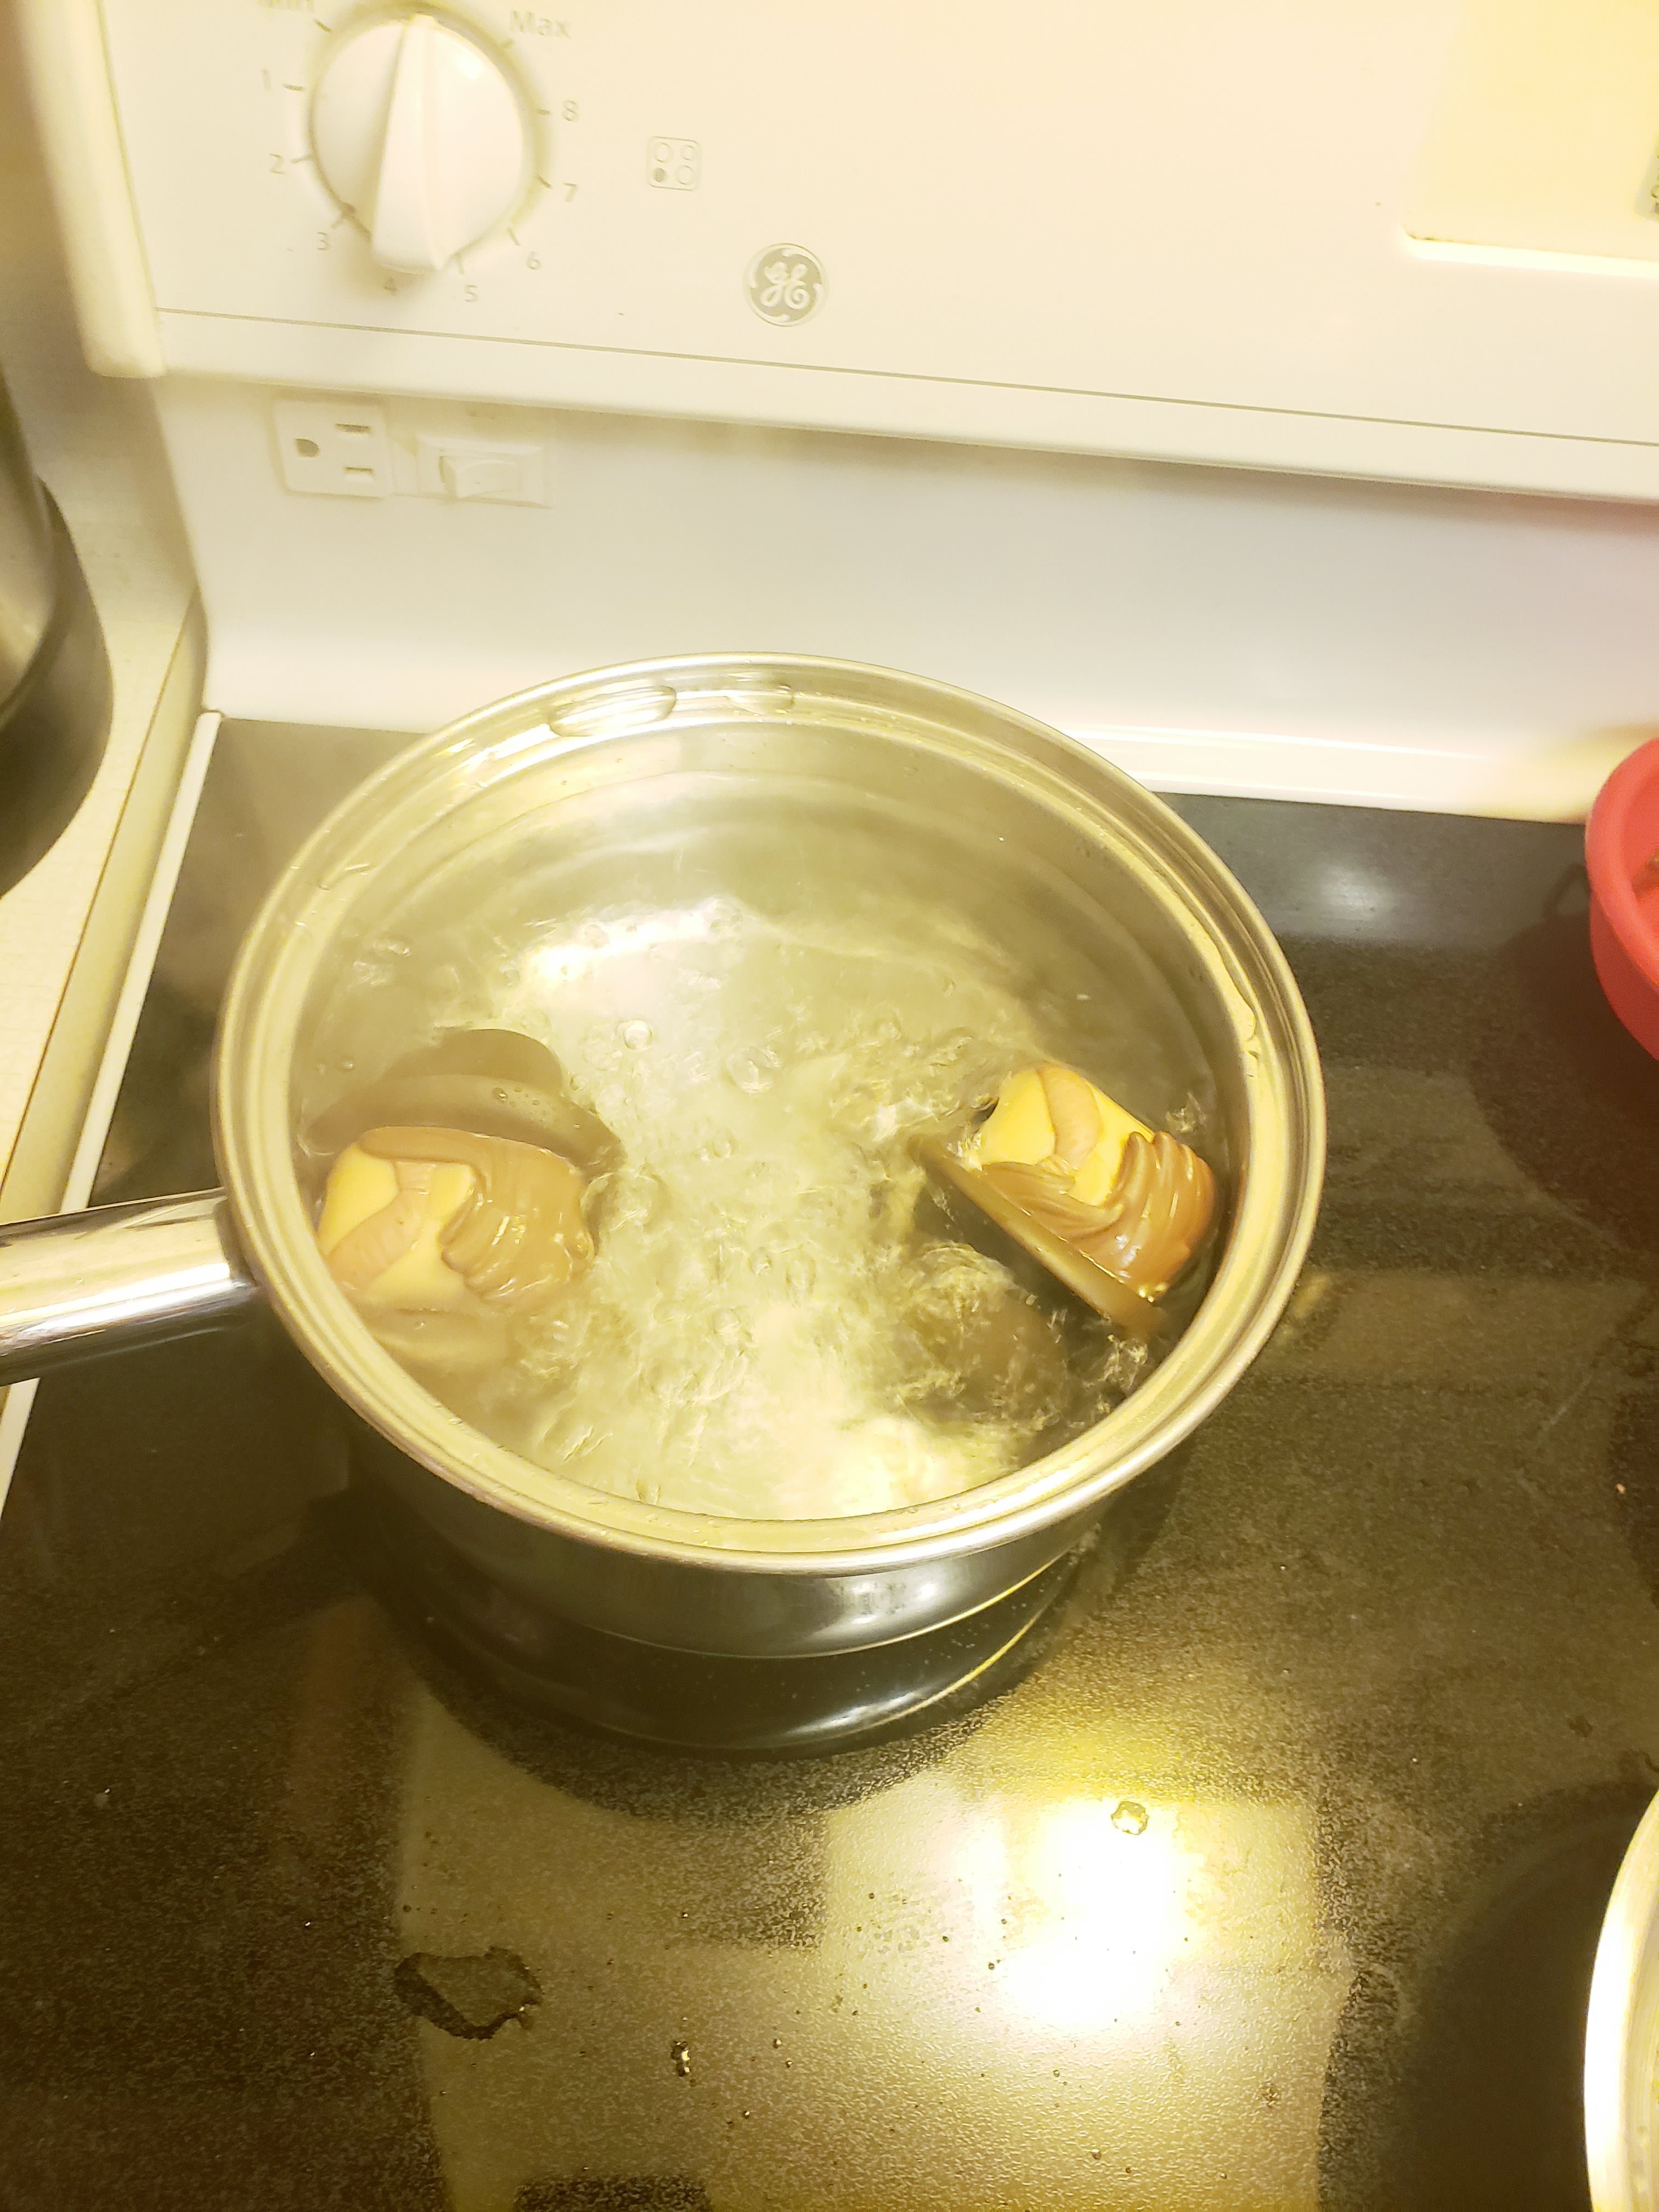
Boiling
This is the method I use when I have difficult parts, or lots of parts to separate. It also works best for separating torsos from legs as they are thicker and the boiling water works faster. I don’t use it often, but this being said, I have been looking into a hot plate for the basement so I can boil without leaving the workroom.
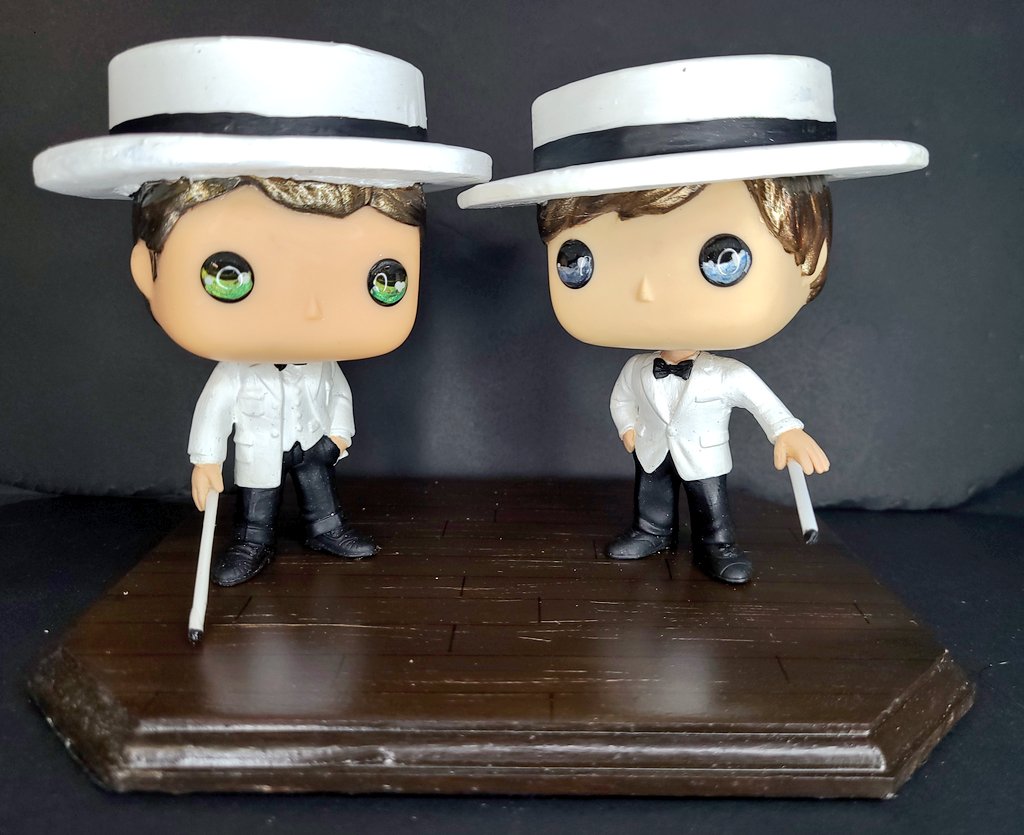
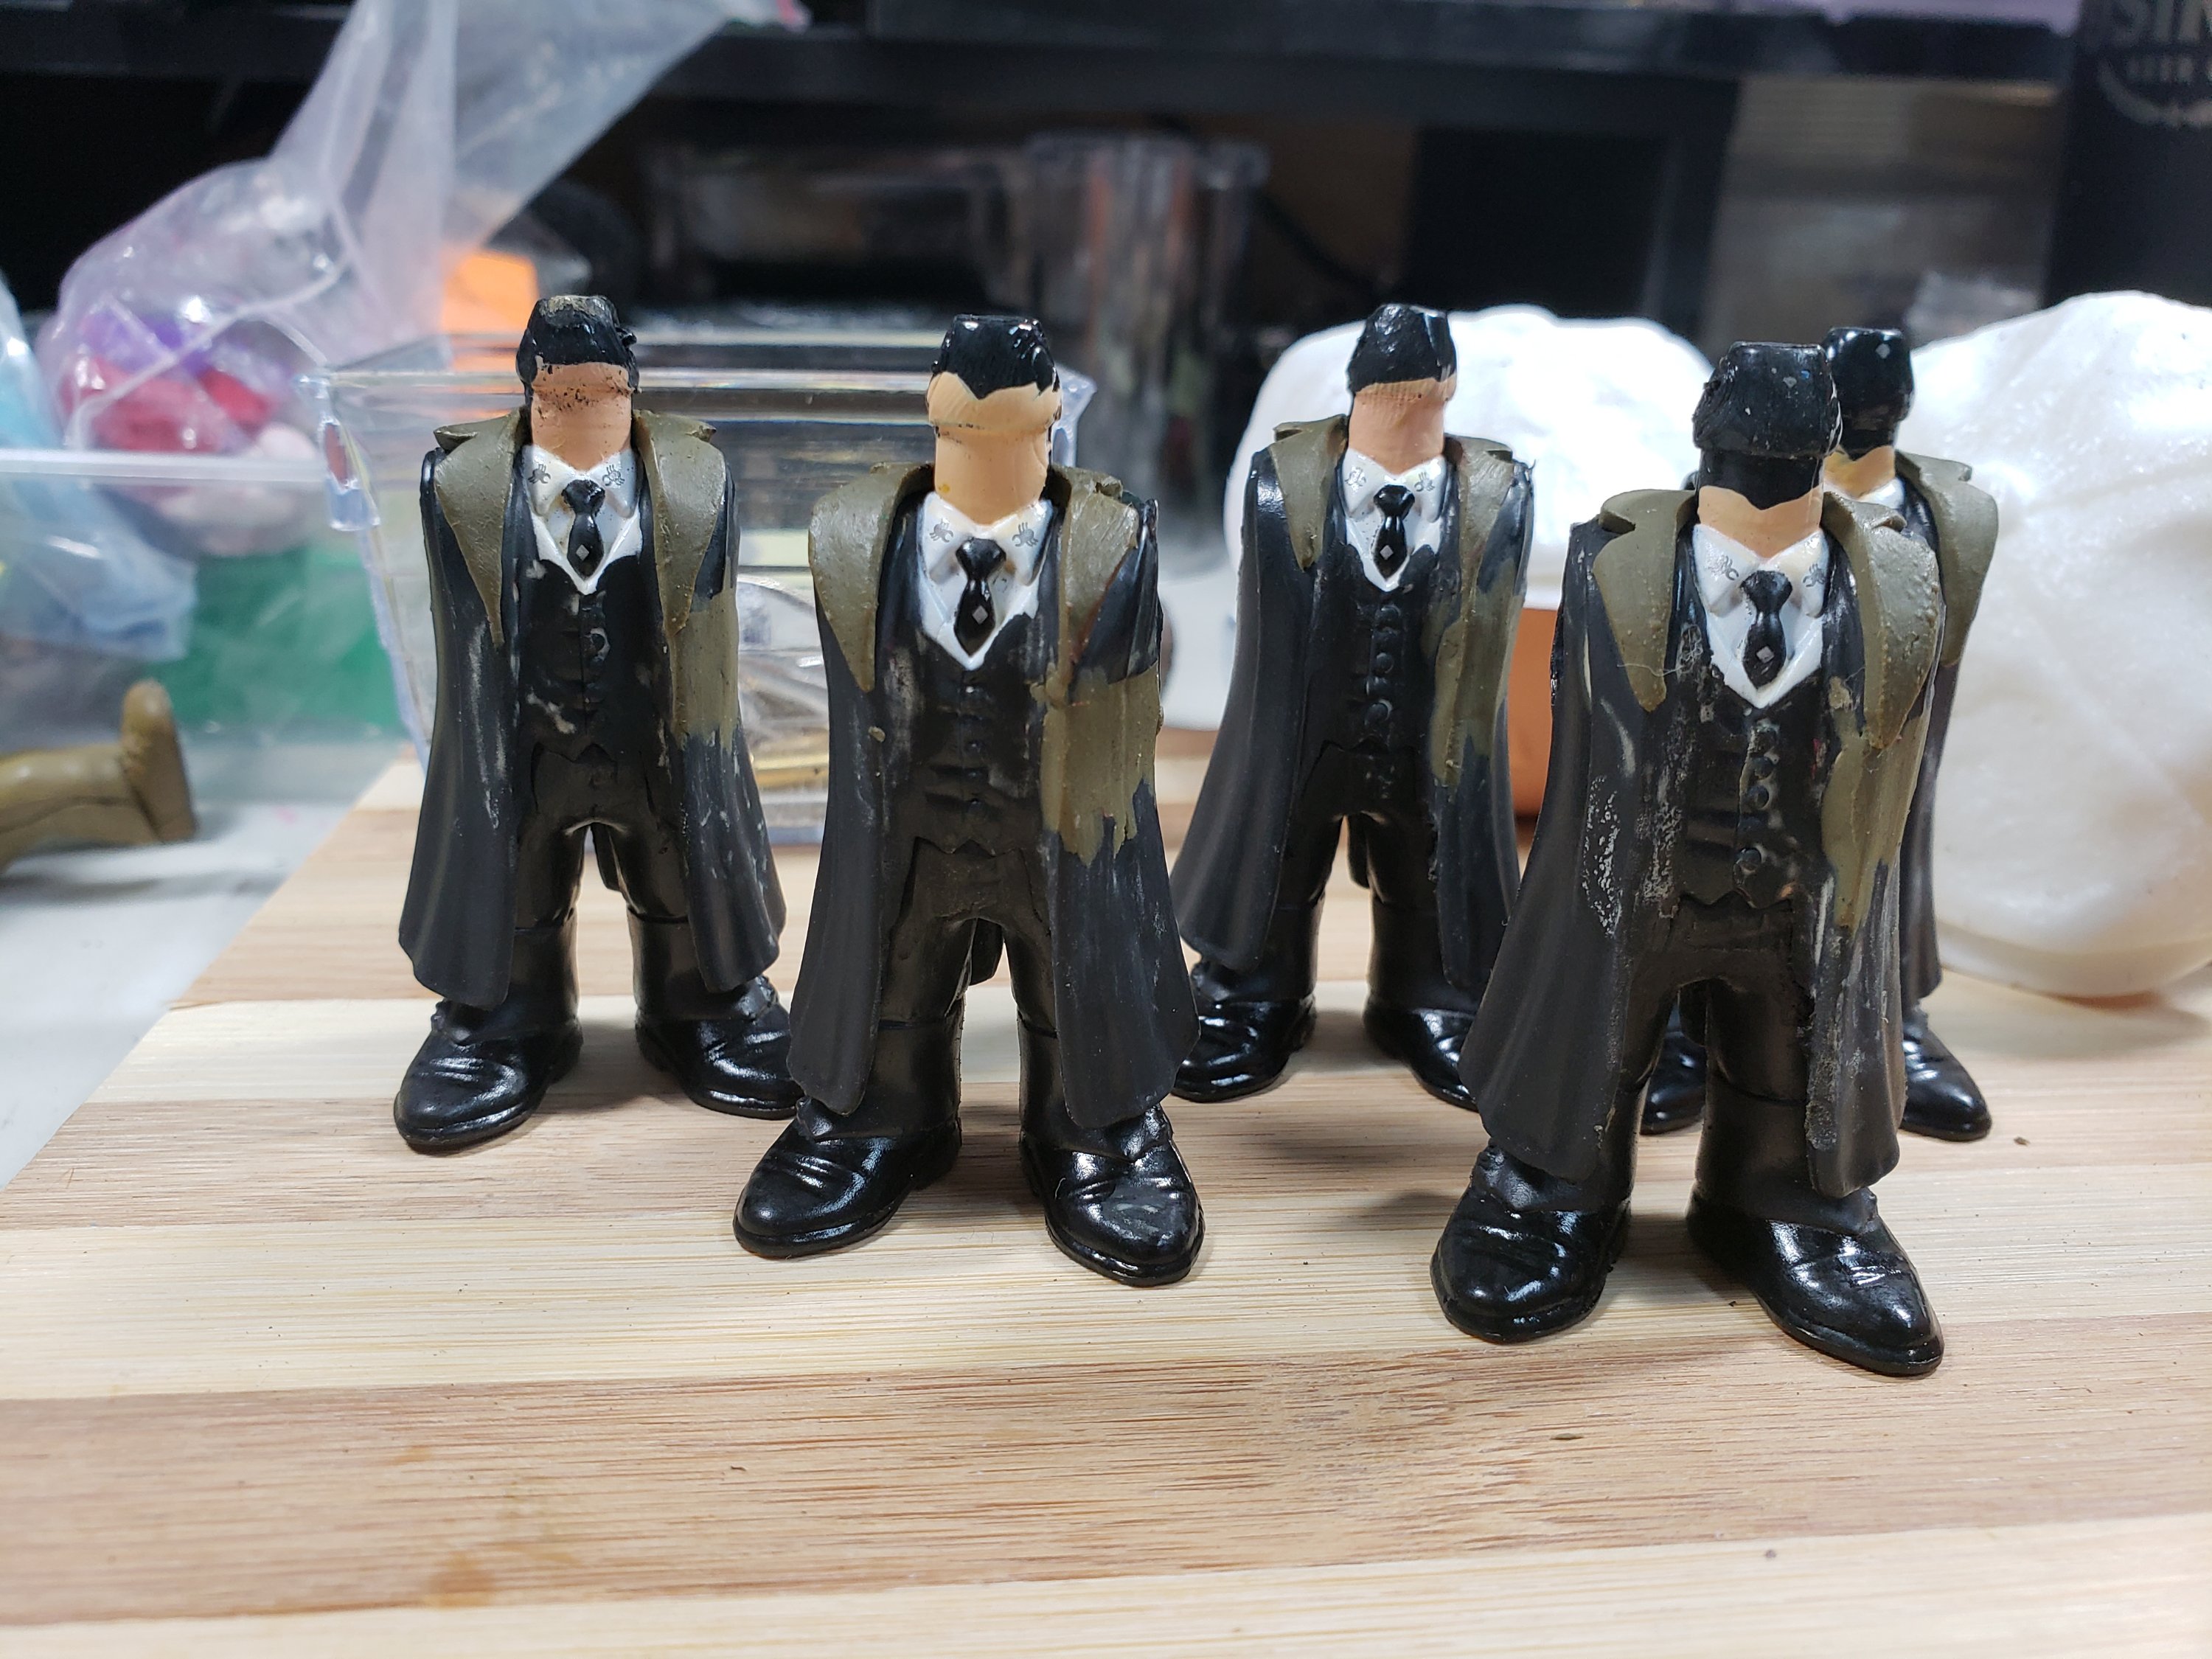
These guys were boiled to remove their hats.
Pros
Very good at separating glued areas, even ones with stubborn glue. Fairly quick once you get the water boiling. Less damage to most pops.
Cons
For me, it’s ease. I have to haul my butt and pops upstairs to boil and wait for them. It’s messier as well. Plus, I have bad patience, so generally burn my fingers trying to separate parts that are too hot (I acknowledge my foible here!)
Cutting
Not a method often used by me, but sometimes there are no easy seams to boil or heat to separate parts so I must take the plunge and cut them off! I use this mainly when extending legs for Pops that need to be taller than normal (Like Aaron’s Gollum) This is a finicky option but completely doable. The trick is to find parts closest in diameter to the original. I then cut them both at the same angle, drill a hole in the centre of both for a piece of wire to strengthen the bond. Then put the glue coated wire in, put them together and secure until dry. Use some clay/resin to cover the break and blend them together. I’ve also done this for arms and torso’s when needed, but to be honest, it’s rare. I’m lucky to have a stock of pops enough to usually get what I need without this method.
One version of a leg extensionSecond version with the sculpting done
I’m sure there are other methods that are used, but these are the three most common for me. Hopefully this takes away some of the fear for anyone wanting to try their own pop but not sure where to start. Feel free to comment with any questions you have, or any processes you’d like to see!
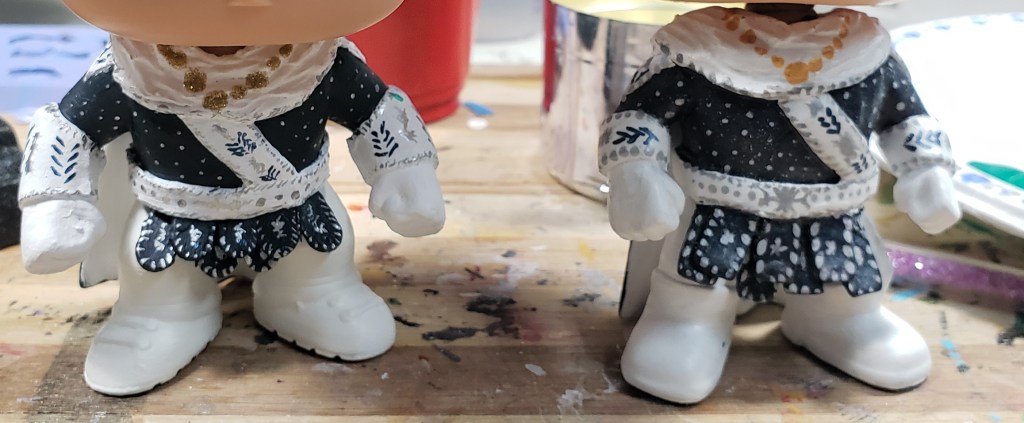
The past few weeks, I’ve been struggling with a bit of a block. I couldn’t get the King!Jensens to where I wanted them to be and it affected EVERYTHING! I realized it wasn’t really the Jensen’s it was me. The block was with my creative side and not with the Jensens. Until I realized that, I kept changing the Jensens thinking that was the issue. I went from this.
Original design
To this..
Trying to add “texture”
And finally I realized that the issue was me so I went back to the original design that I loved. Once I did that, I was able to get so much done simply because the creative juices were now flowing. Part of the issue, I realized, is that I was micro judging. By that, I mean judging the entire pop based on this incredibly small view of one particular area. When I do that, and forget to see the bigger picture (or in this case, the entire design that works together) I tend to focus on tiny things that aren’t “perfect” and it colours the entire project. When I step back and take the entire thing as a whole, and remember that being handmade means that there WILL be imperfections and that is part of what makes them good, I can progress and remember the joy from the art, instead of the need for perfection.
The original design that worked, once I realized they weren’t the problem
How do I stop it from happening? Got me! My hope is that I get better about recognizing when it’s happening so I can catch it sooner sooner and change my view. Finding the different things that have helped, and adding them to my artistic toolbox helps too. Things like
-making a new prototype
-changing up what I’m working on. From Pops to Vinyl to Wood to Jewelry
-taking a project that has been stumping me and just doing it. Getting that off my to do list helps.
-organizing my work-space or cleaning my area
Each time I go through this I am a little more empowered and a little more comfortable with my art. I deal with Impostor Syndrome in a lot of areas of my life. The thoughts that I don’t really deserve any recognition and that people are just humouring me come through when I get a block. Every time I pull myself through it gives me that much more solid of a footing in my own creativity.
We all have doubts. Every. One. Of. Us. Never forget that. Remembering that can help push you through when those scary voices raise their head.
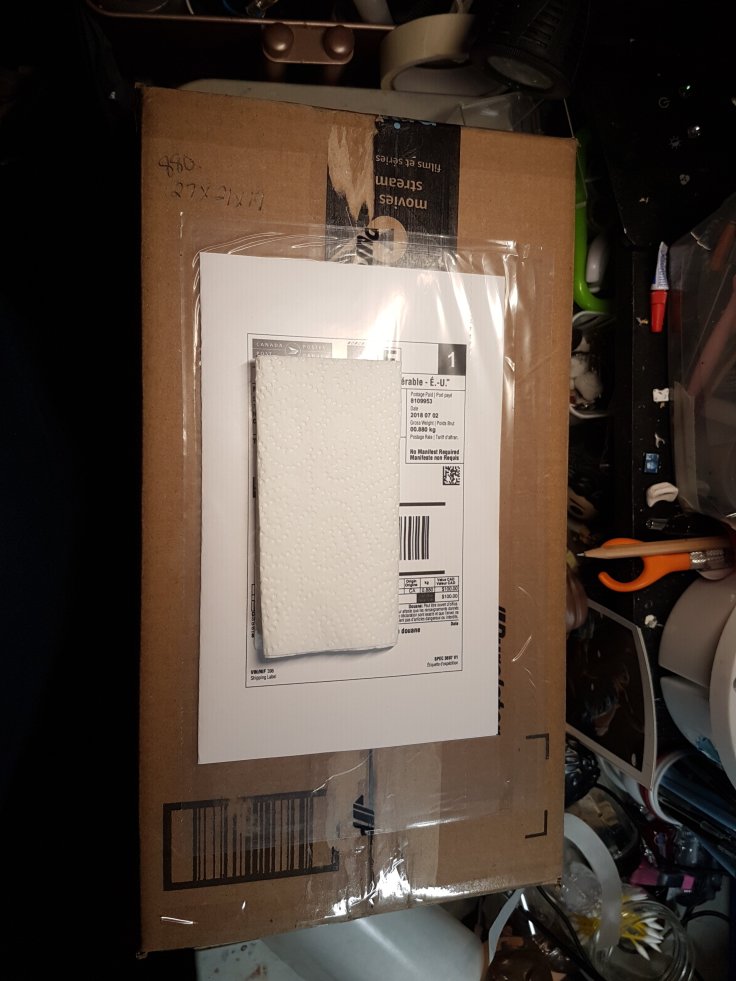
I’ll admit, shipping is one of my least favourite things. Packing, modifying inserts, weighing, navigating the shipping software… it’s all just a pain in the booty. Shipping starts with the insert.
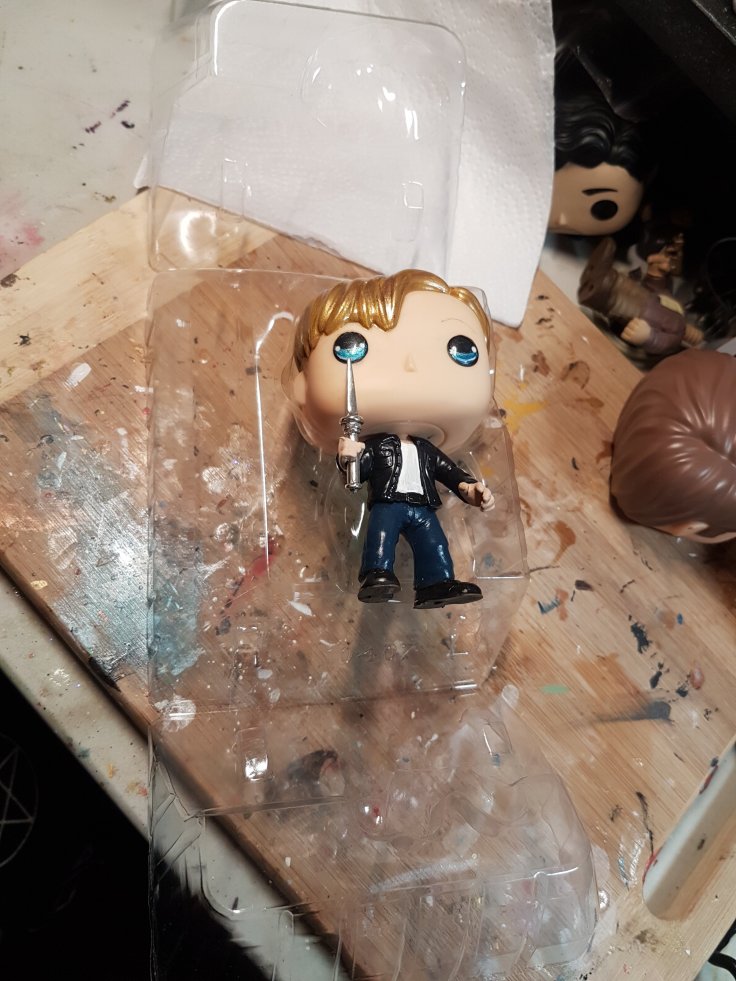
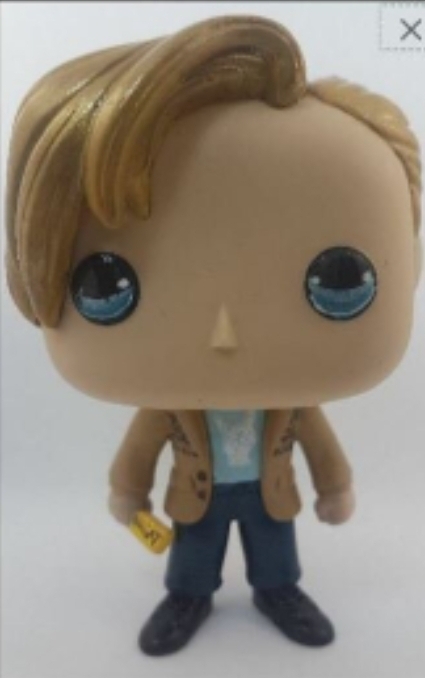
After the pops have dried for a few days, they need an insert. Some pops can go into an insert as is, but most need some sort of modification for accessories, heads, wings etc. That’s where it gets tricky. The one in the picture here is AU Jack. He’s a good one, as I can use the base insert for his body (Scott McCall, usually) and it will fit his head, and as he’s a Mag Wing pop, his insert doesn’t need to be cut to accommodate permanent wings, they get packed separately. The insert goes into a soft pop protector. This holds them secure, and can be used for display. To be honest, I don’t like making custom boxes, because they hide the pop. I want people to be able to see all of it.
Luckily this guy fit! Otherwise it needs to be carved out and smoothed
In the soft pop protector
Example of an insert that needs to be modified
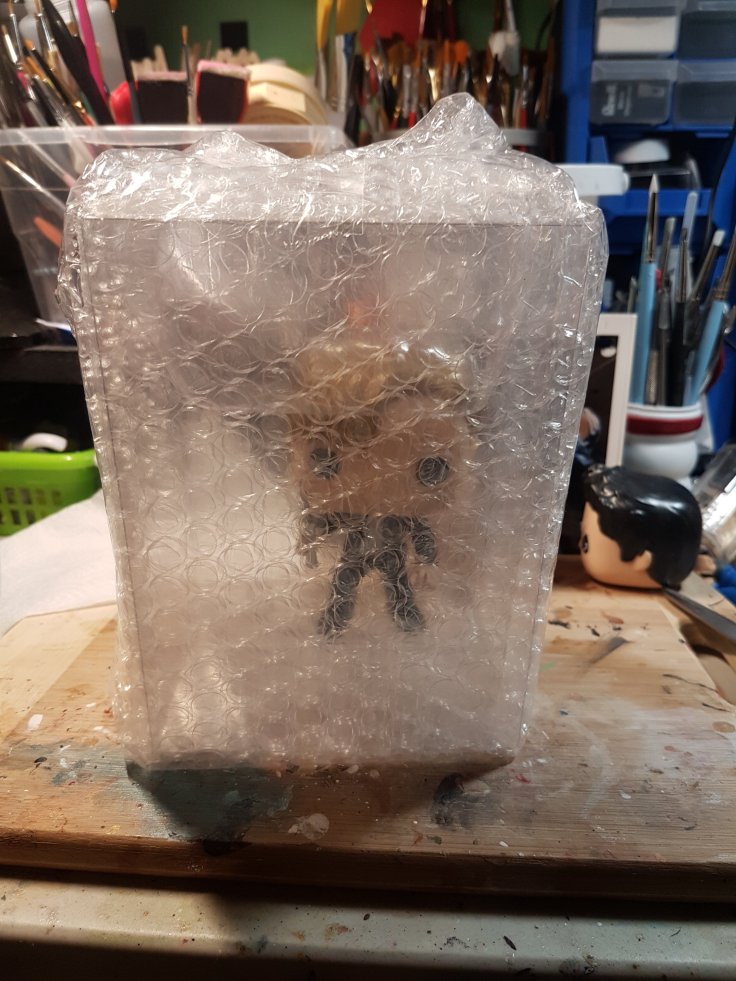
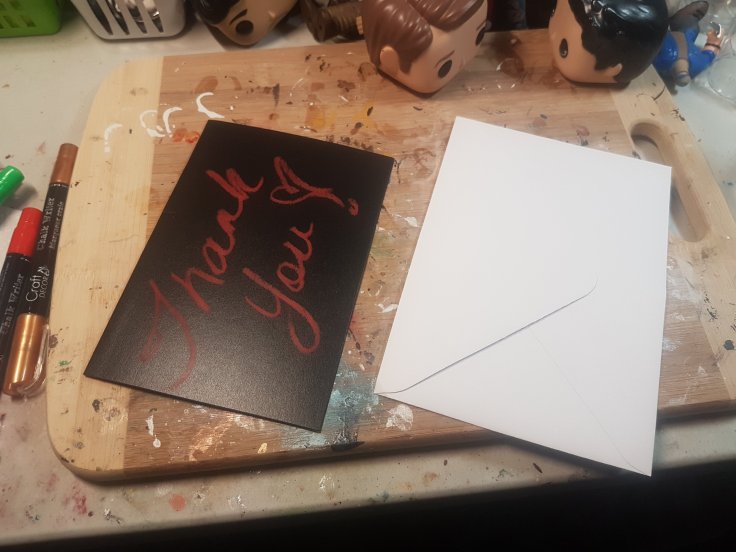
The pop now gets bubble wrapped and a box is sized up for it. I’m lucky in that I rarely have to purchase boxes, but it does mean some extra packing sometimes. extra space is usually filled with air bags. Then the thank you note. I used to hand draw all of them and seal them with wax, but that became too time consuming. Now they are preprinted cards with care instructions that I will add my personal note to. I can still seal with wax when I have time. An AKF item goes in as a thank you gift and the box is sealed.
Bubbly!
In the box with the card
Old style card
AKF goes in every package
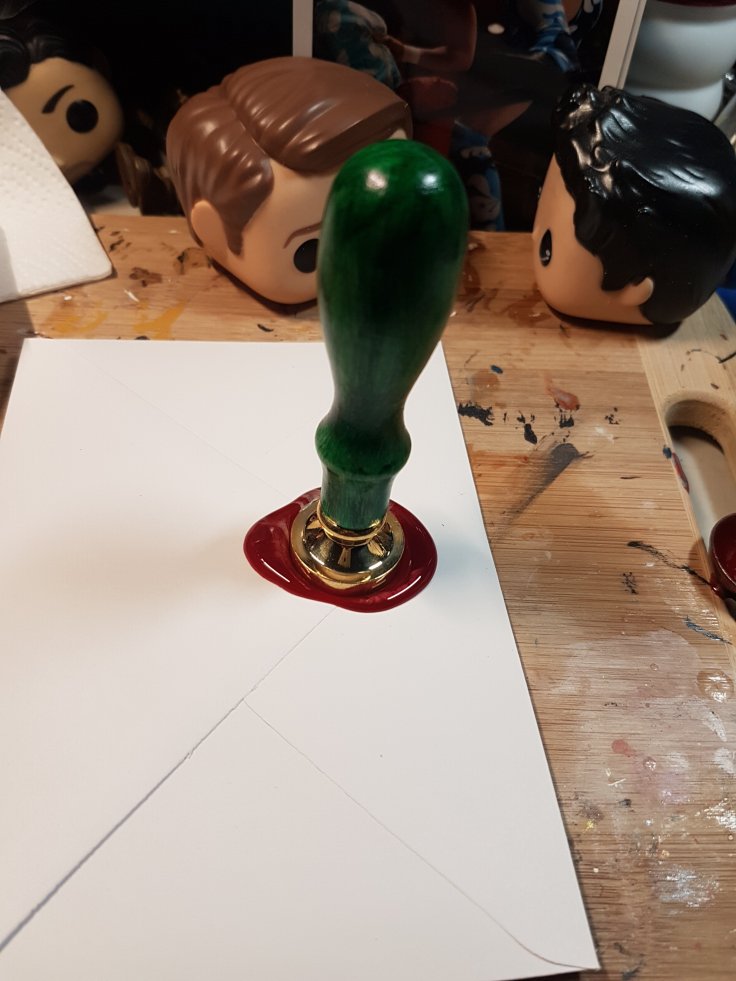
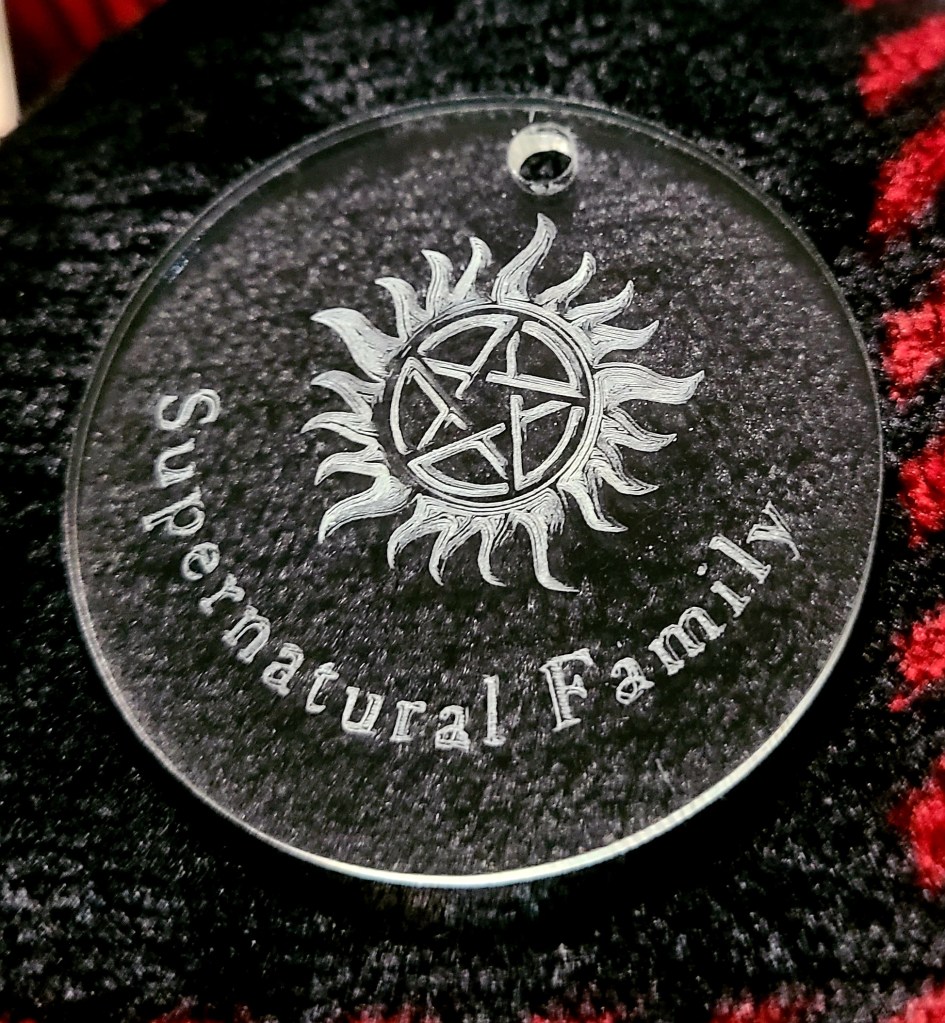
When I can, I seal the envelope with wax. I have Anti-possesion, demon traps, wings
After that it’s just a matter of printing the labels and dropping them off at the post office so they can be on their way to their new homes.
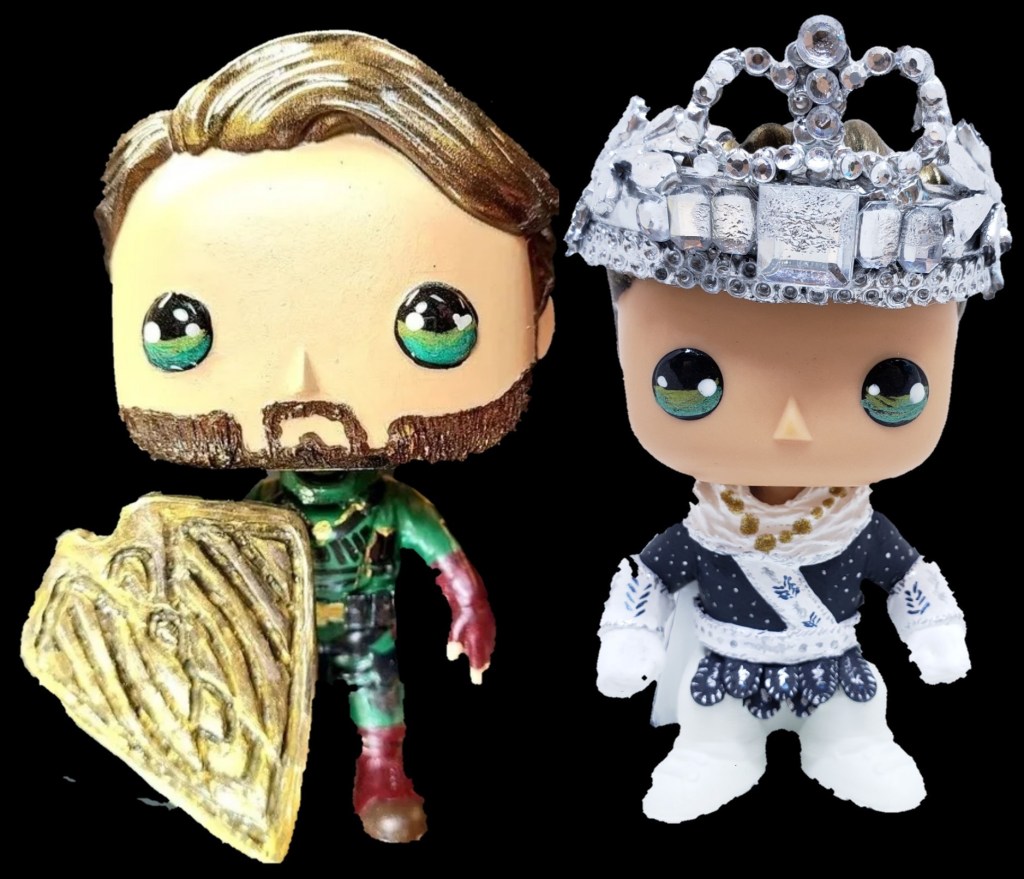
This year, Jensen was the King Bacchus at Mardi Gras with an outfit that screamed to be popped! I made one for me, but the process ended up being to time consuming and not practical for sales, so back to the drawing board!
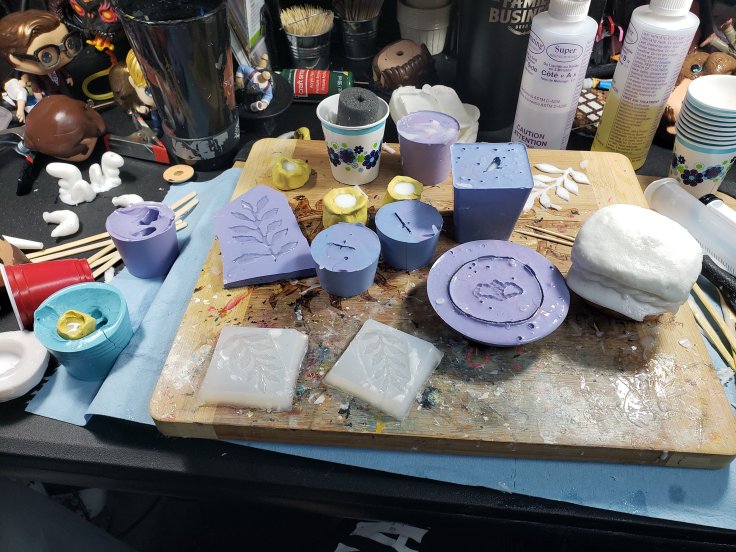
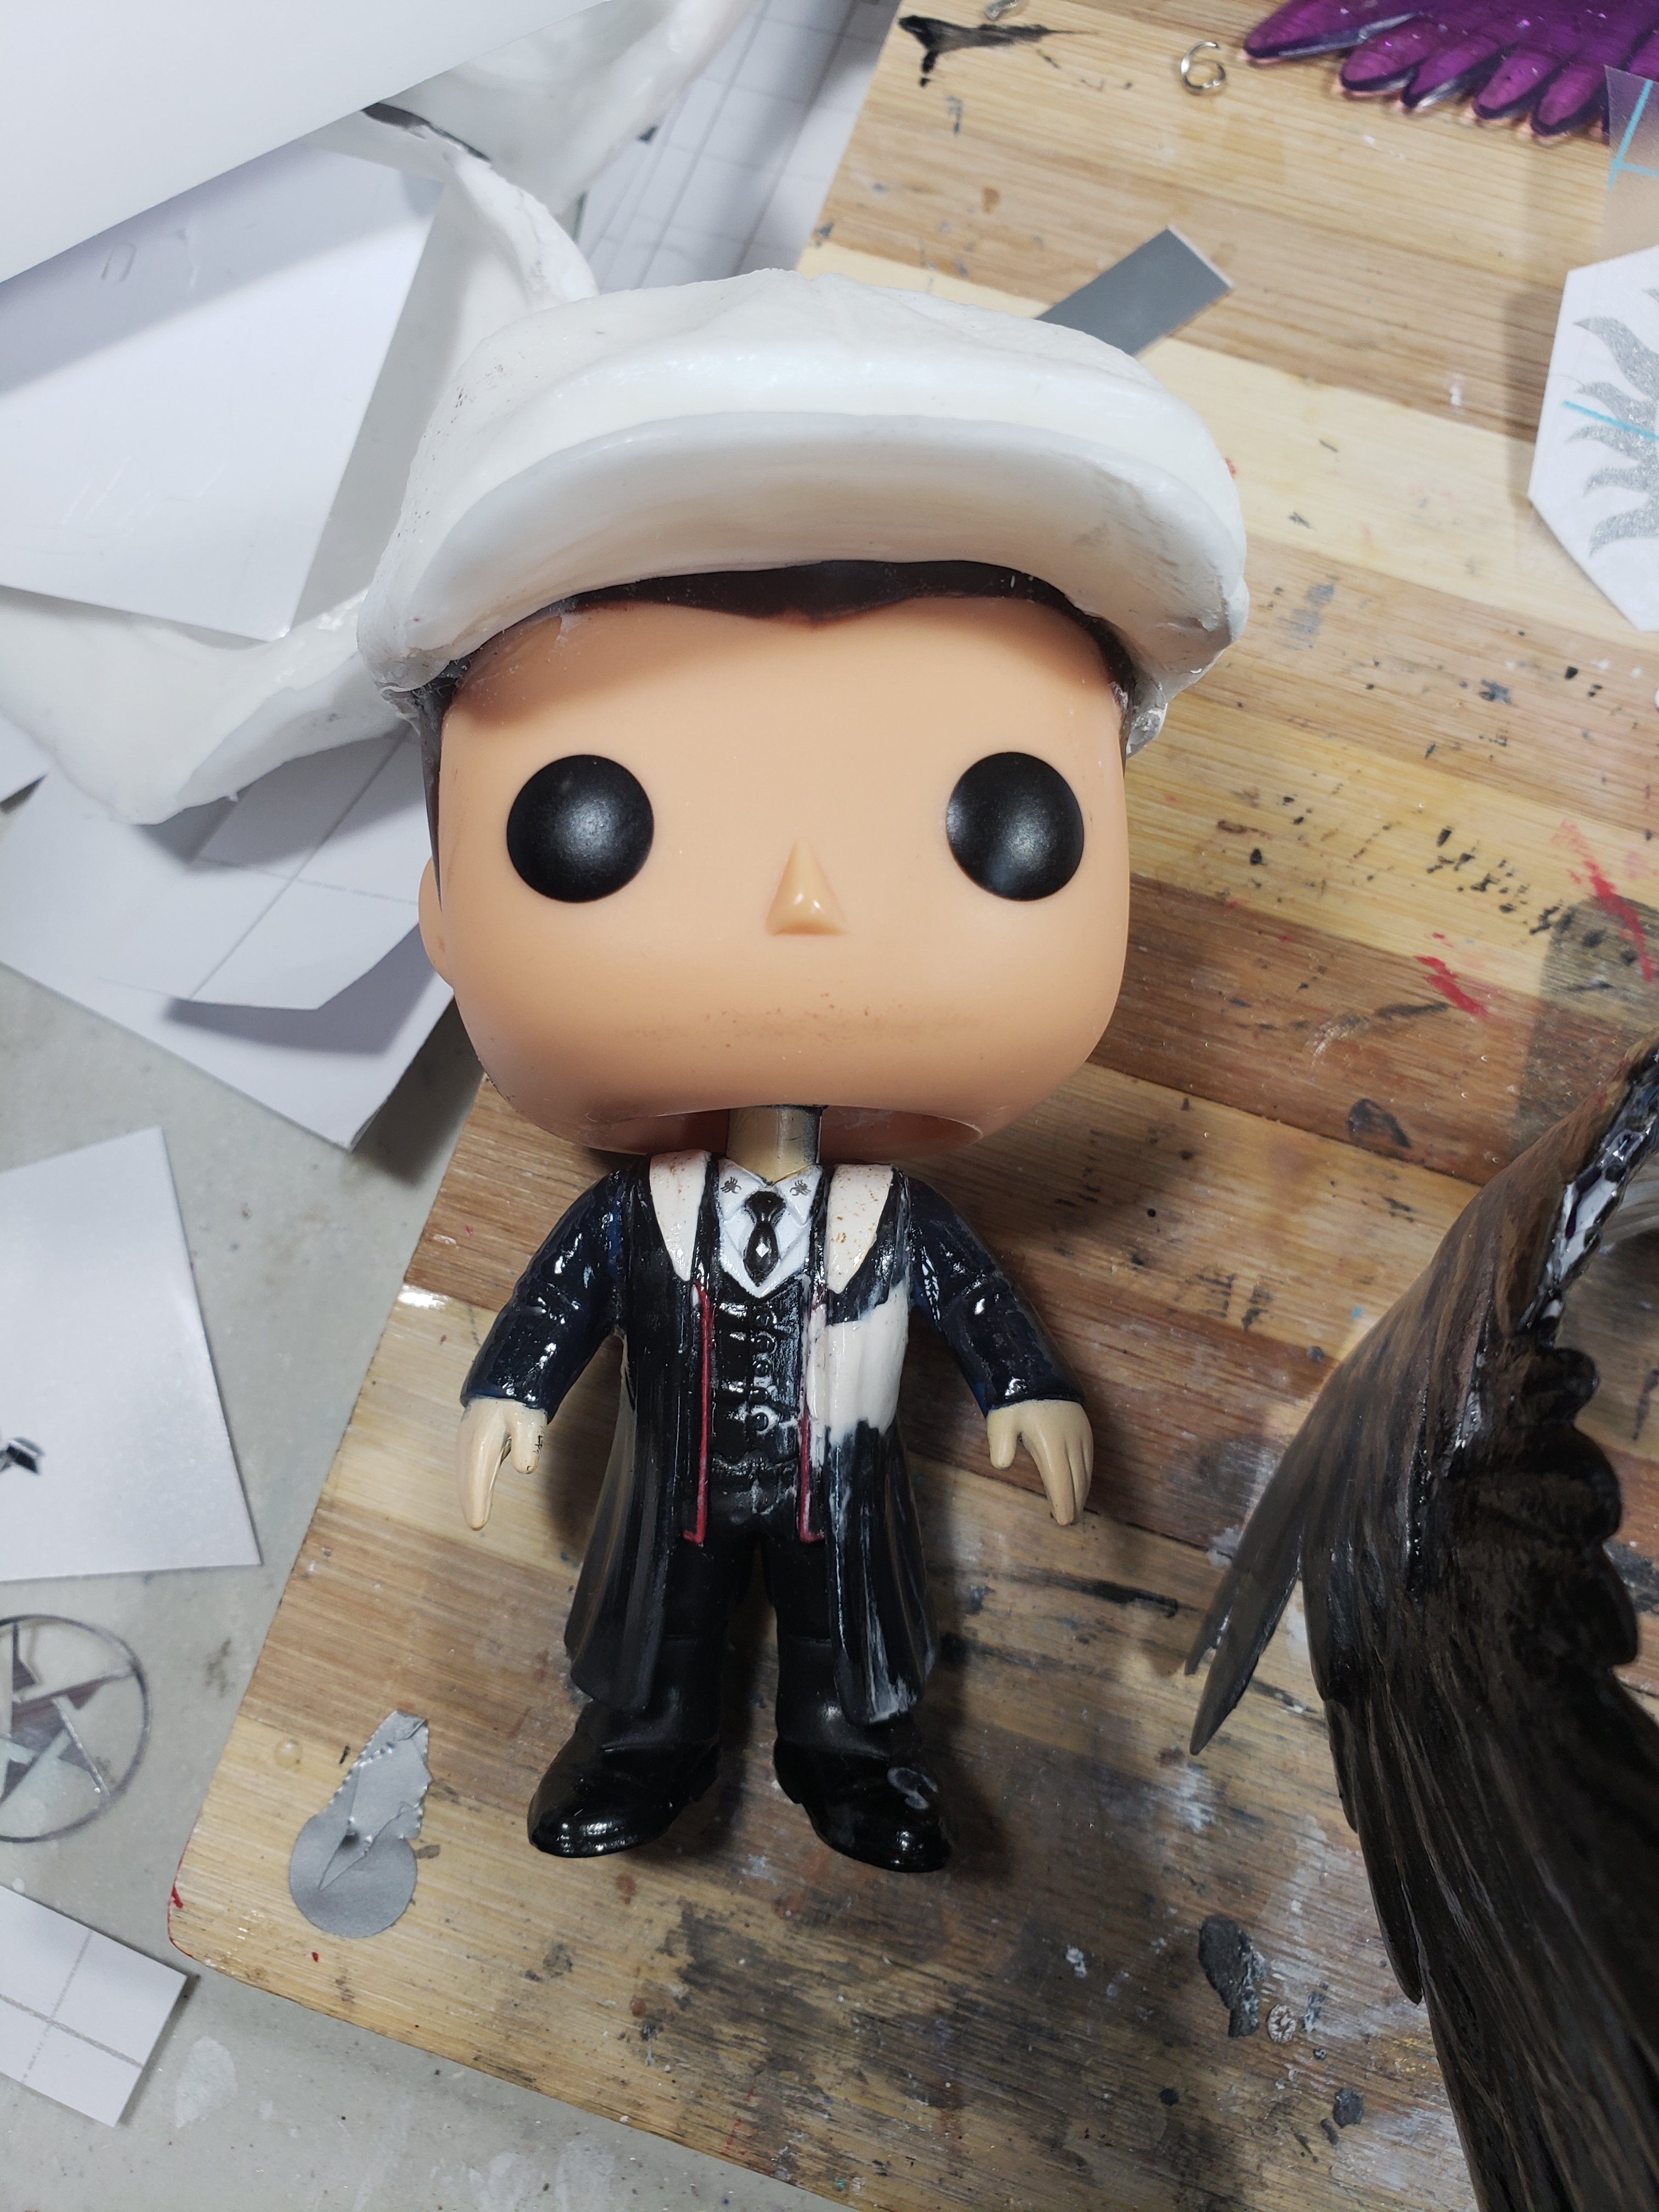
For his crown, I figured casting would be the best bet. I sculpted the leaves from Sculpy, cured them and cast them in 2 different mediums, a clear silicon and Oomoo. I also made a mini crown from a dollar store Disney crown (do NOT tell the babies!) I cast that as well. The base of the crown was the base of the dollar store Disney crown, heated and molded to the shape of Dean’s head. When casting the resin, I found a syringe was best to direct the resin into the small areas without overflowing. Less overflow means less cleanup and sanding required.
Moulds. The clear are silicon and the blue/purple are Smooth on. here are leaves, crown, apron and cape (With bonus Benny hat)The bases of the crown
His outfit had some elements that would be iffy to sculpt, and would work better with some flexibility. His apron and his cape would be cast as well. More trial and error, and I cast his apron out of coffee stir sticks stuck together, and his cape out of on from the Ego pop.
Capes, aprons, crowns and leaves curing
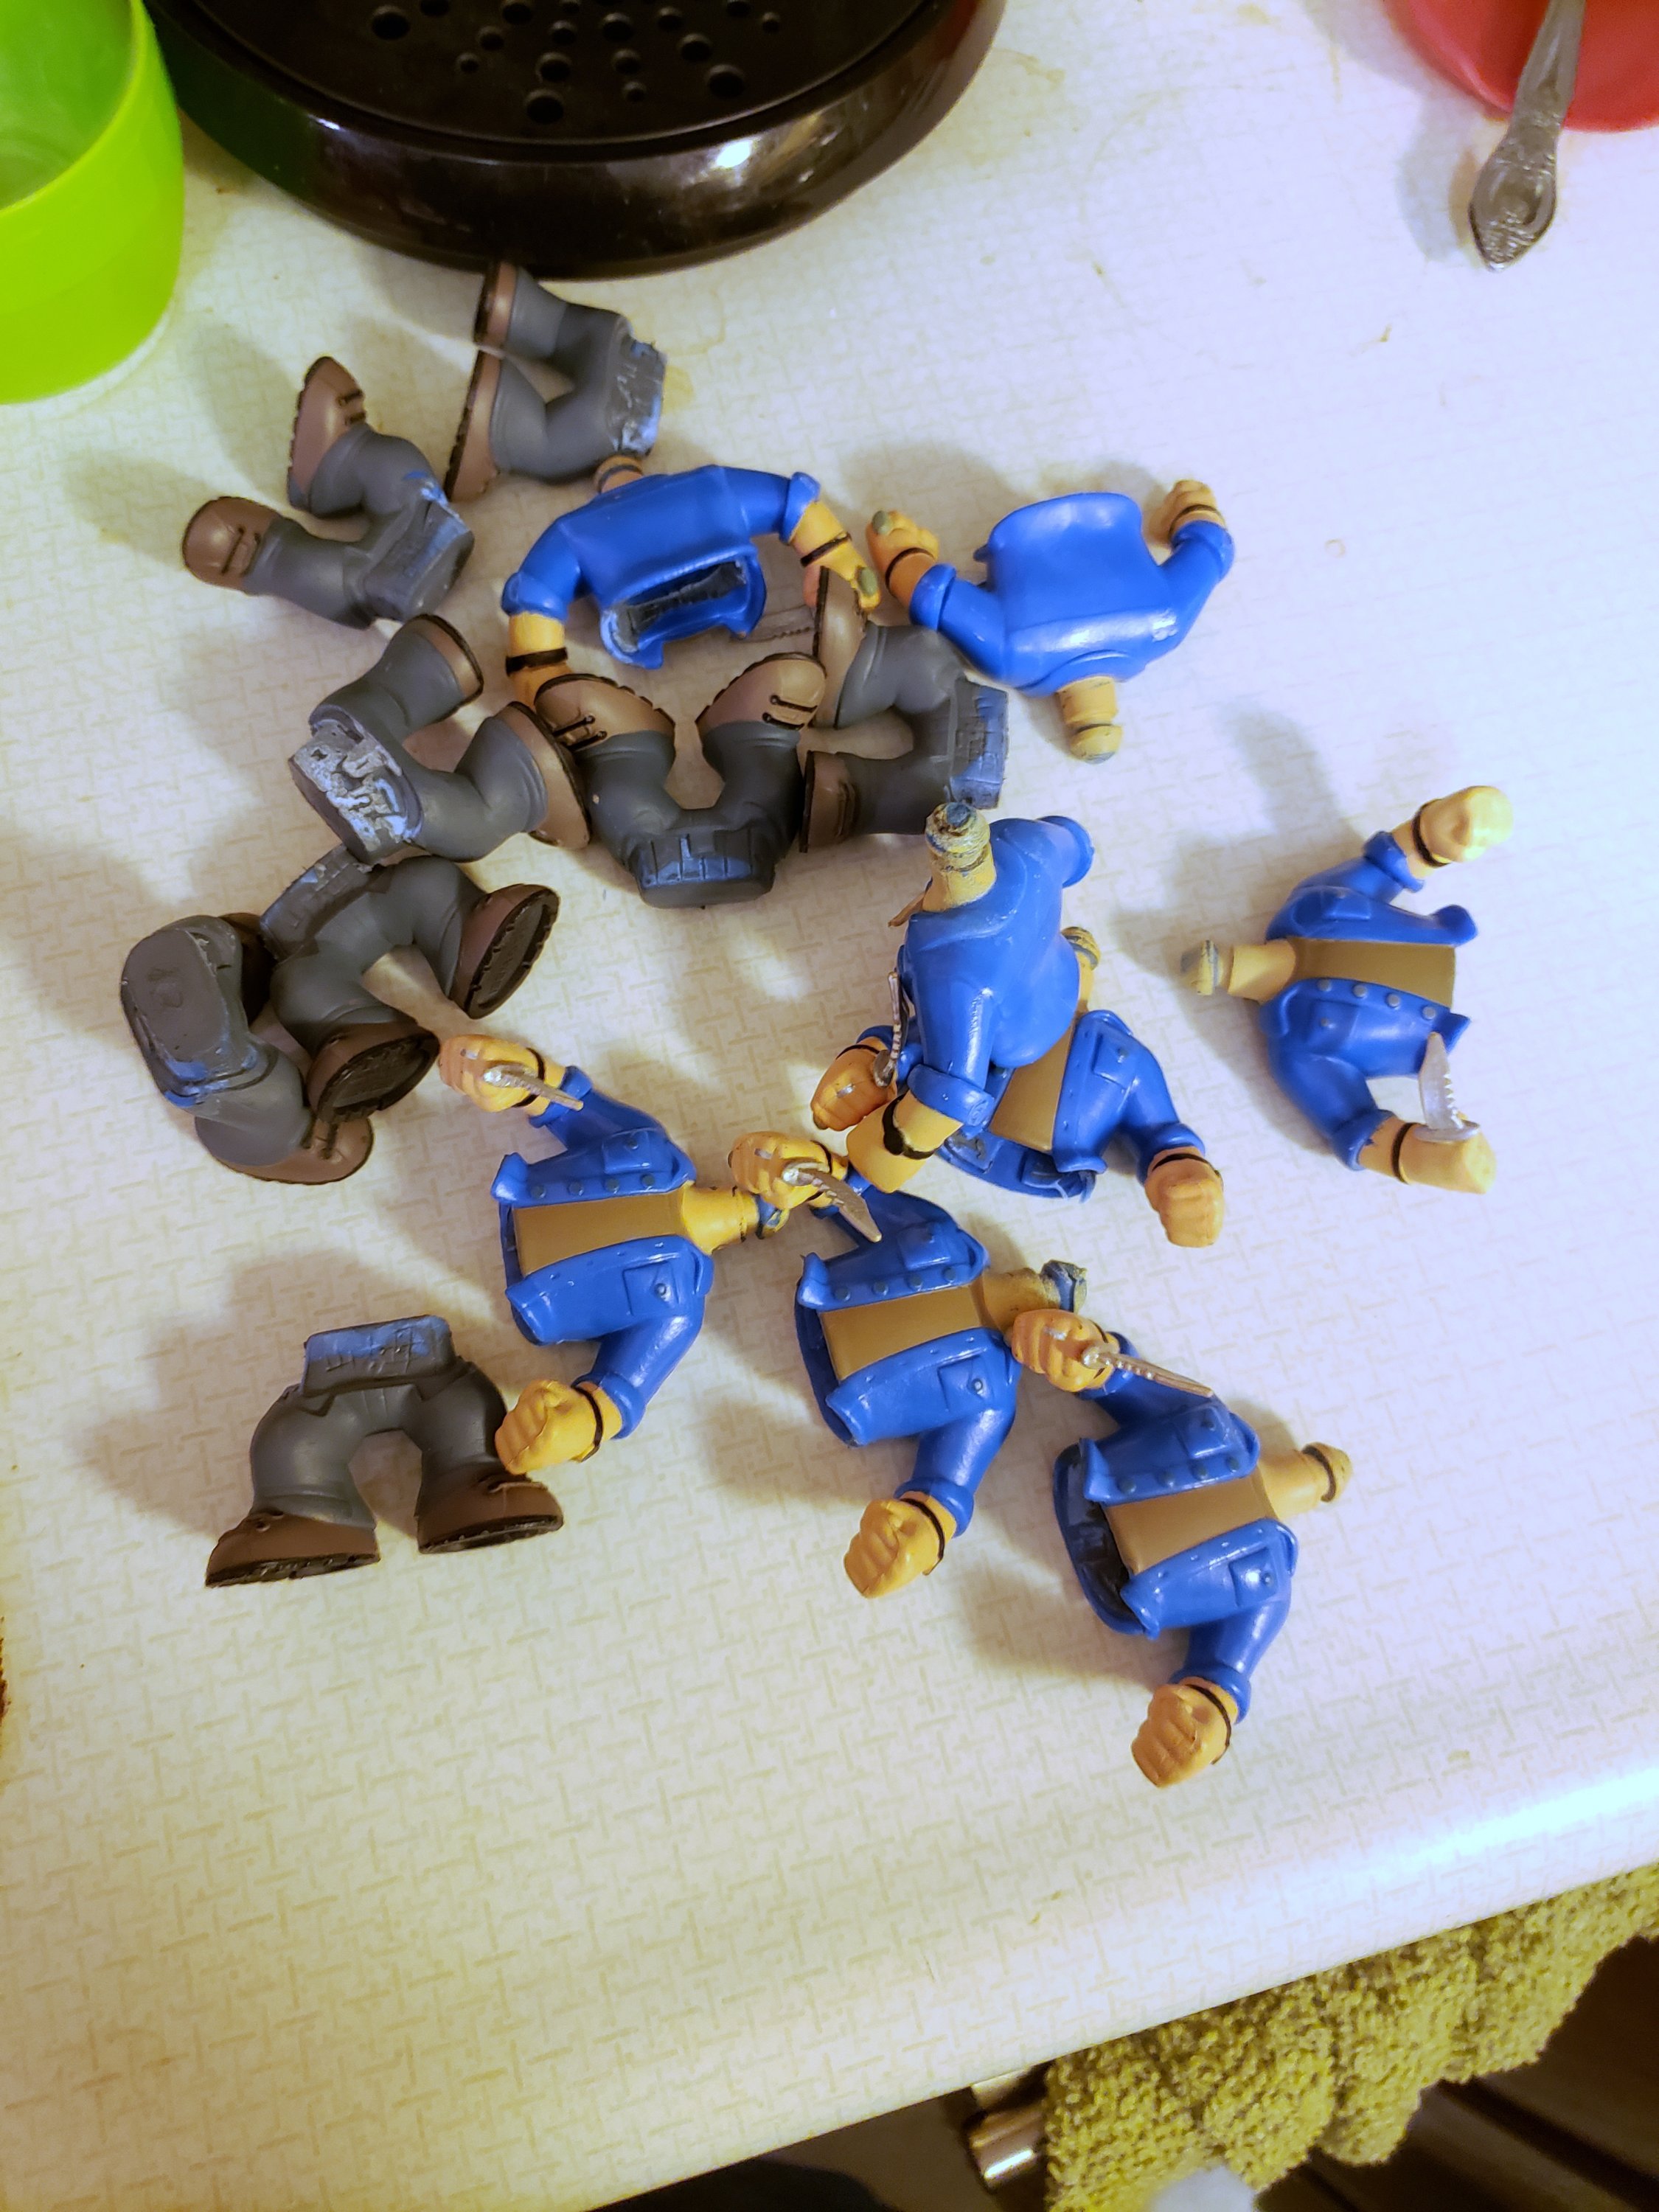
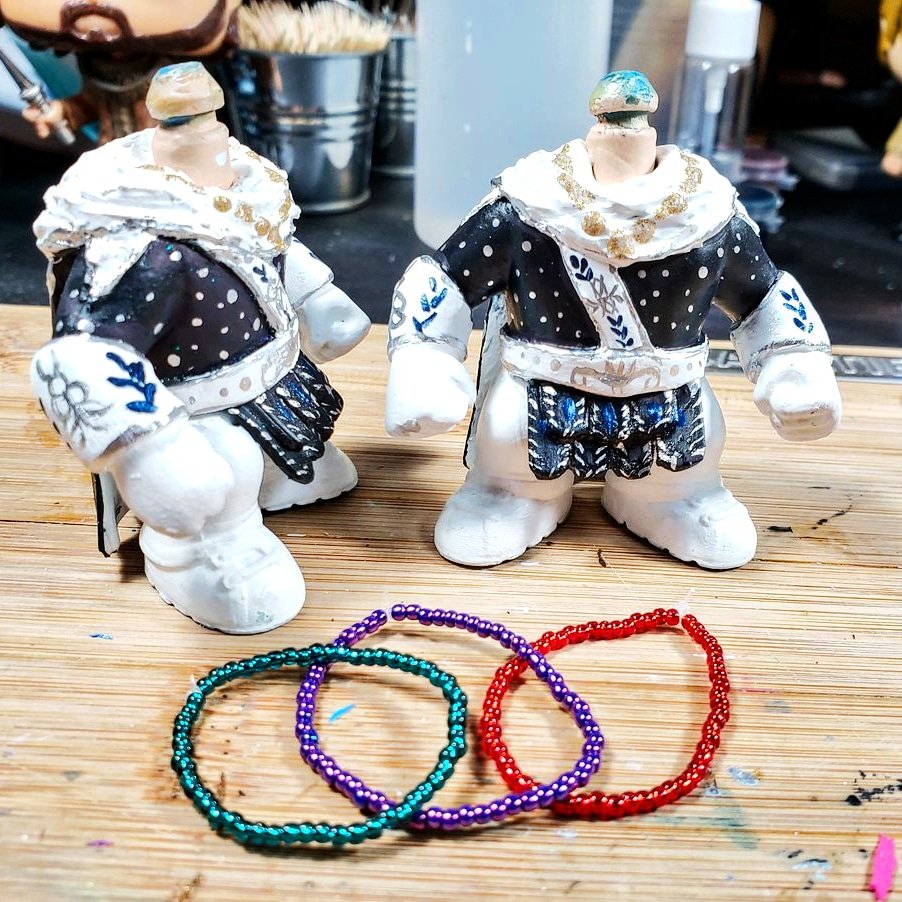
I used Winchester bodies for King!Jensen. Taking them apart made everything more accessible. I was able to sand down the area where the apron went to accommodate the thickness, and to sand down the back a bit to hold the cape. The entire thing was base coated white for the legs, and dark blue for the body.
Separated bodies
I usually use a heat gun, but for large amounts, boiling is more efficient
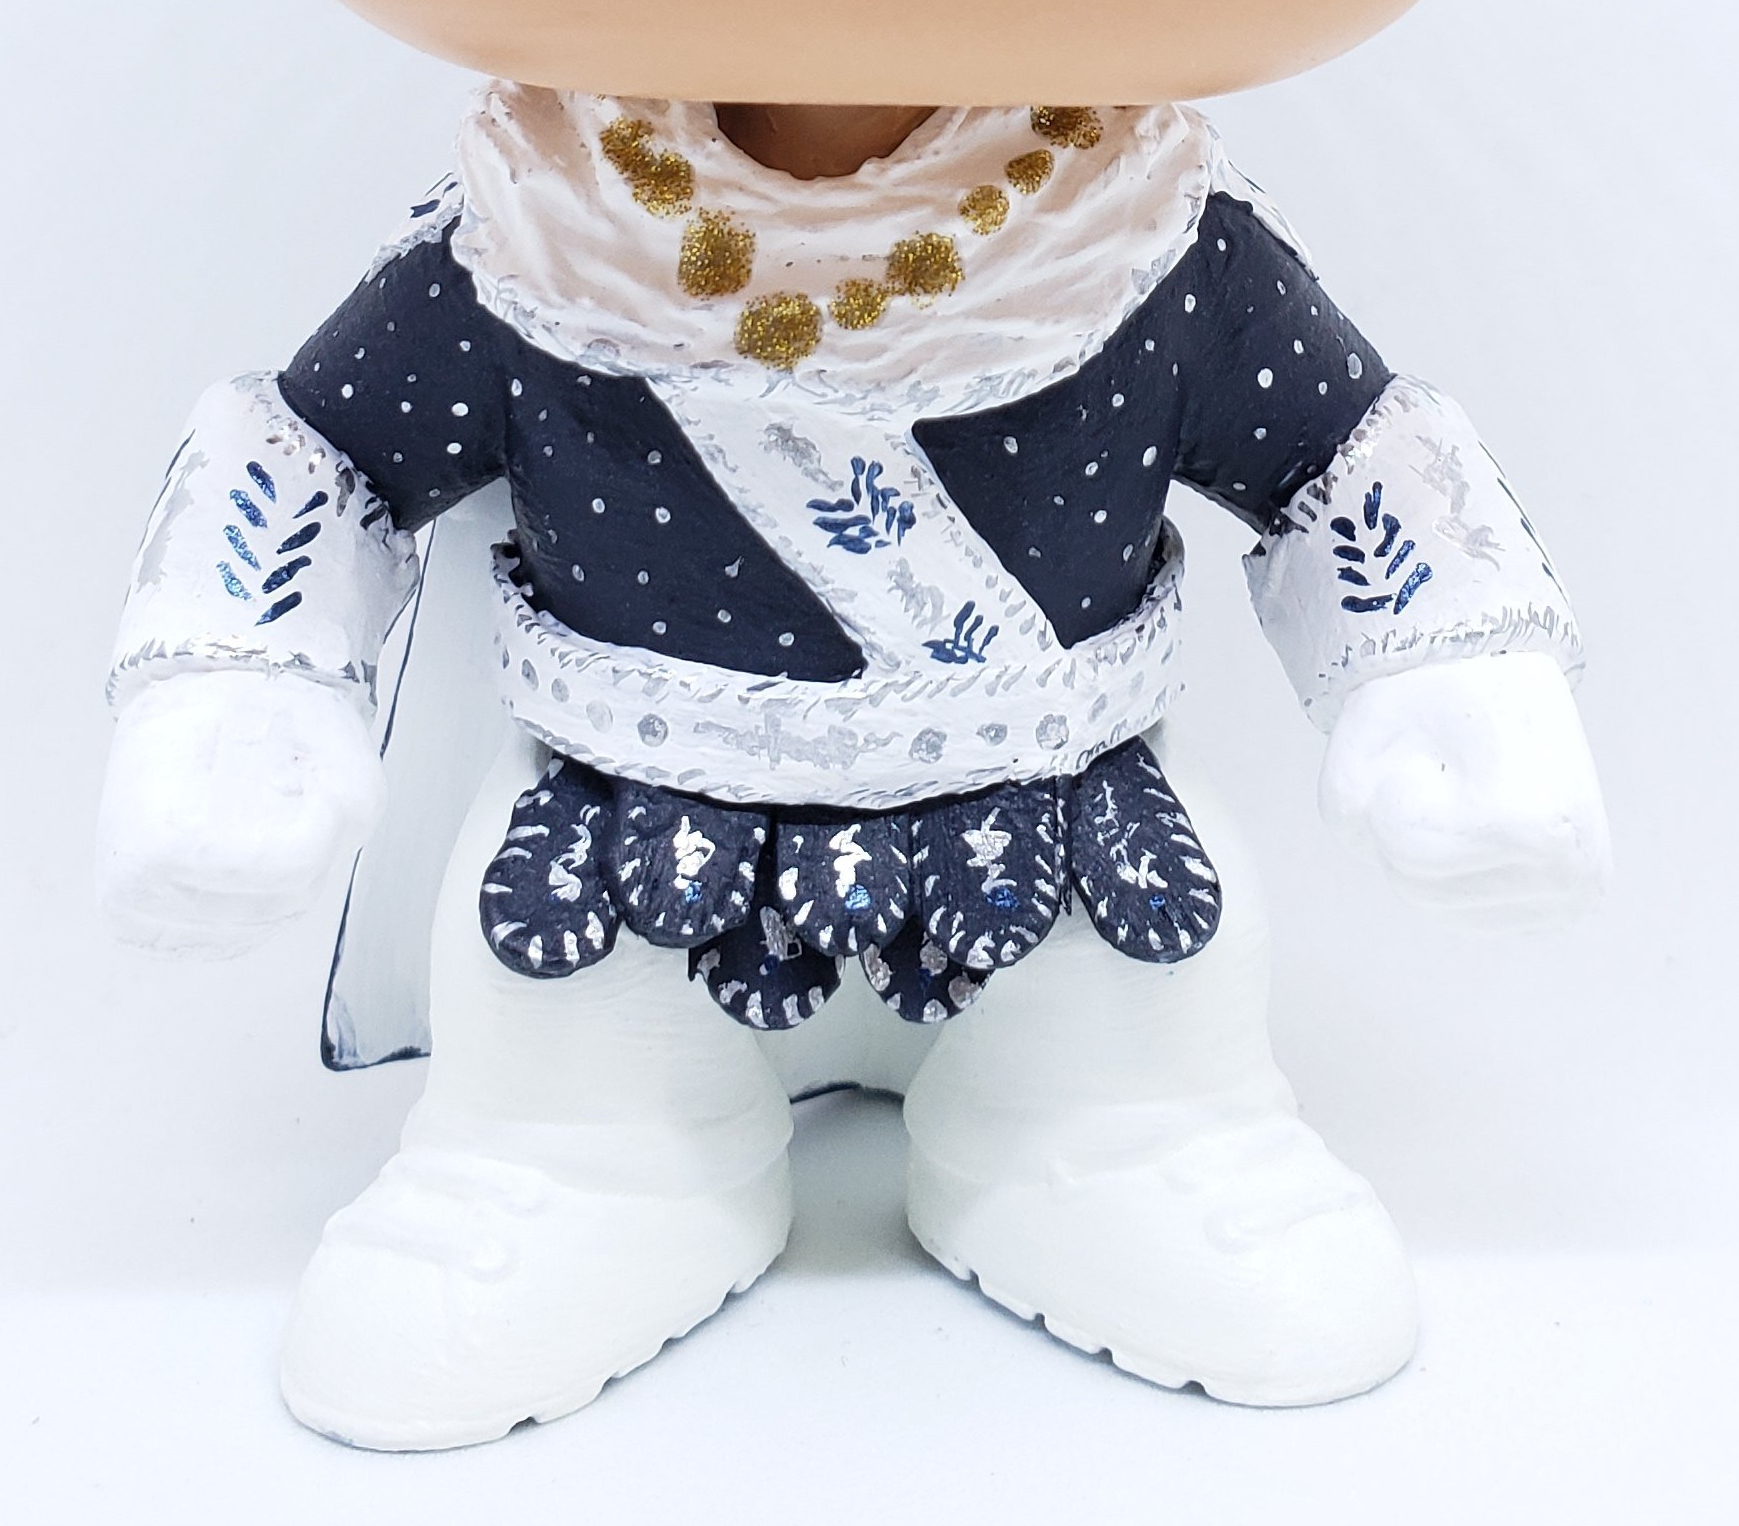
Sculpting is next. there are 3 areas of sculpy here. The scarf, the sashes and the gauntlet cuffs. I found the scarf was great to tie everything together and show the cape as a seamless unit. A curved tool pressed in repeatedly made the drape folds come alive. The sashes are quite thin, and trimmed to clean edges. The gauntlet cuffs fill in the area between his shirt cuff and his wrist. After smoothing with rubbing alcohol, the areas are heat cured, sanded and base coated white.
Stages of sculpting
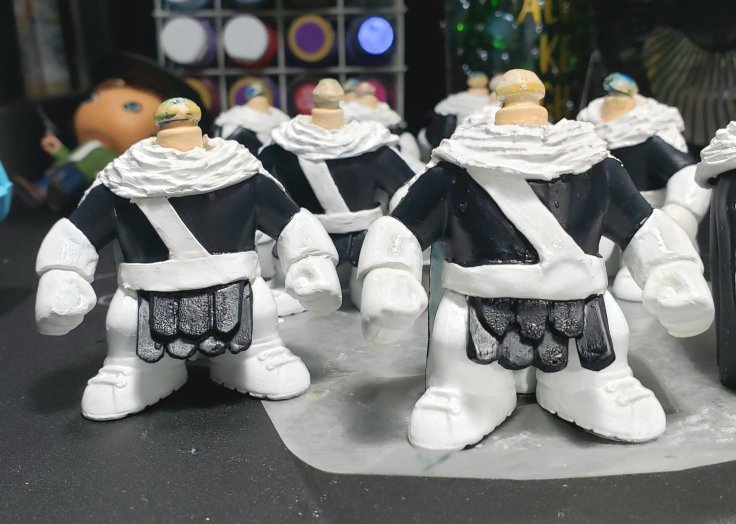
Painting is next. Coats of dark blue for the tunic and outside of the cape, white for everywhere else. Surprisingly, the white is the hardest! Something always bleeds through. I have 5 or 6 coats on most of them!
Sealed base coat ready for detailing
Artist tip!!! DO A COAT OF SEALANT BETWEEN THE BASE COAT AND DETAILING. Ahem… I really want to stress this. Nothing worse than having to repaint the whole thing because your brush slipped. The chrome paint doesn’t wash off easily, but the base coat gives you a smoother surface to wipe.
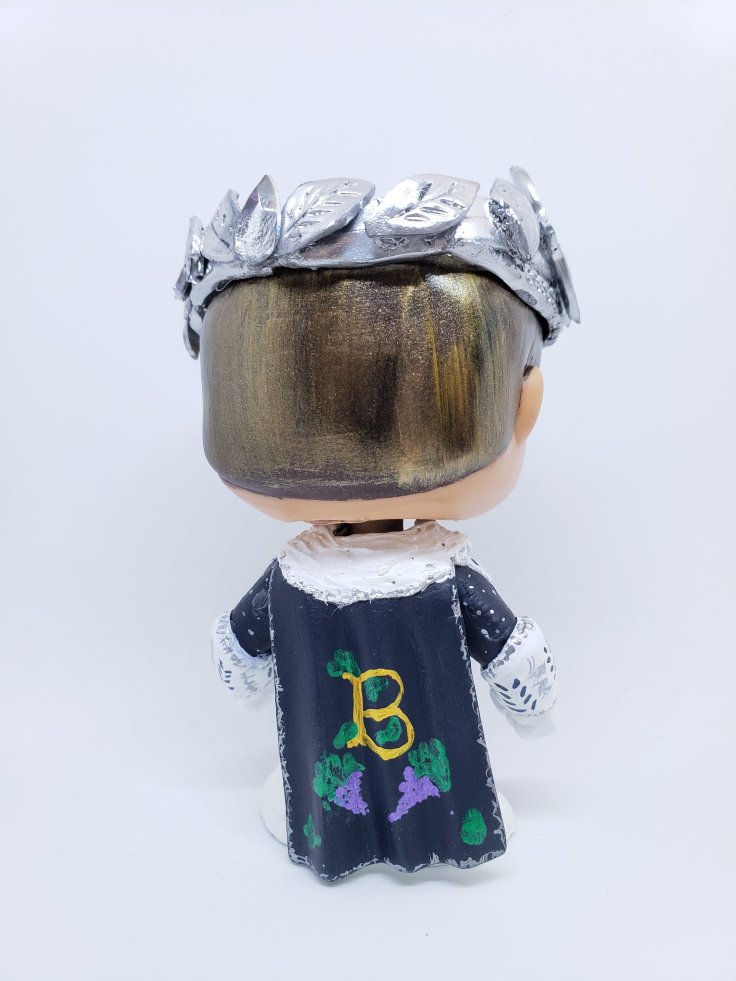
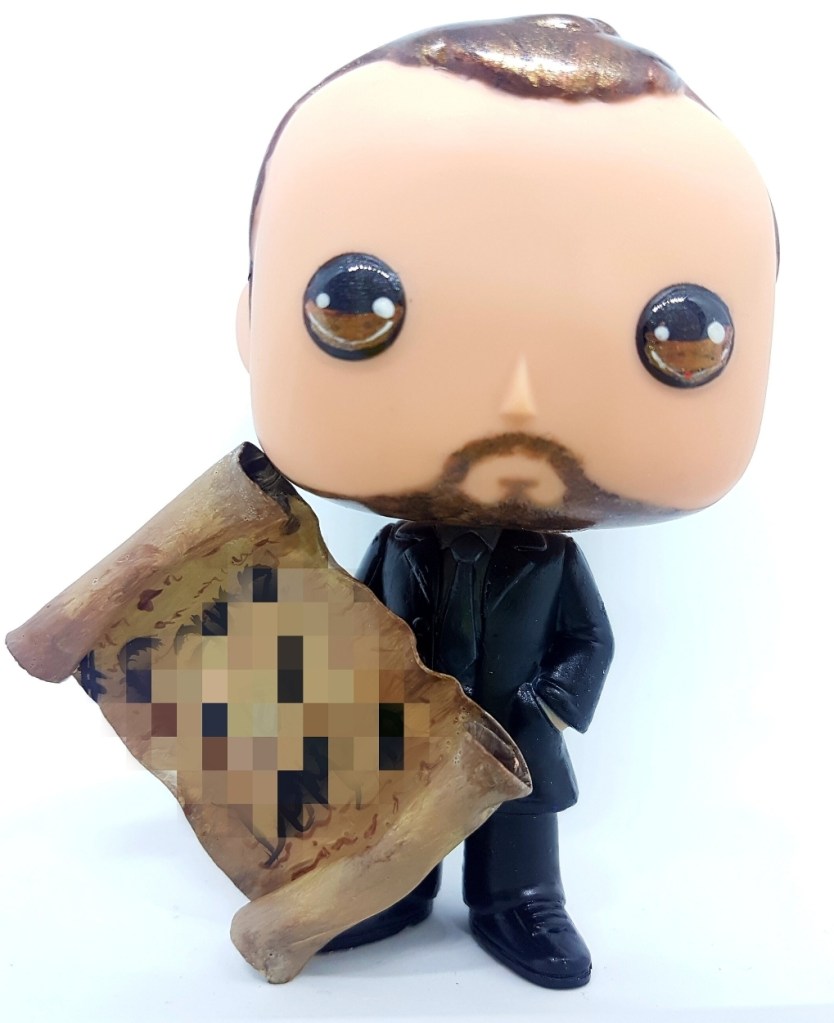
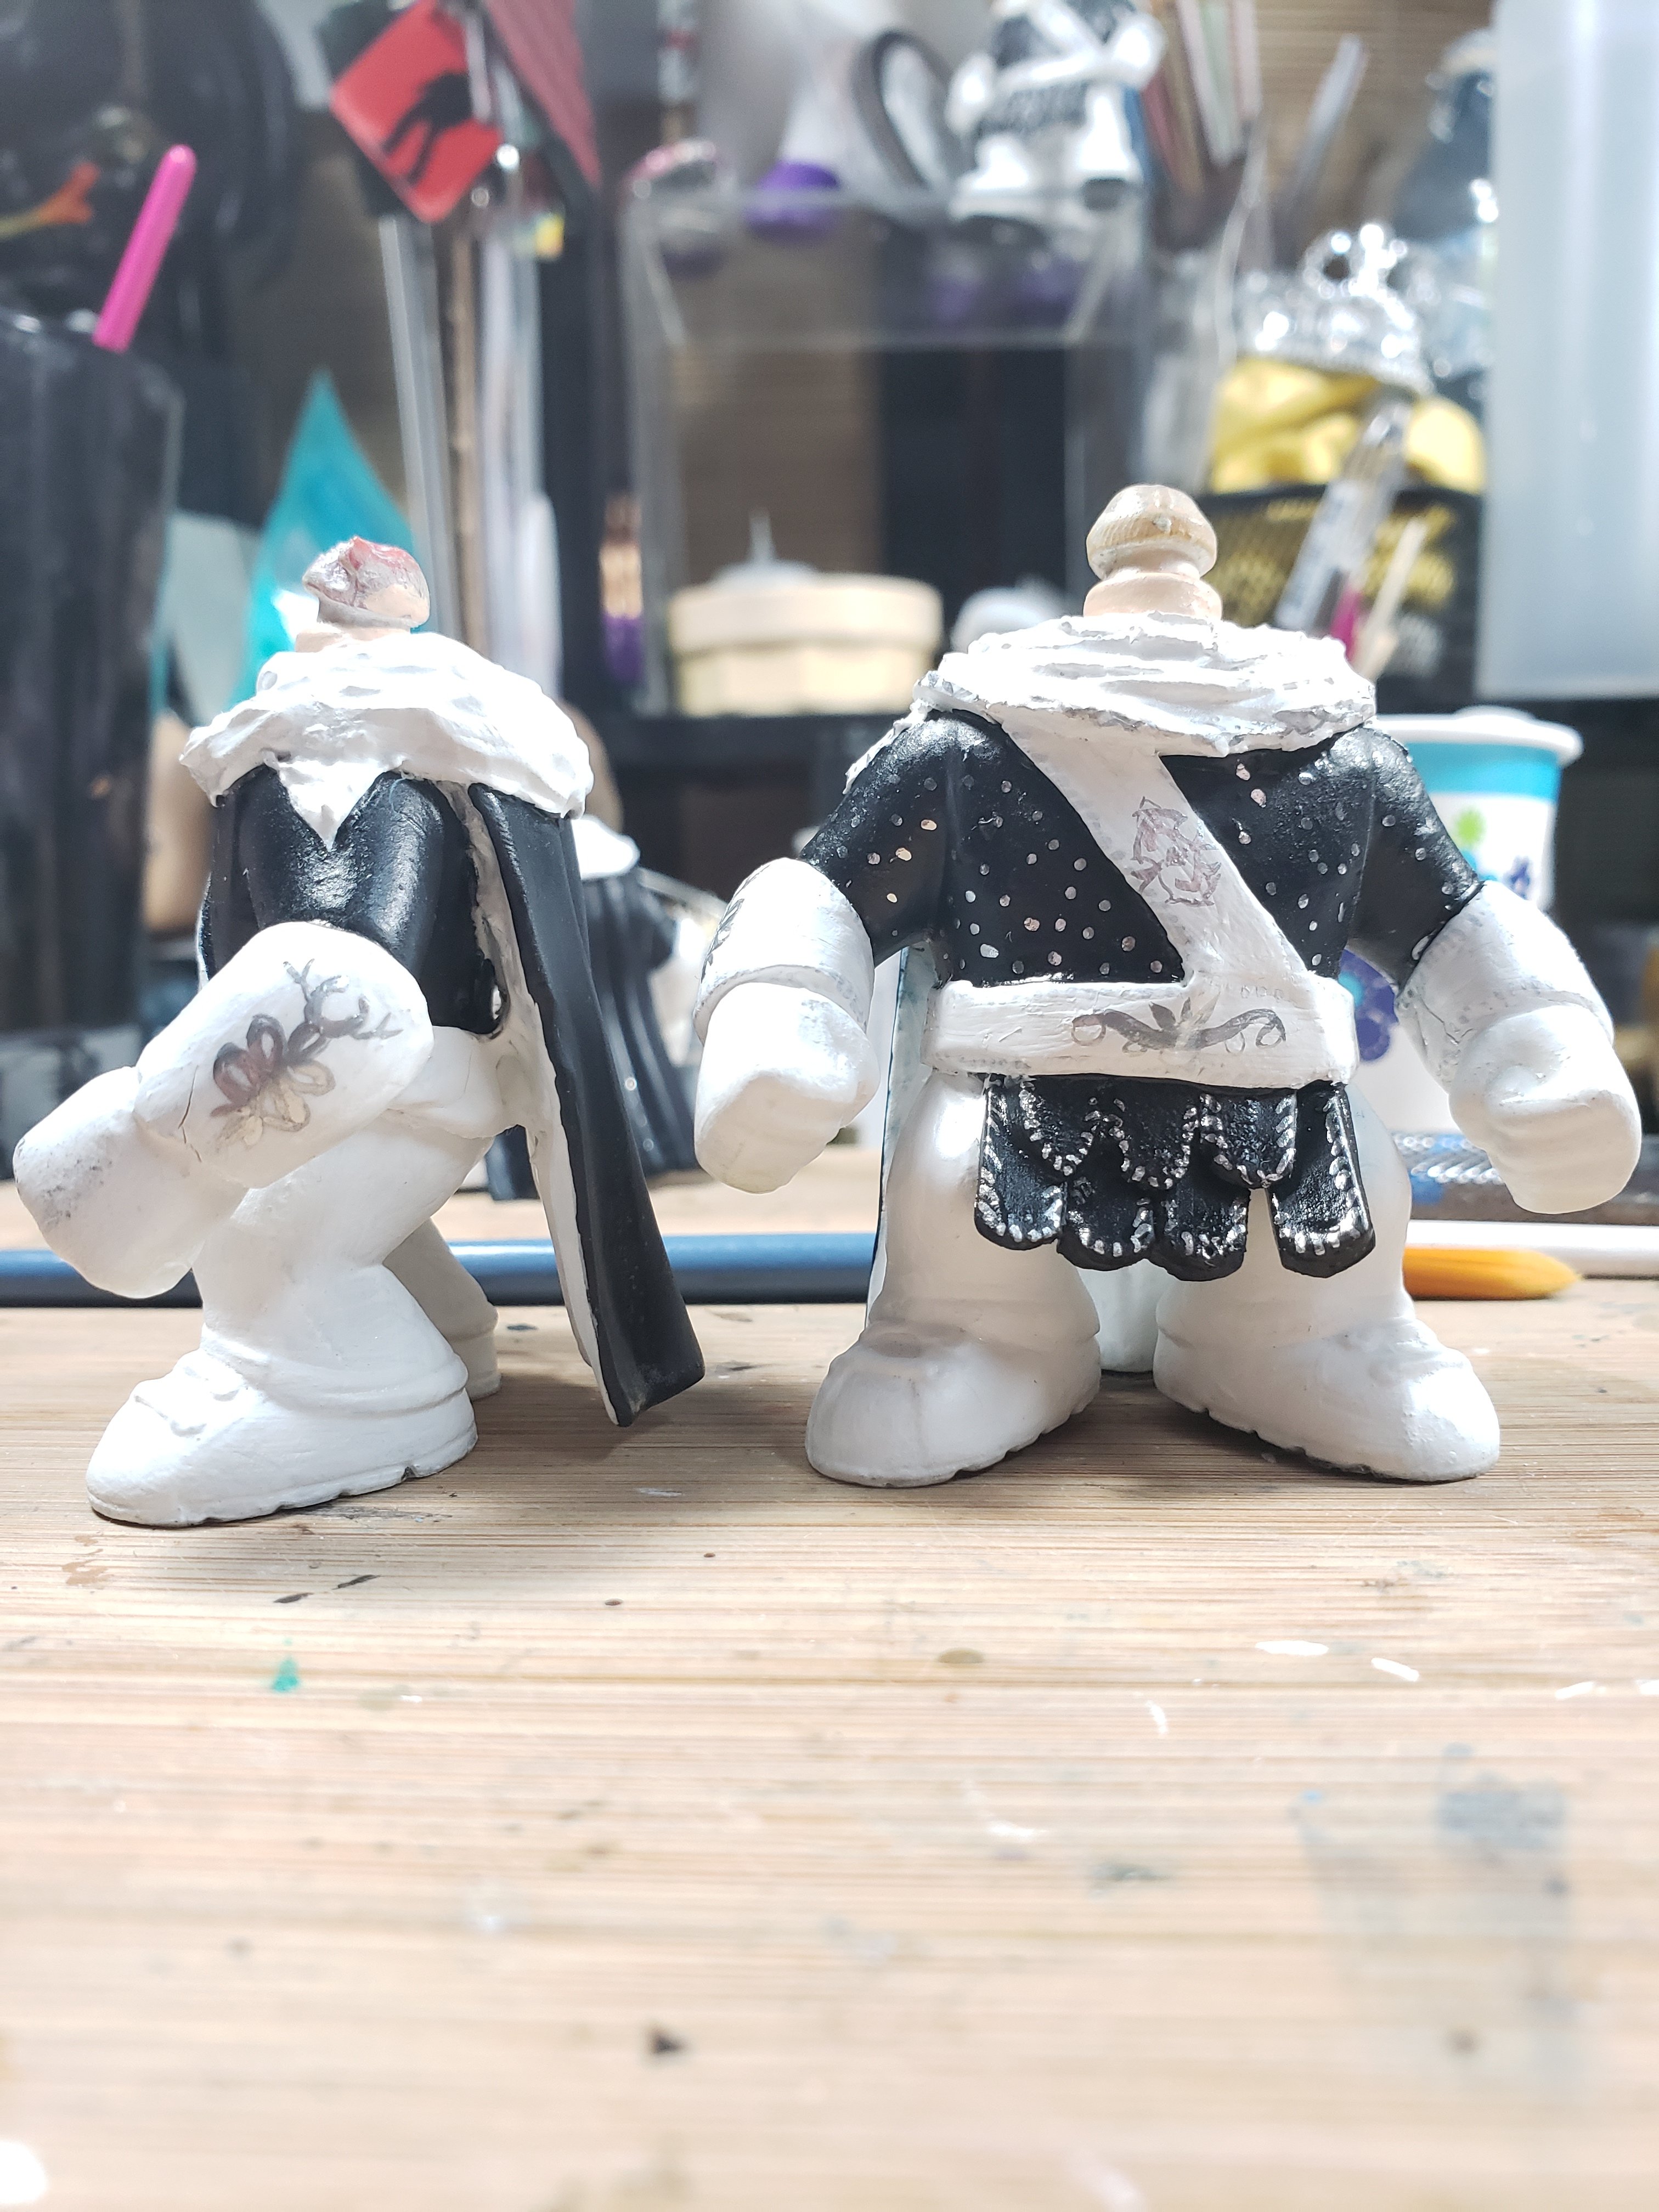
Detail paint is incredibly labour intensive. Magnifying glasses and tiny, tiny brushes are a must. I do the chrome paint first, dots on the tunic, embellishments on the gauntlet cuffs, sash and scarf. Next is metallic blue for the leaves on the cuffs and sash. Finally the stylized B and grapes for the back of the cape, also in metallic paints of green and purple. Once everything is dry, another 2 coats of sealant.
Two different styles of details
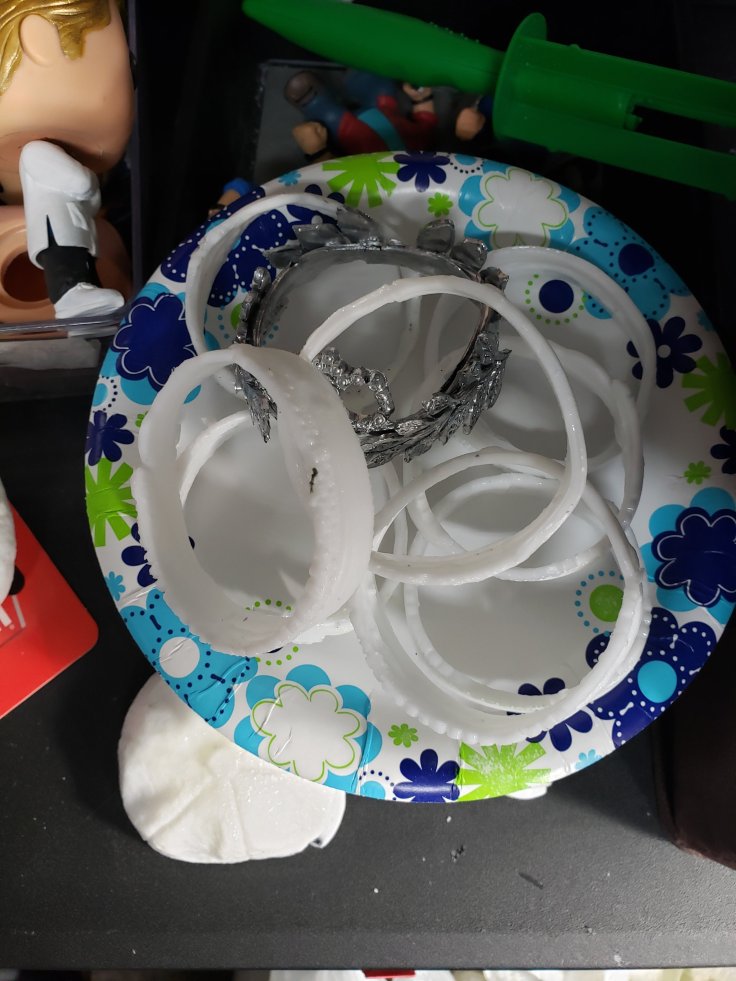
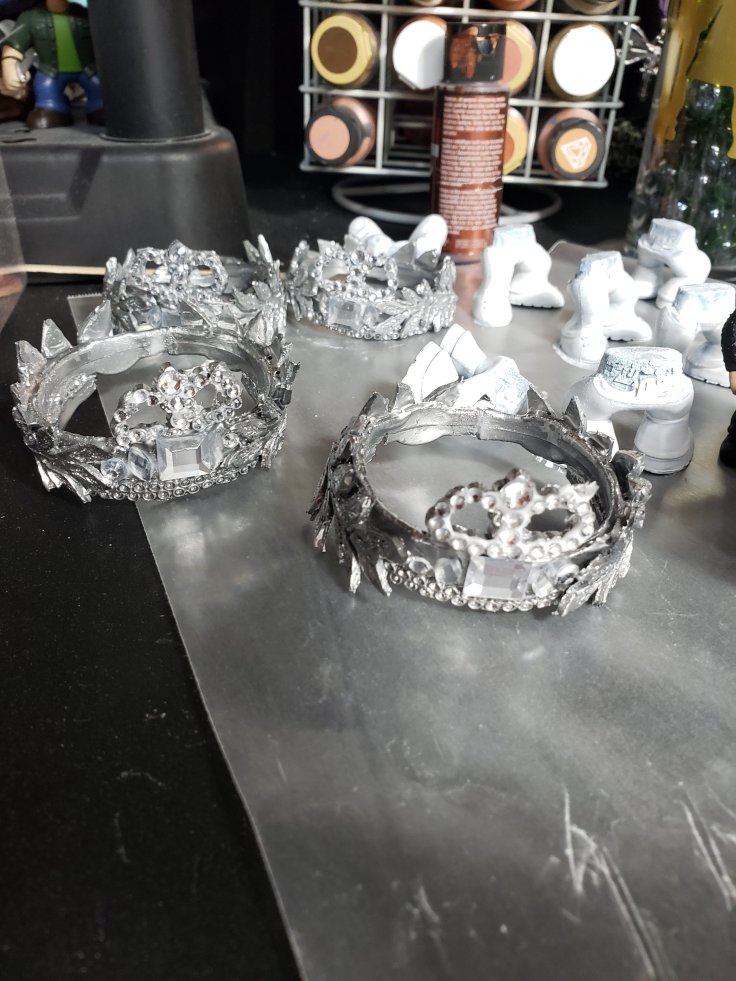
Now to finish the crown. when the resin is cured enough to hold it’s shape, but still malleable, I shape it and glue it. two full leaves, one on each side, and some individual leaves to fill out the back. Once dry, it gets 2 coats of chrome spray paint and some time to dry. The jewels are the shining finish. Each one is a bit different, depending on where things are glued. It’s important to choose the right glue as a lot of glues will bubble the backing of the rhinestone. I find weld bond works best for me.
Spray painted crown bases
plain and jeweled
crown bases
Lastly is putting it all together! Heating the crown a bit to fit it better to the head, then gluing it on, and King!Jensen goes in the drying box for a day.
Long process, but I love how he turns out! Let me know what you think!
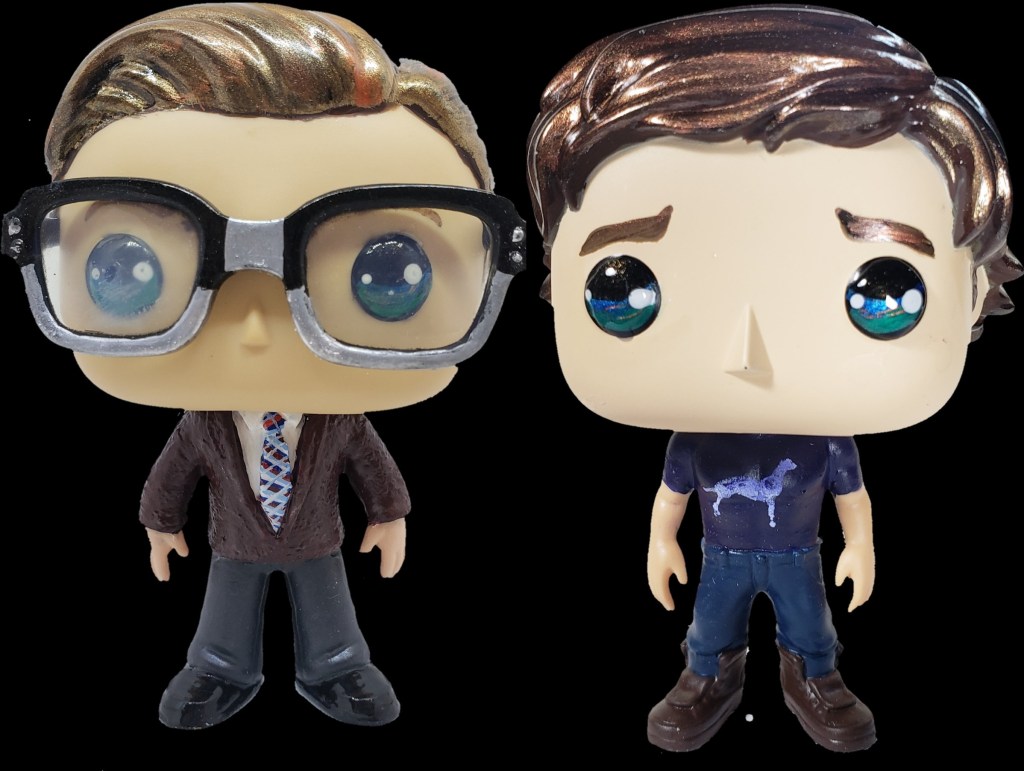
I don’t, as a rule, do charity pops. To clarify, I don’t SELL charity pops or profit in any way from them. I have made AKF pops to give away, but won’t even charge shipping. That being said, I had a friend get accepted by Random Acts and I wanted to give her something to commemorate such a huge accomplishment. So below, you will see the Making of a Misha pop.
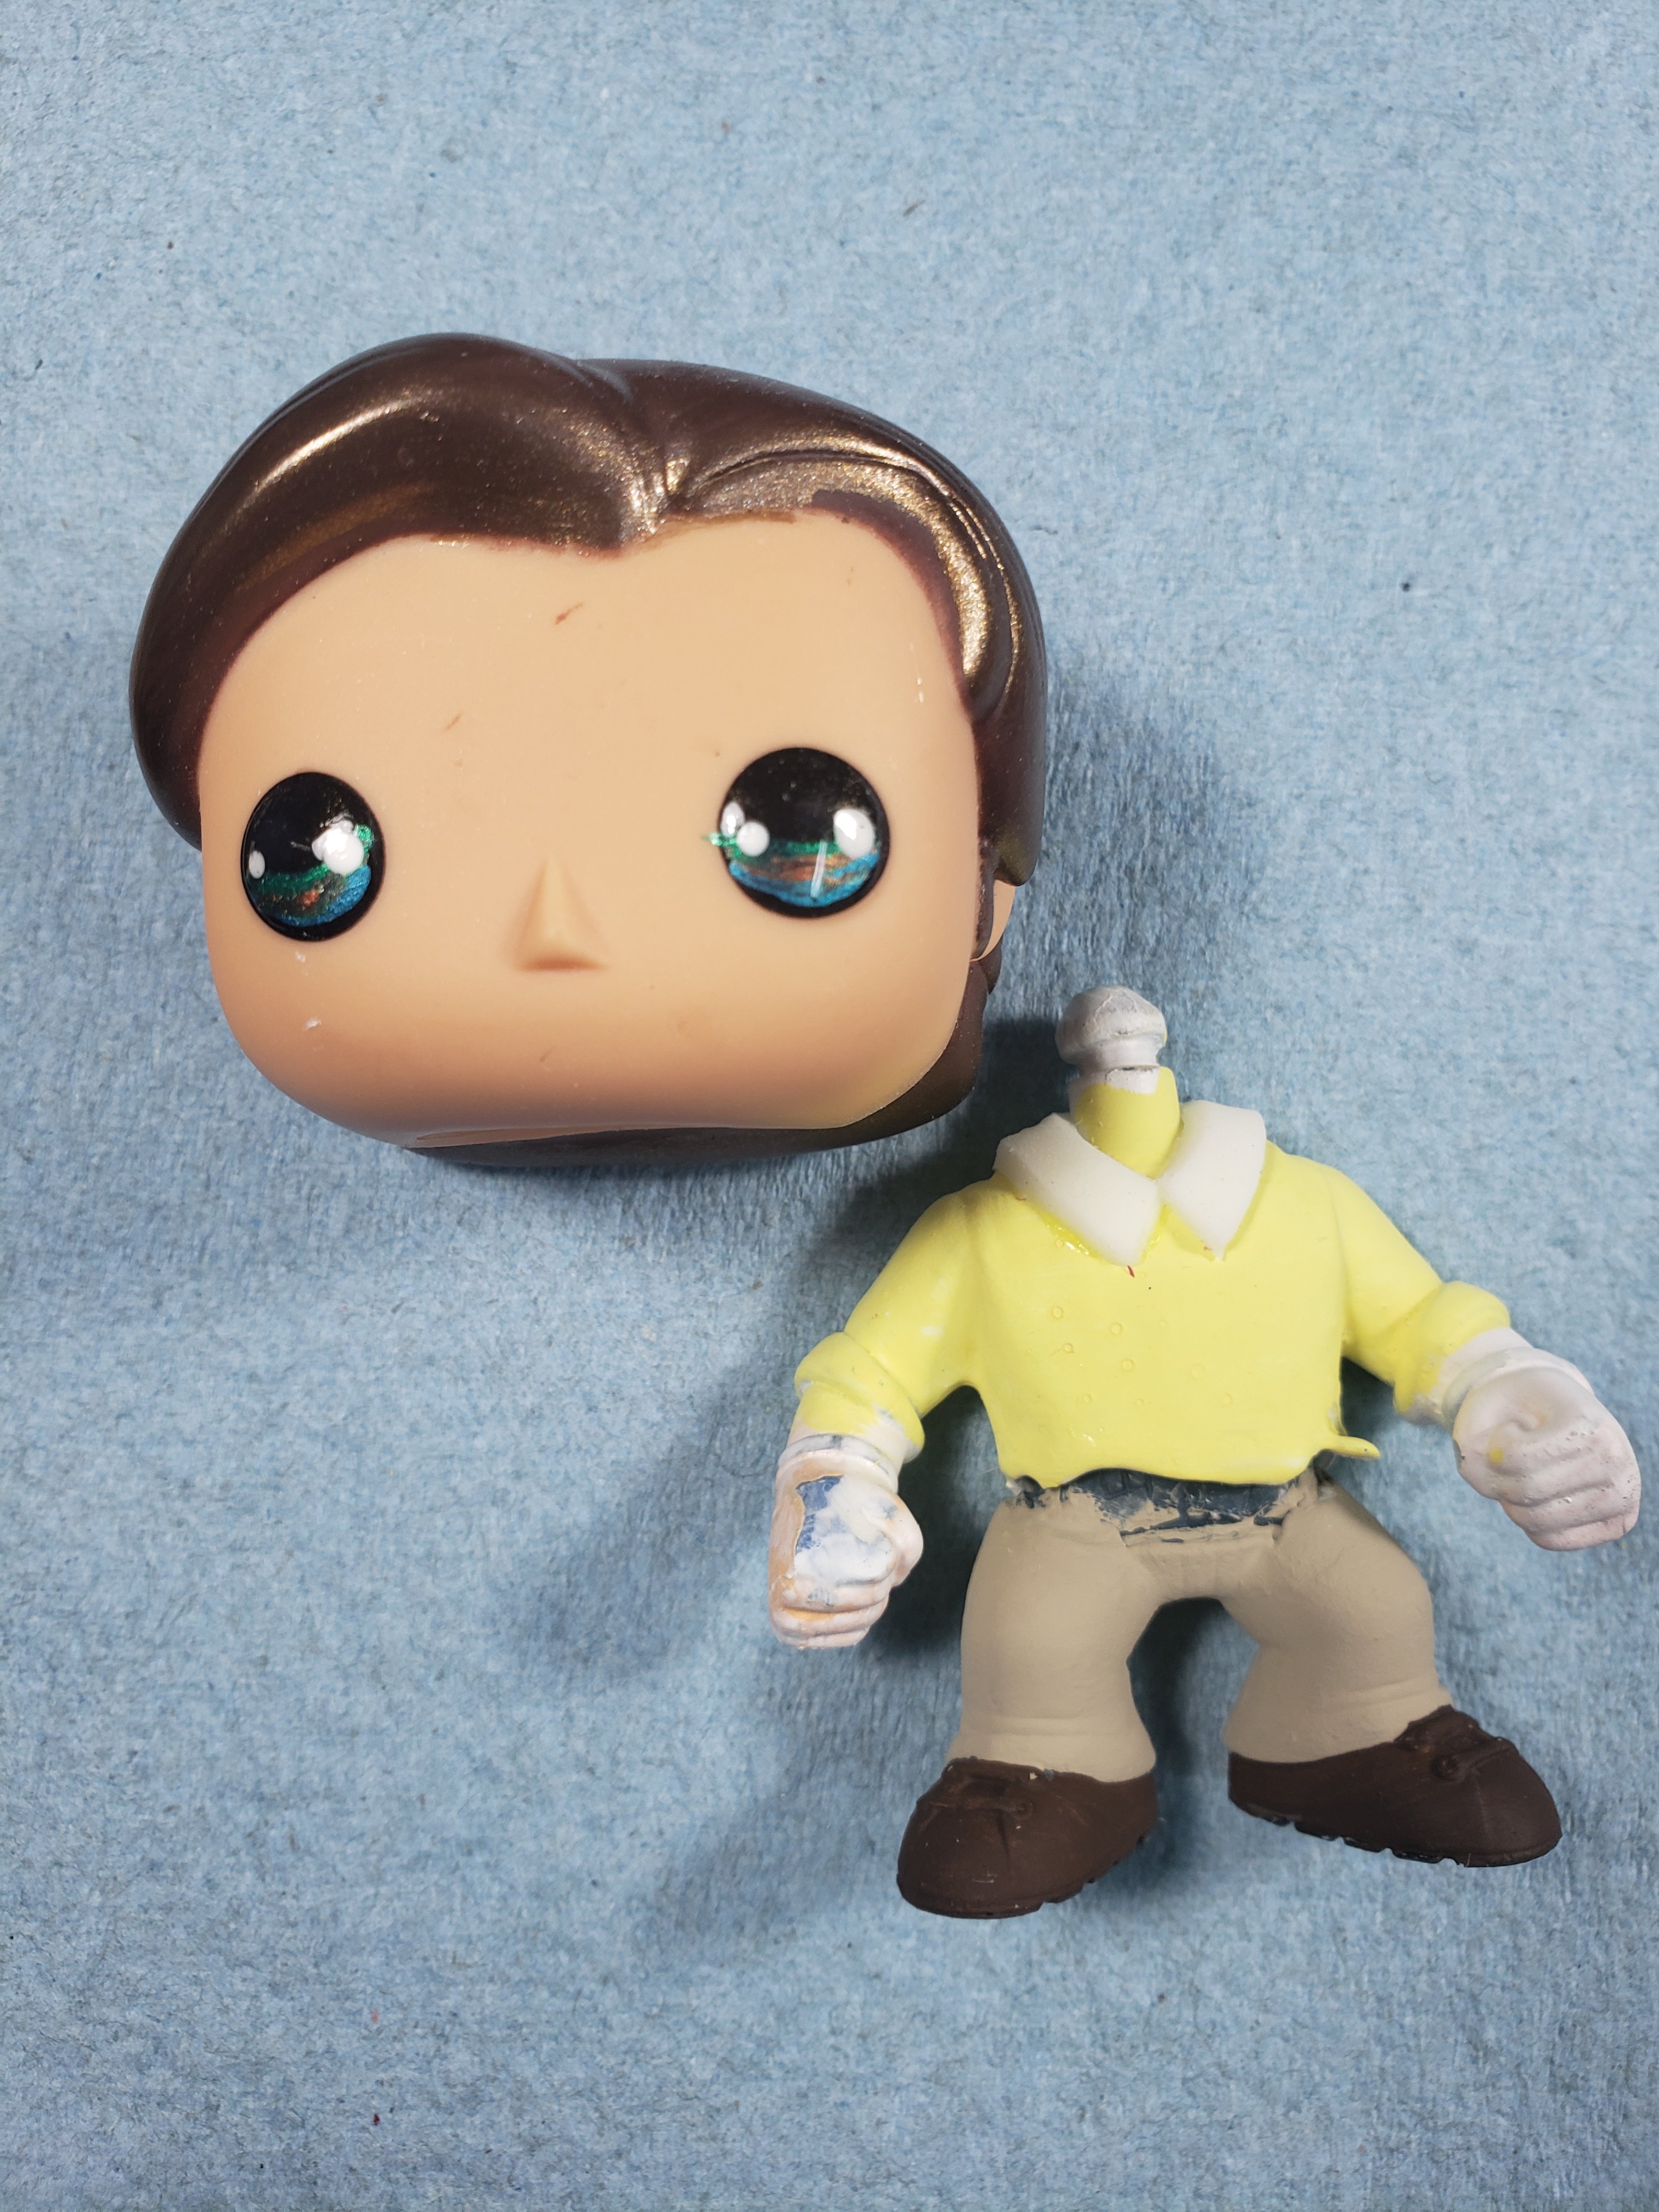
Step one, Parts.
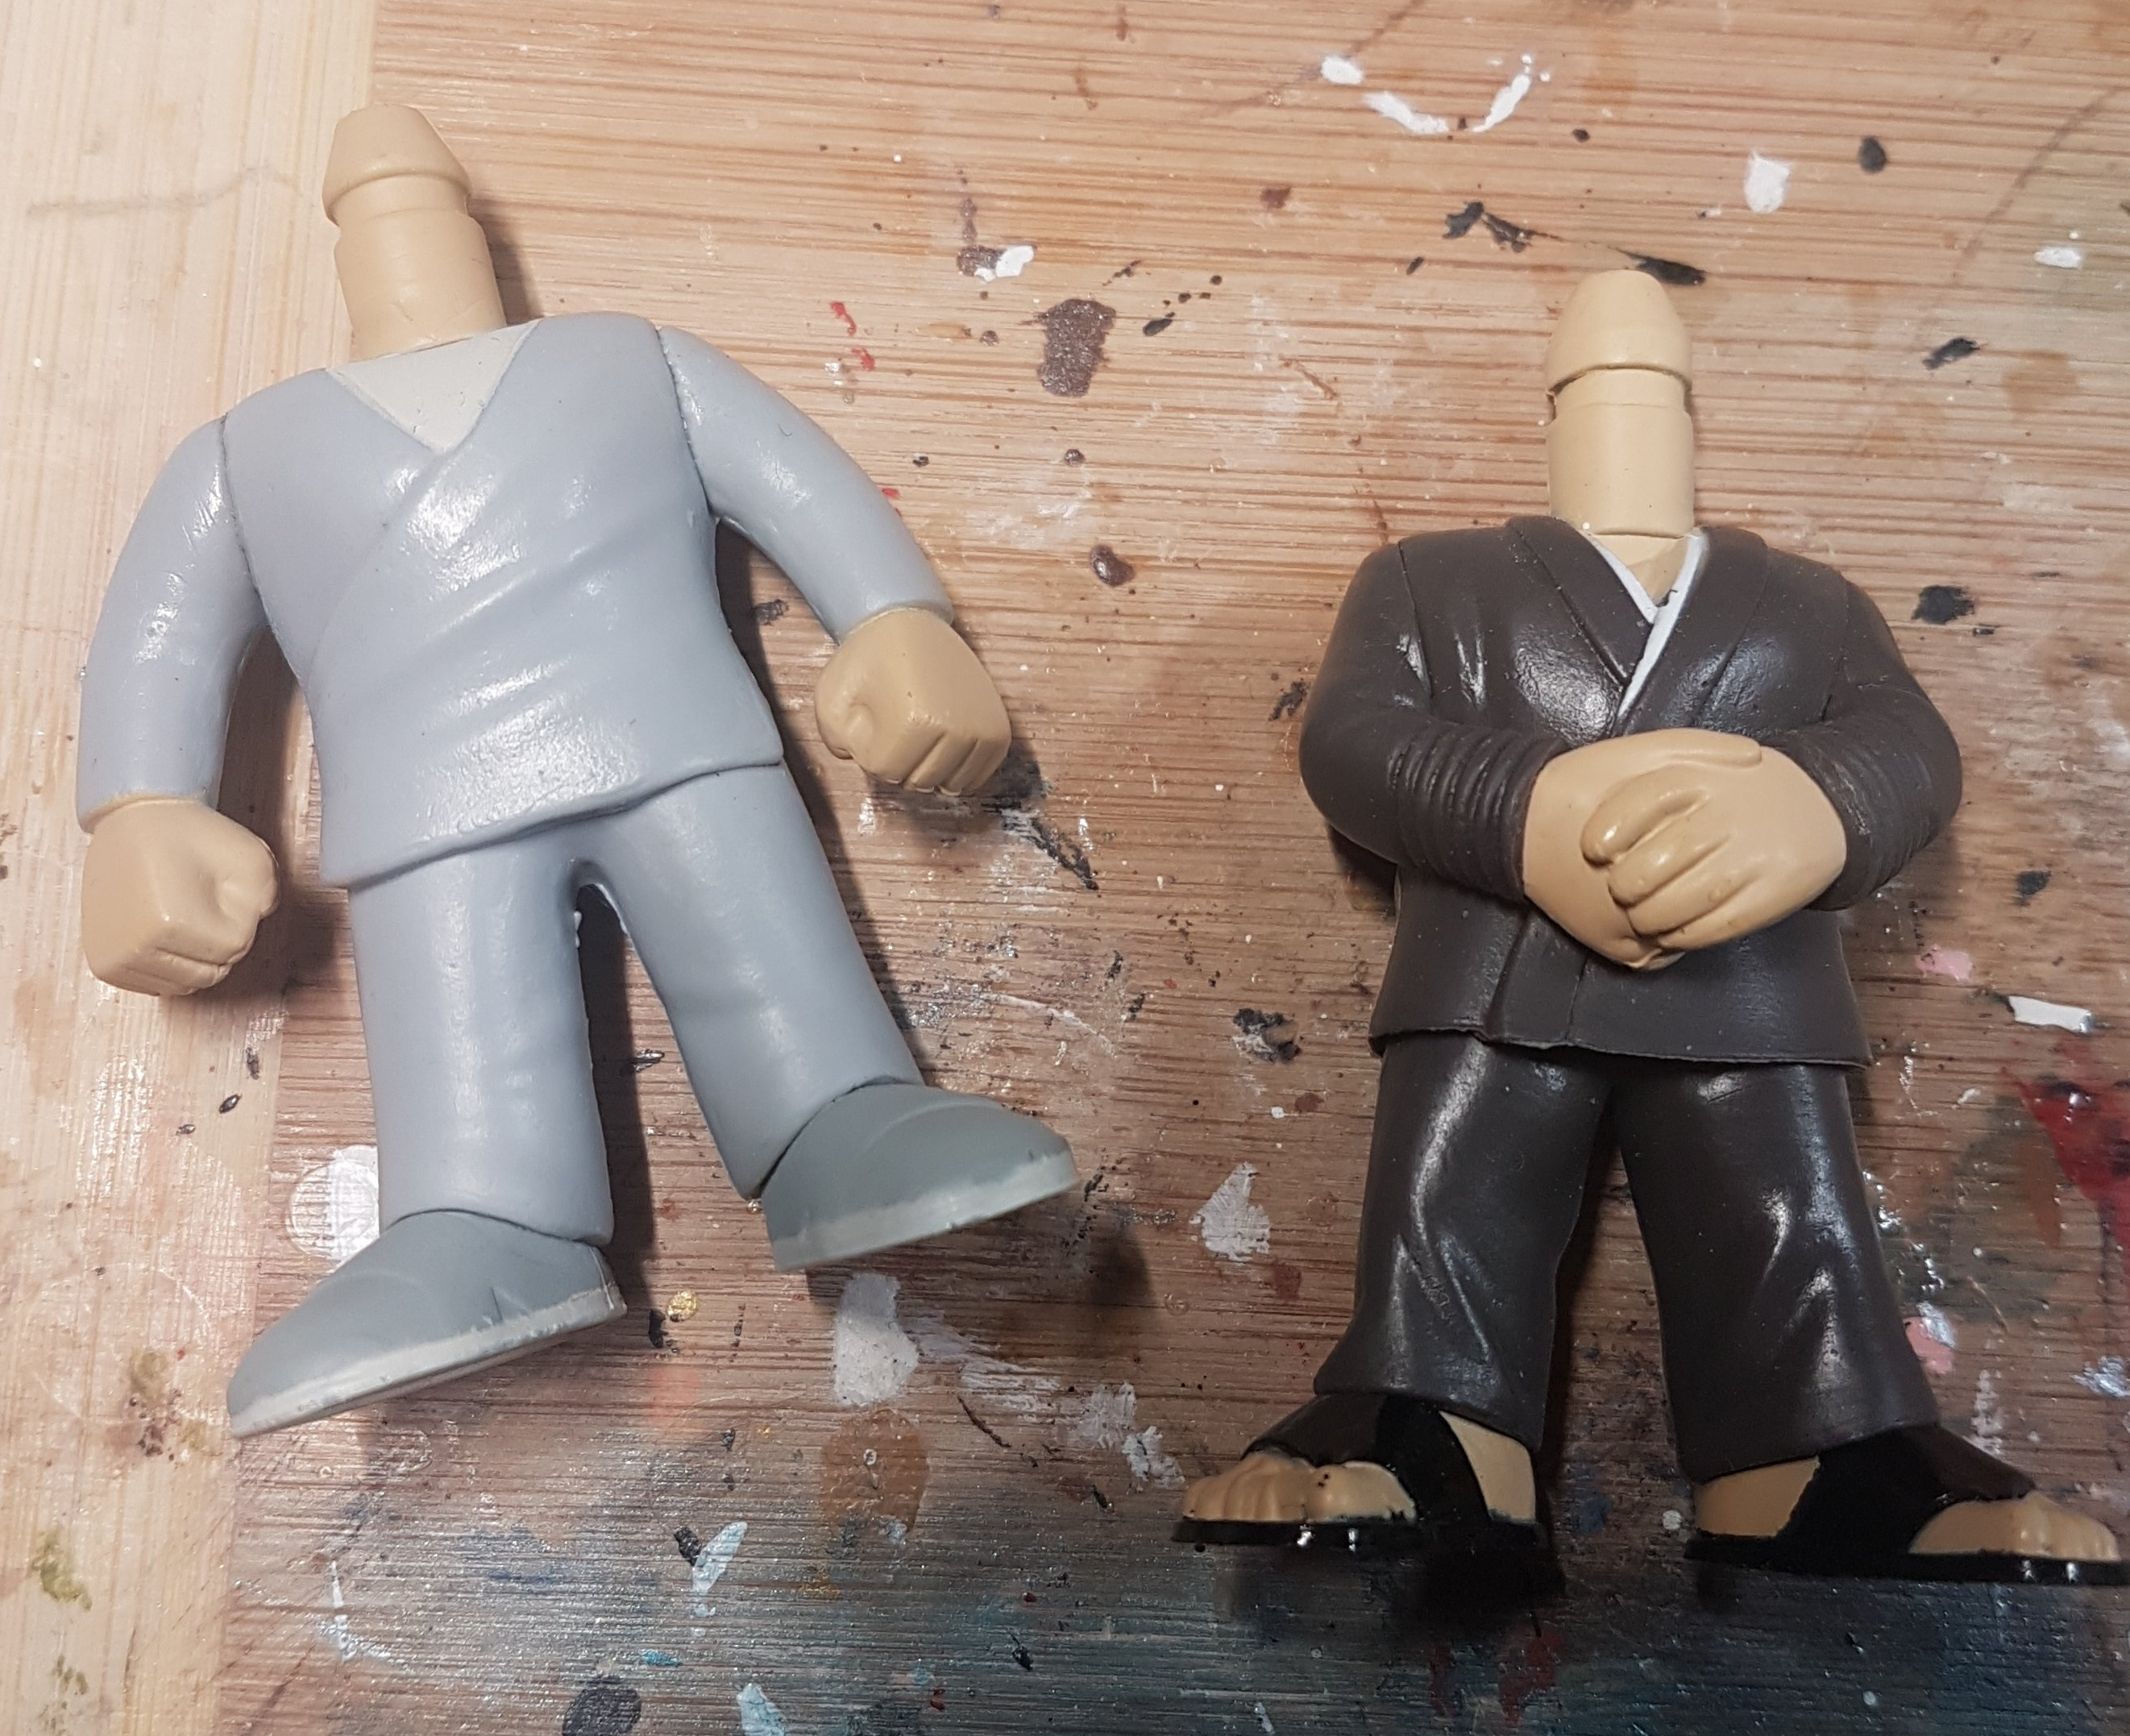
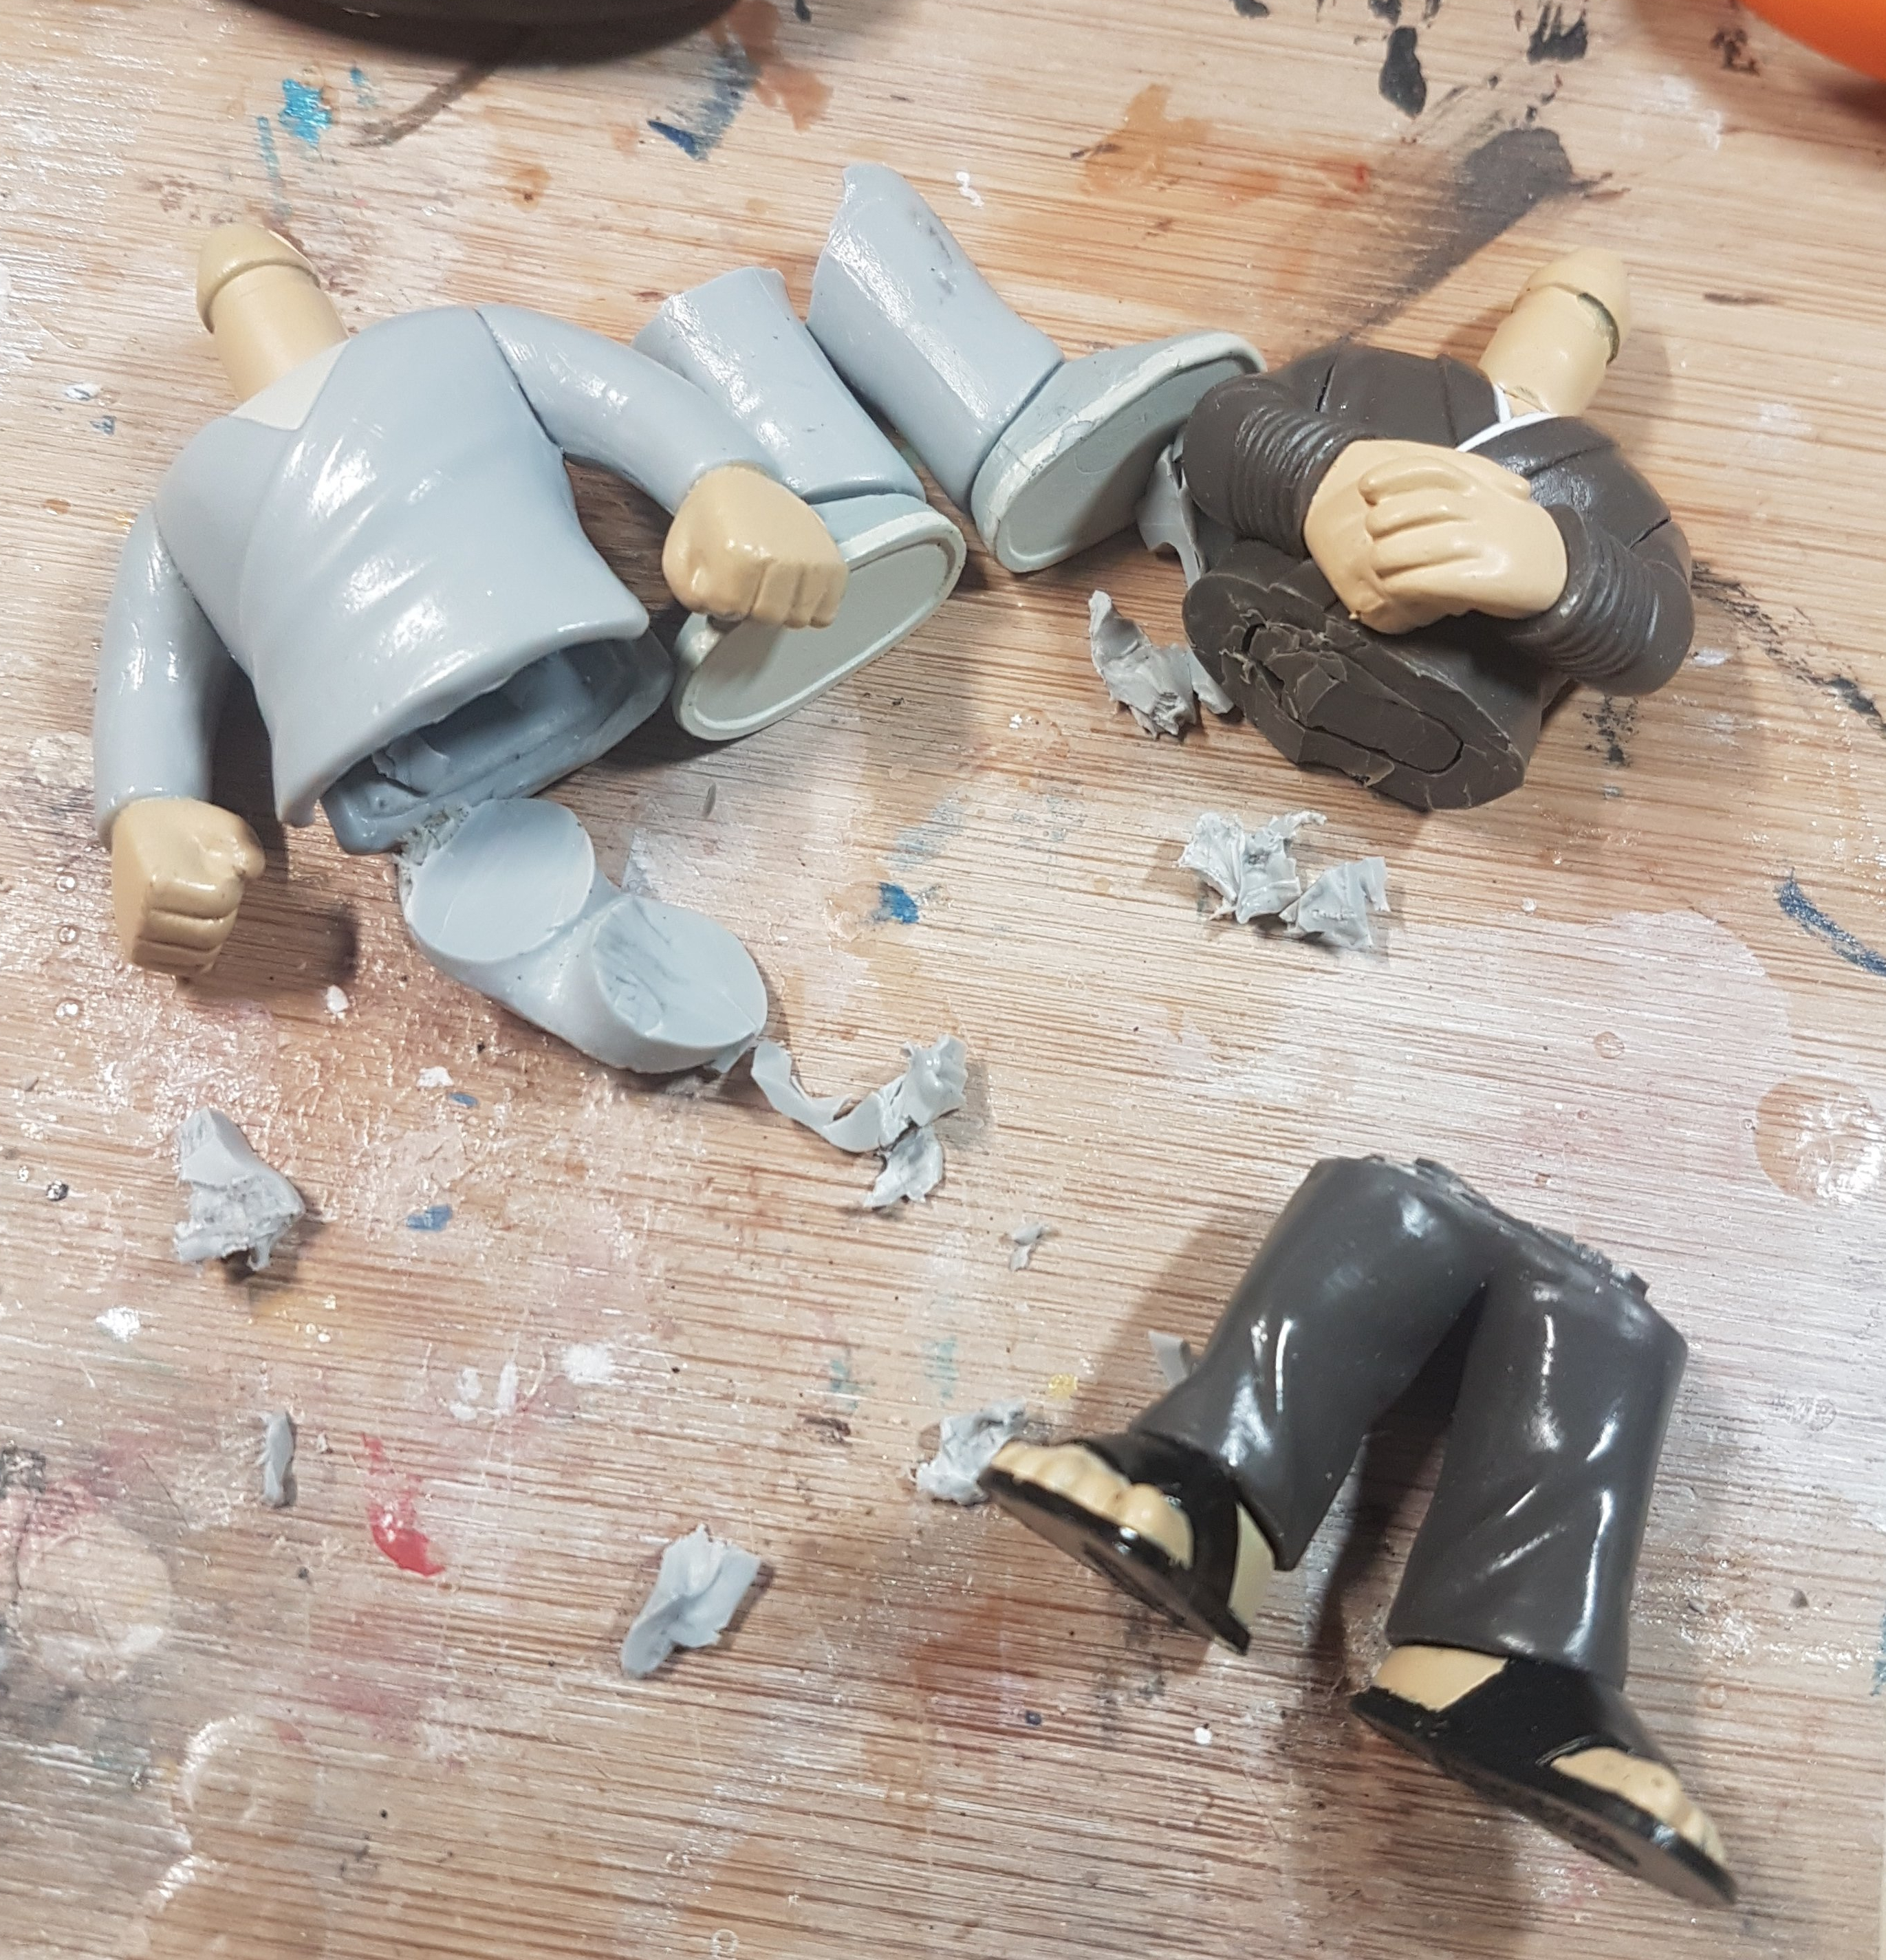
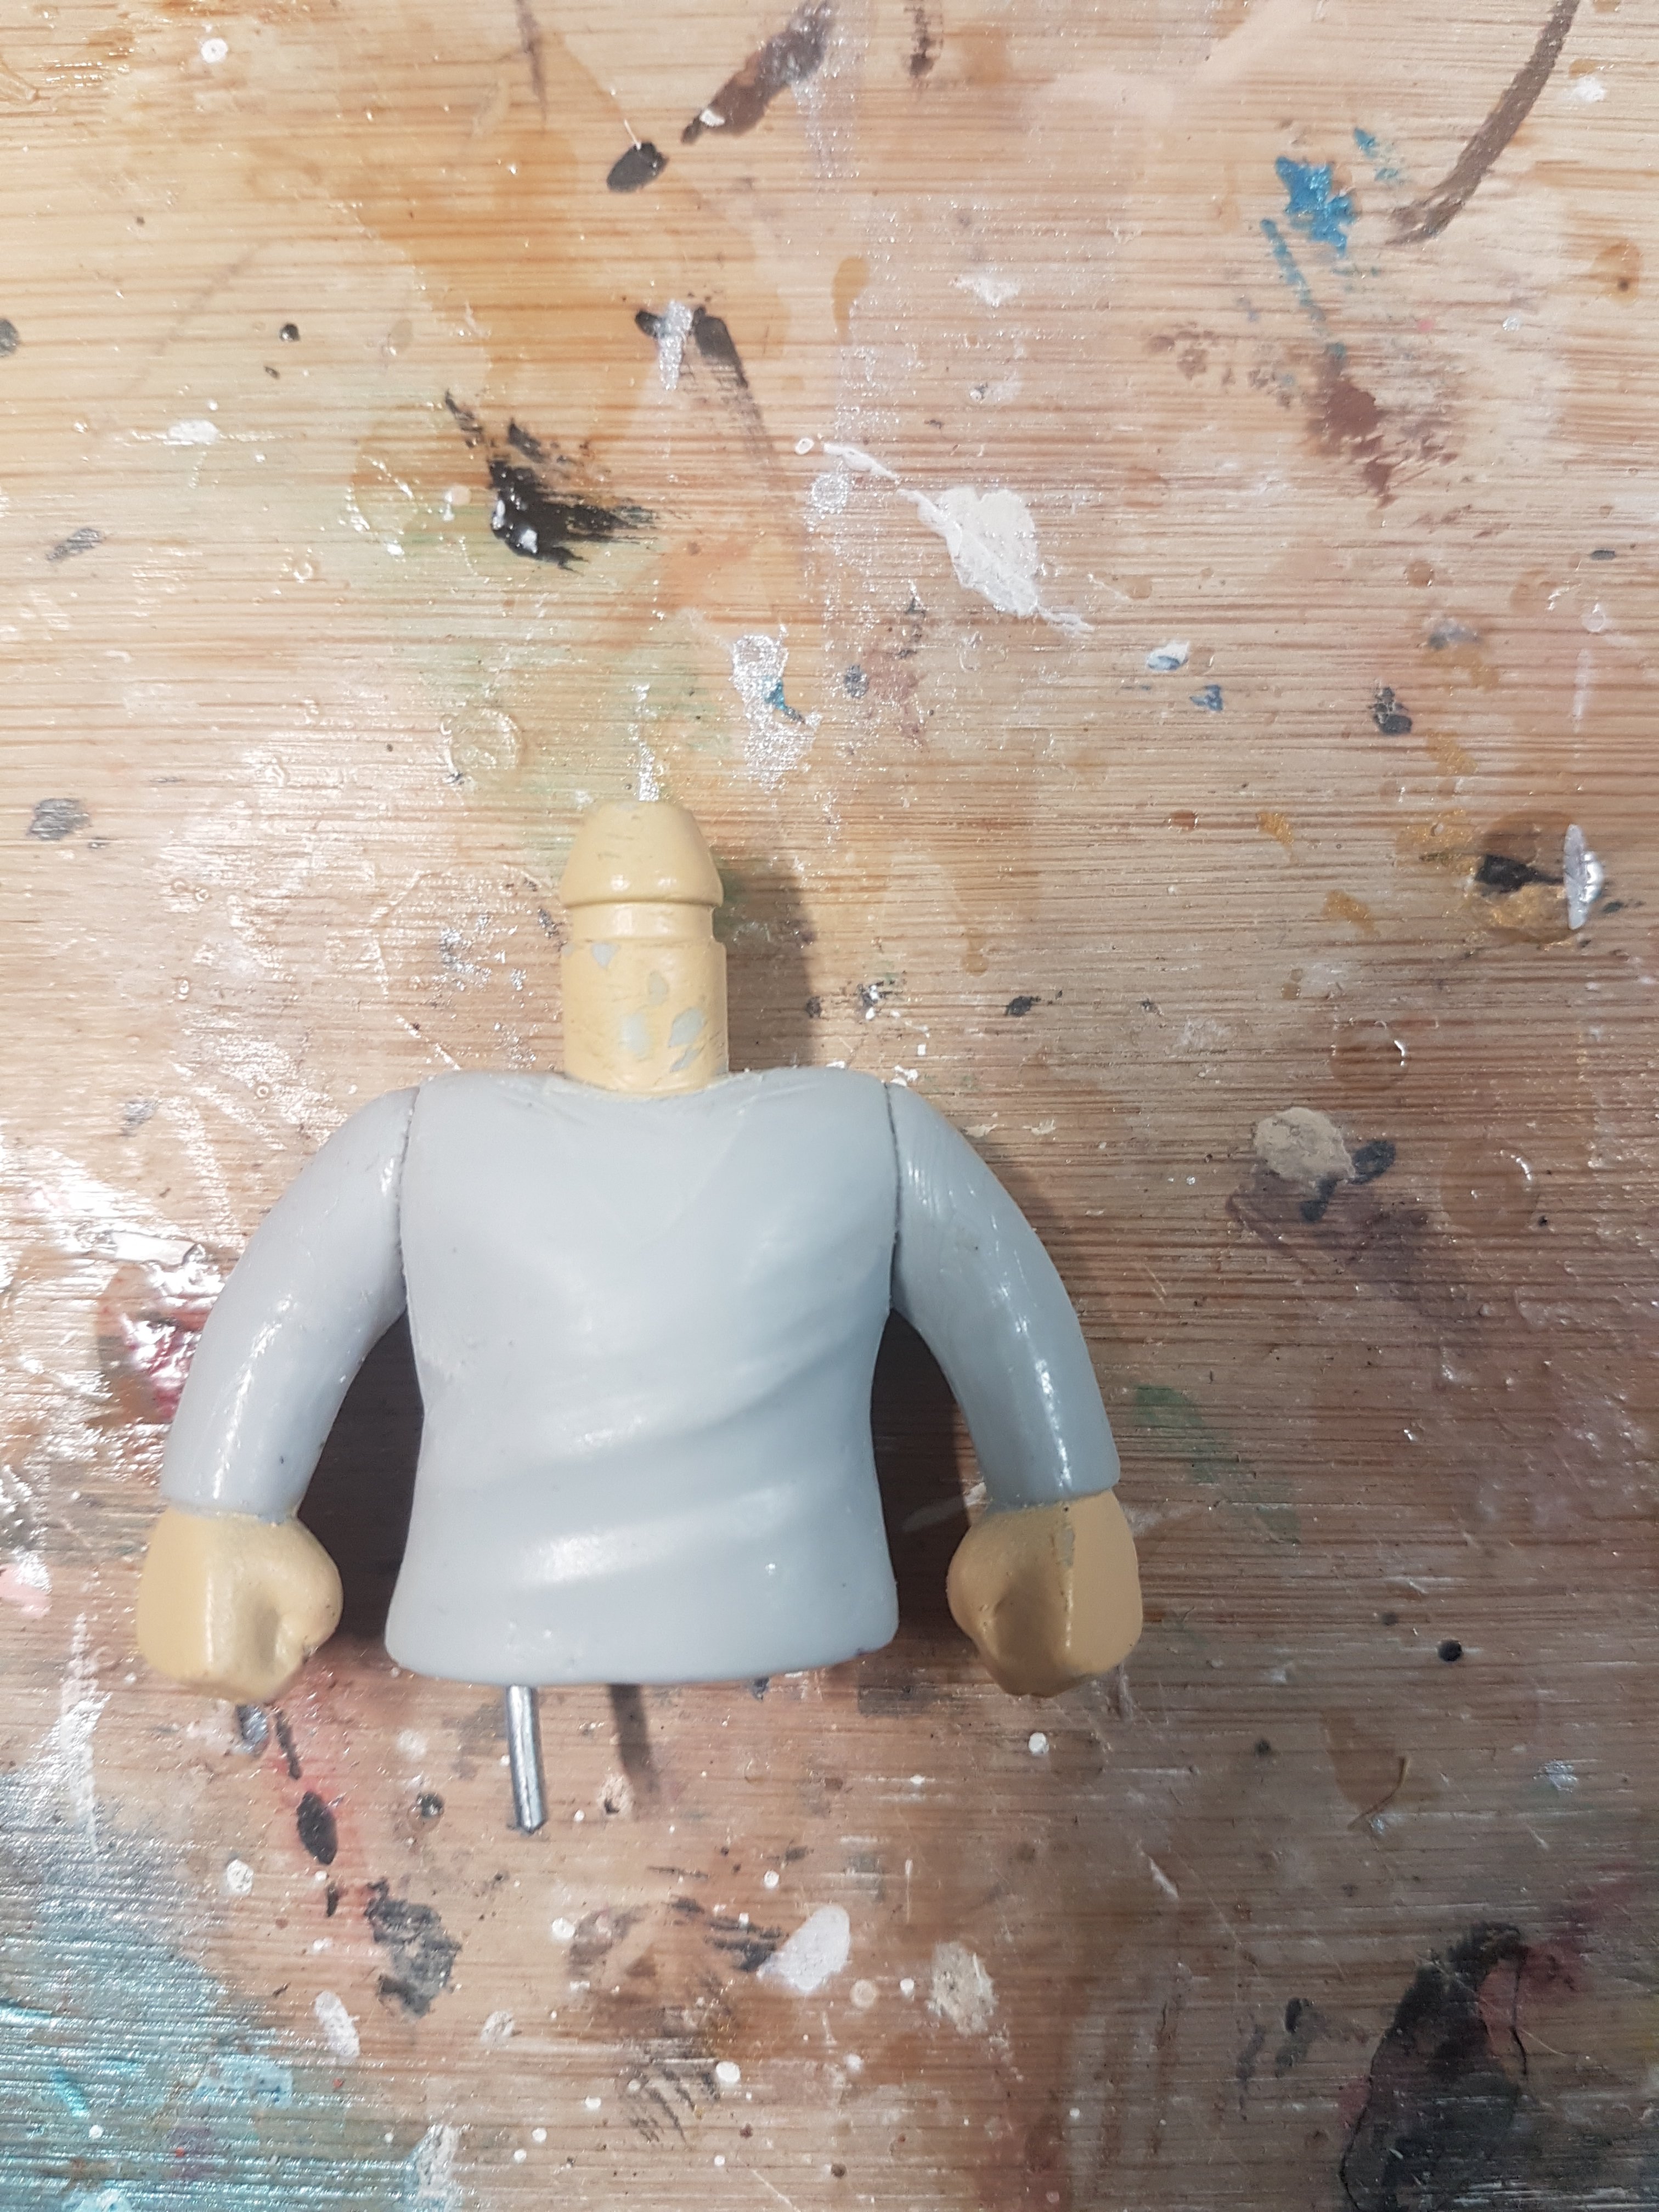
This took 3 separate pops to put together. A Callum Lynch body for the torso, A Wallace body for the legs and feet (so he could be wearing his flip flops) and a Cas head. The 3 pops were broken down into the parts needed.
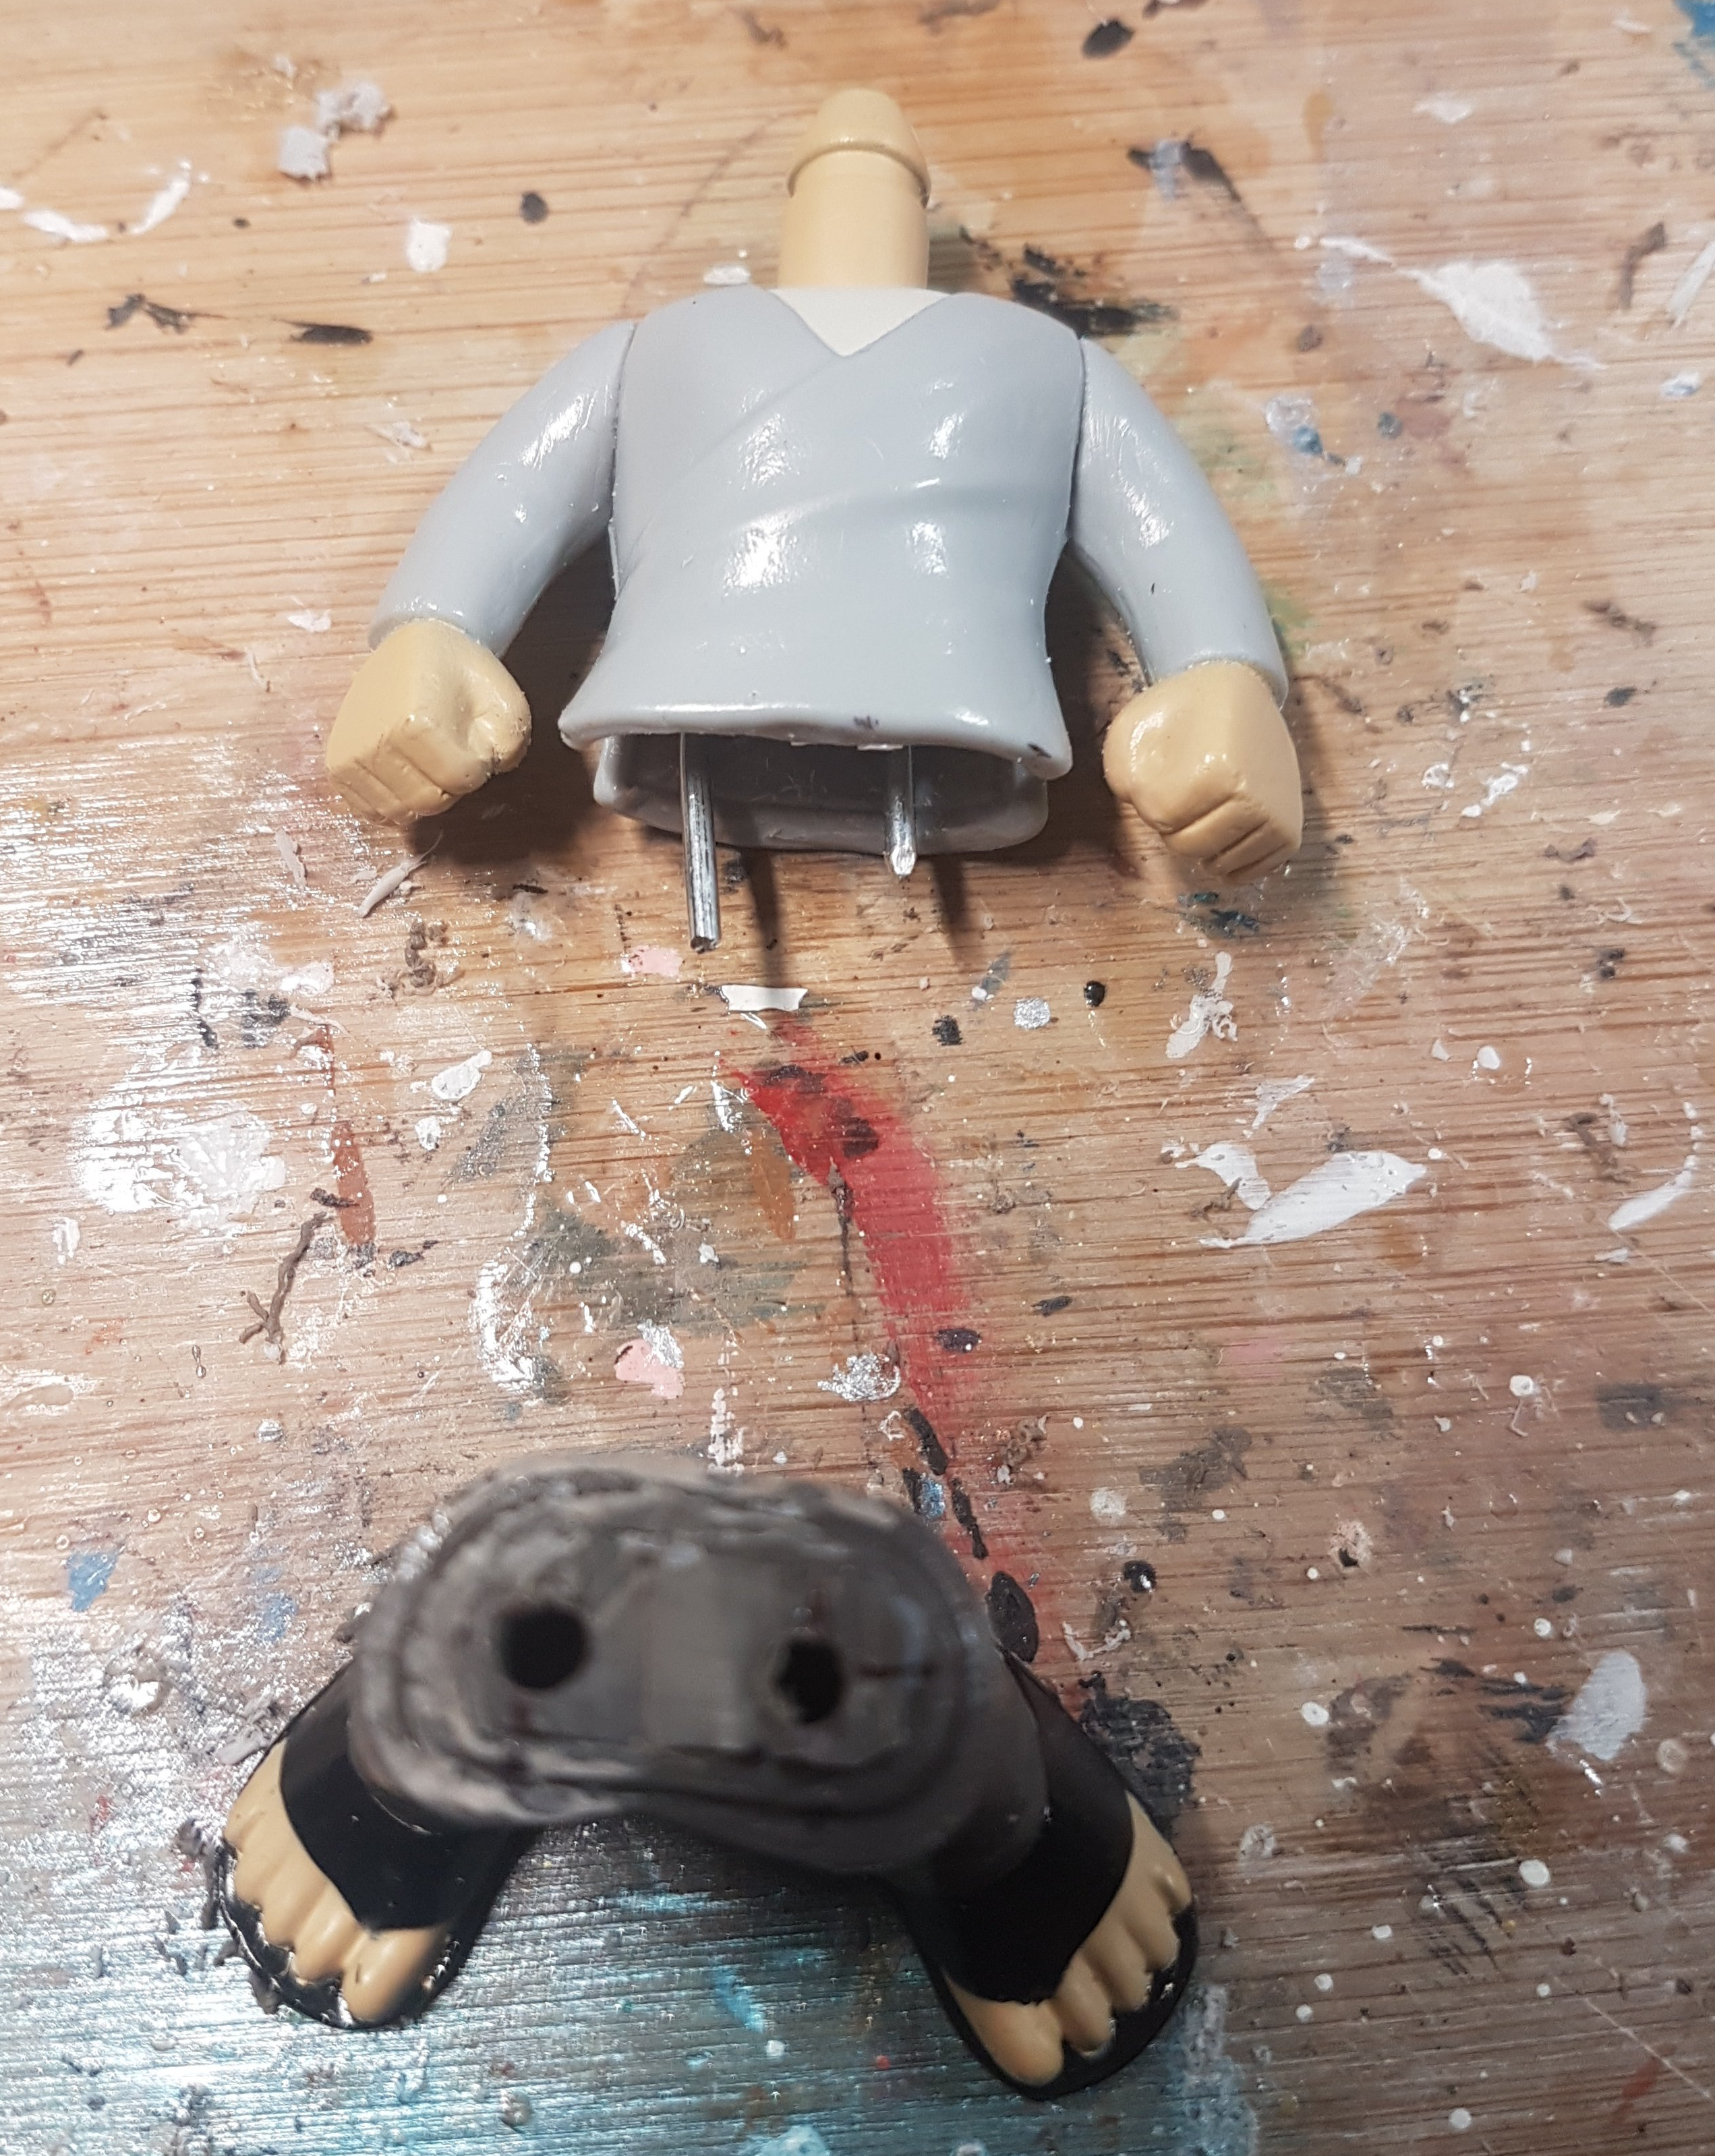
Step two, Bracing.
Because the pops were slightly different makes, they needed to be braced to hold together. I drilled holes in each side, and using a heavy gauge wire and glue, lined them up and glued them together. This creates a sturdier body.
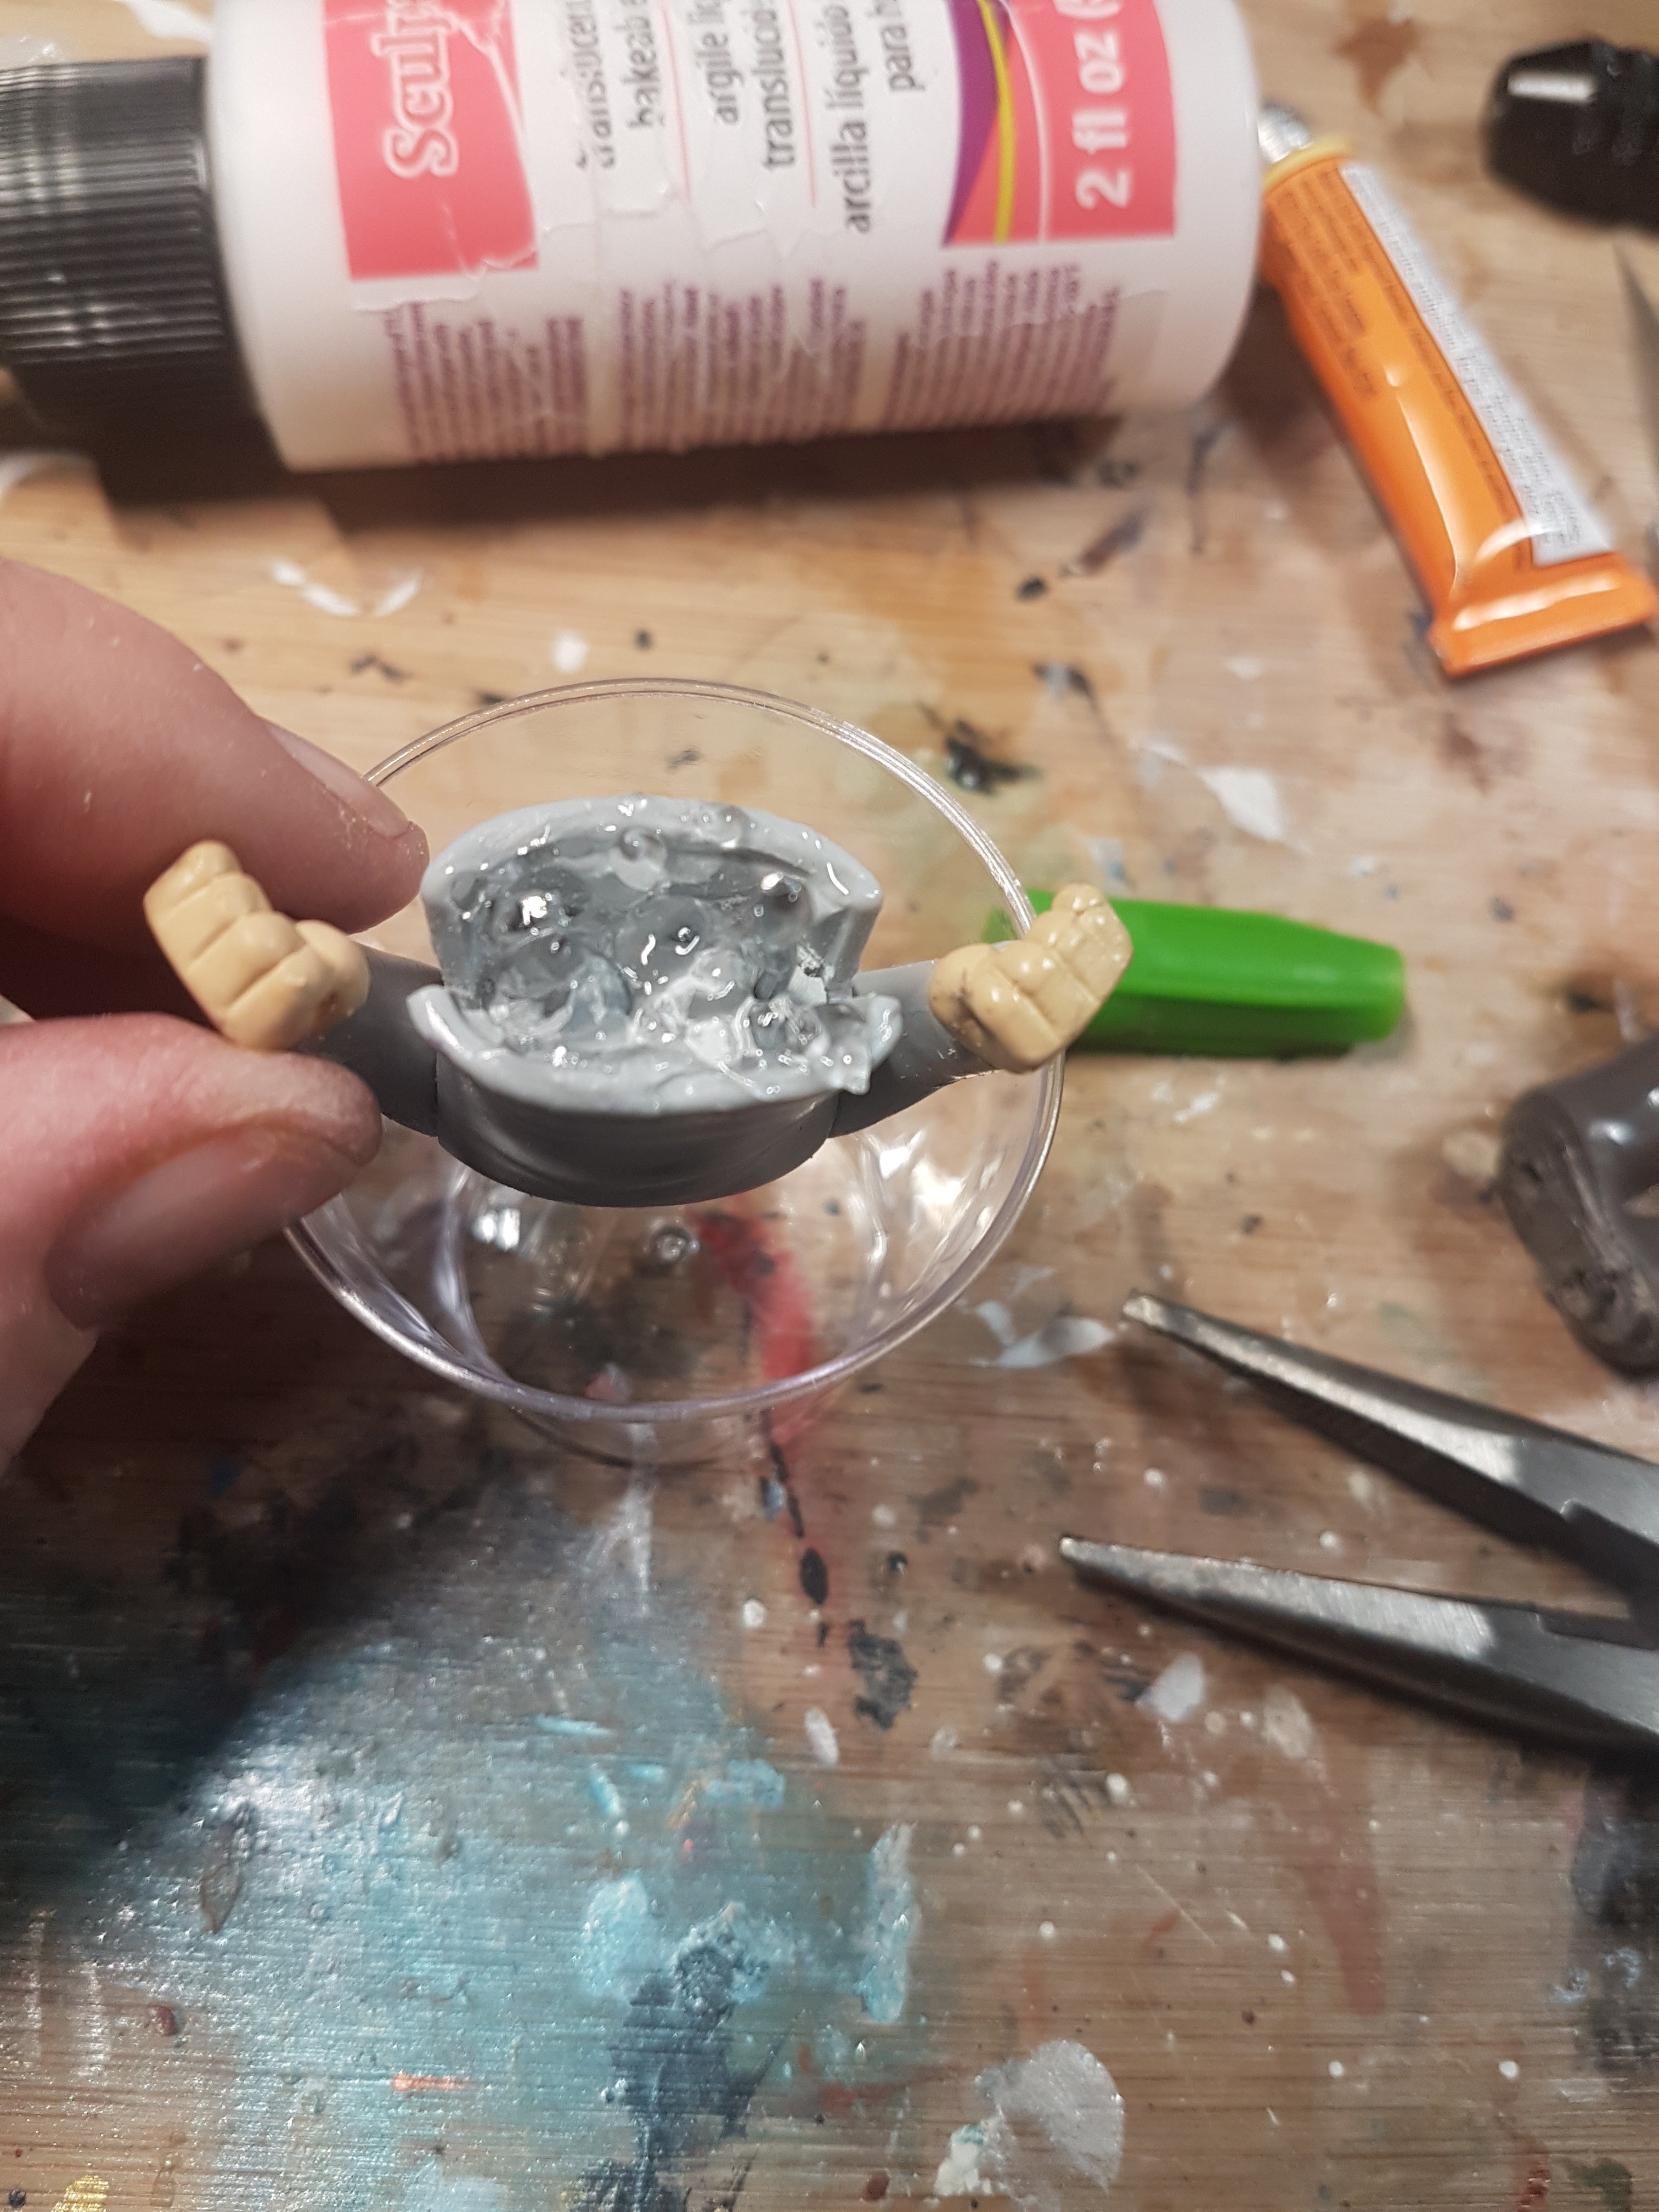
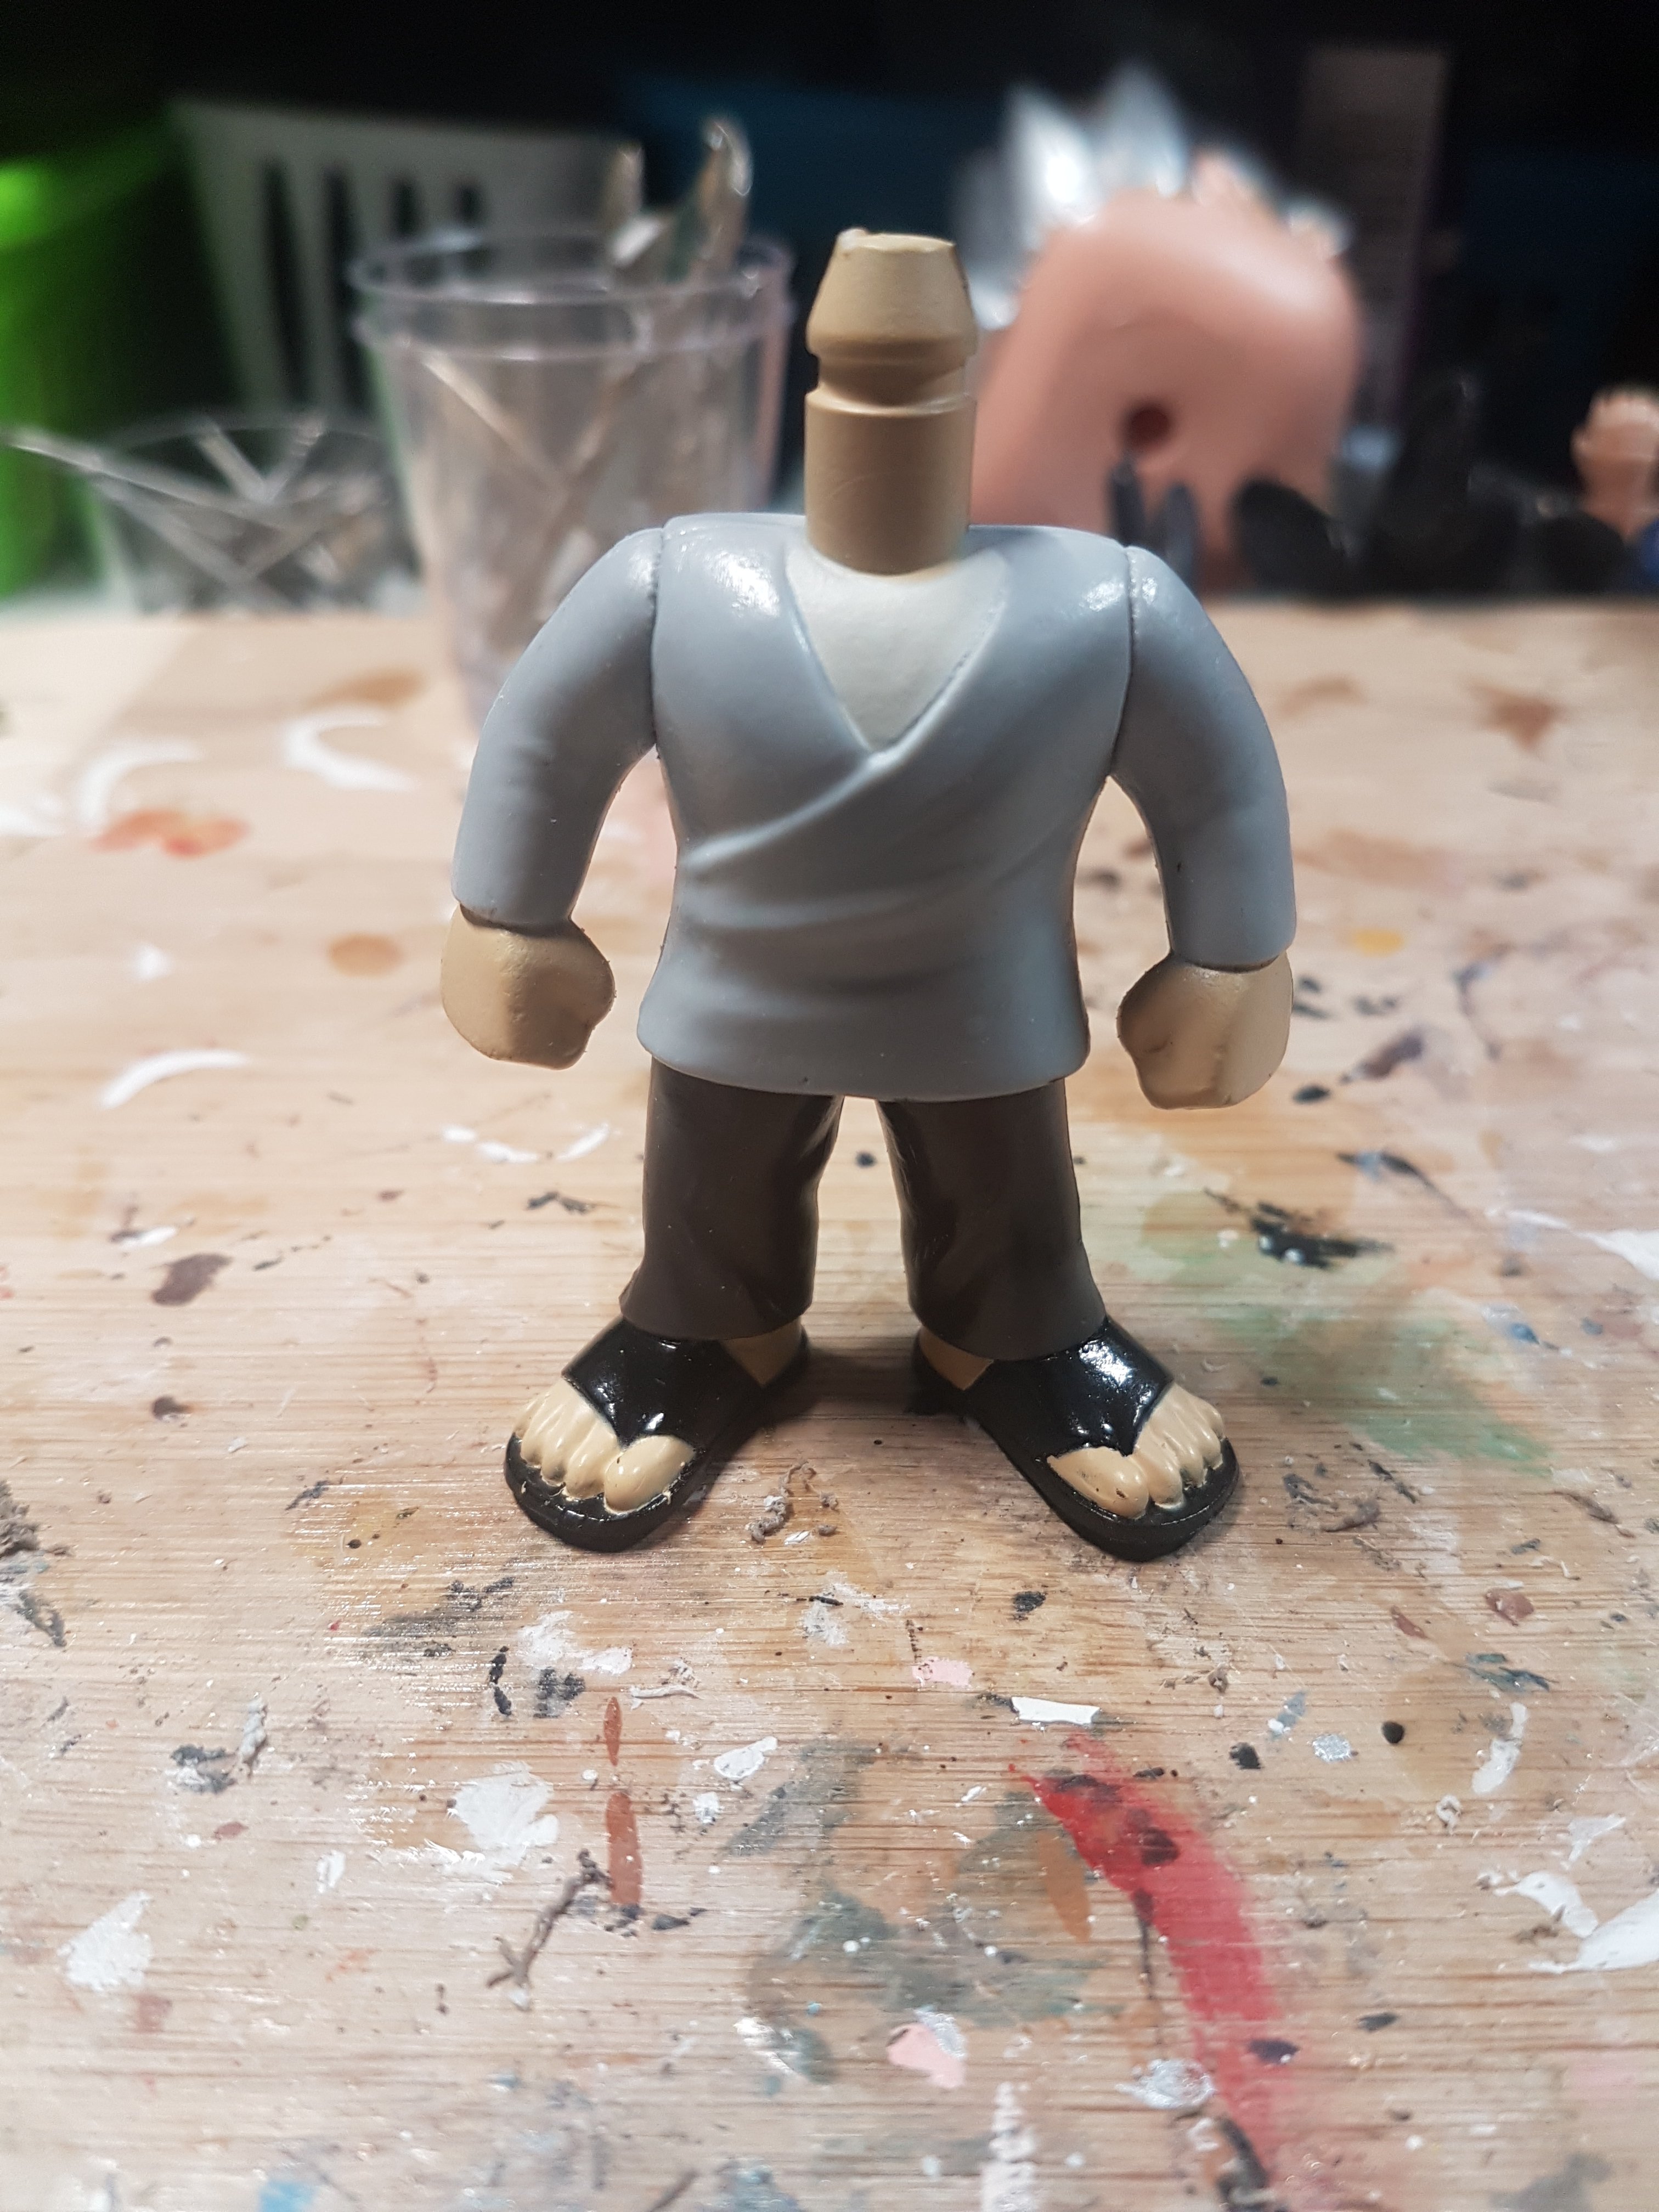
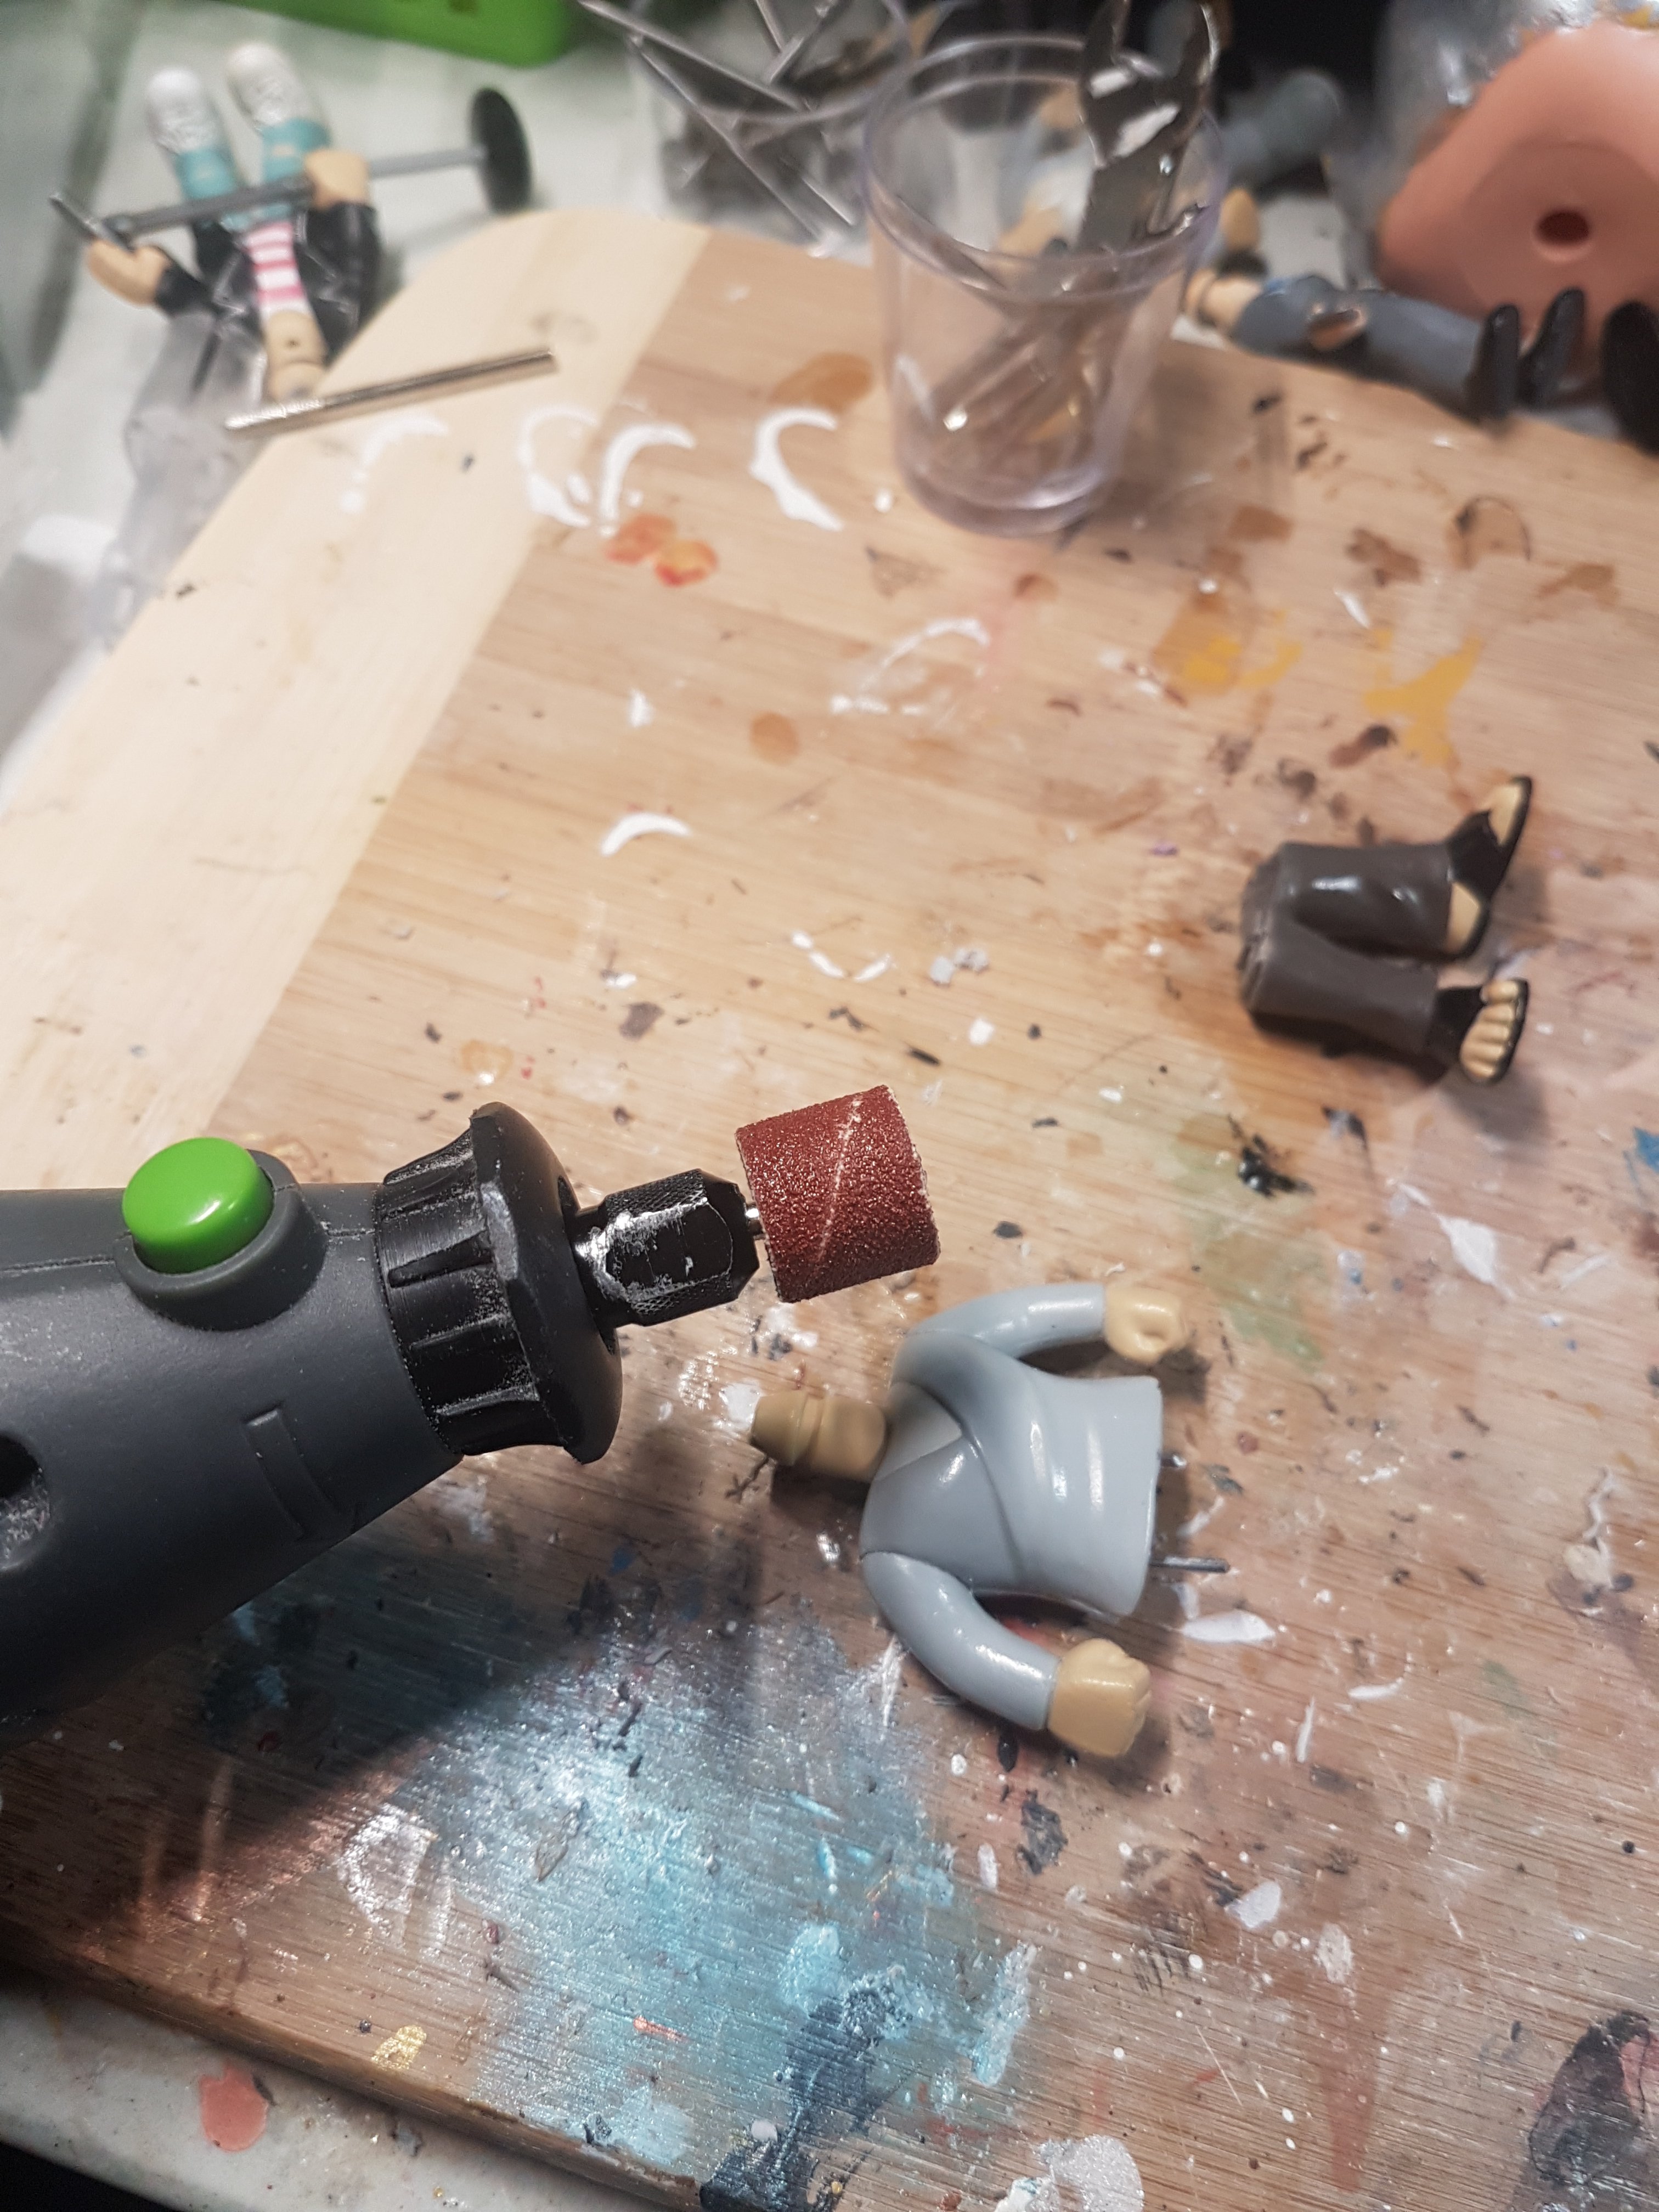
Step three, Smoothing.
I wanted Misha to have a Random Acts t-shirt on, so I needed to smooth out the existing shirt. That is done with a Dremel, heat gun, and fine sandpaper until I get it smooth enough to be a t-shirt but leaving enough wrinkles to look more natural.
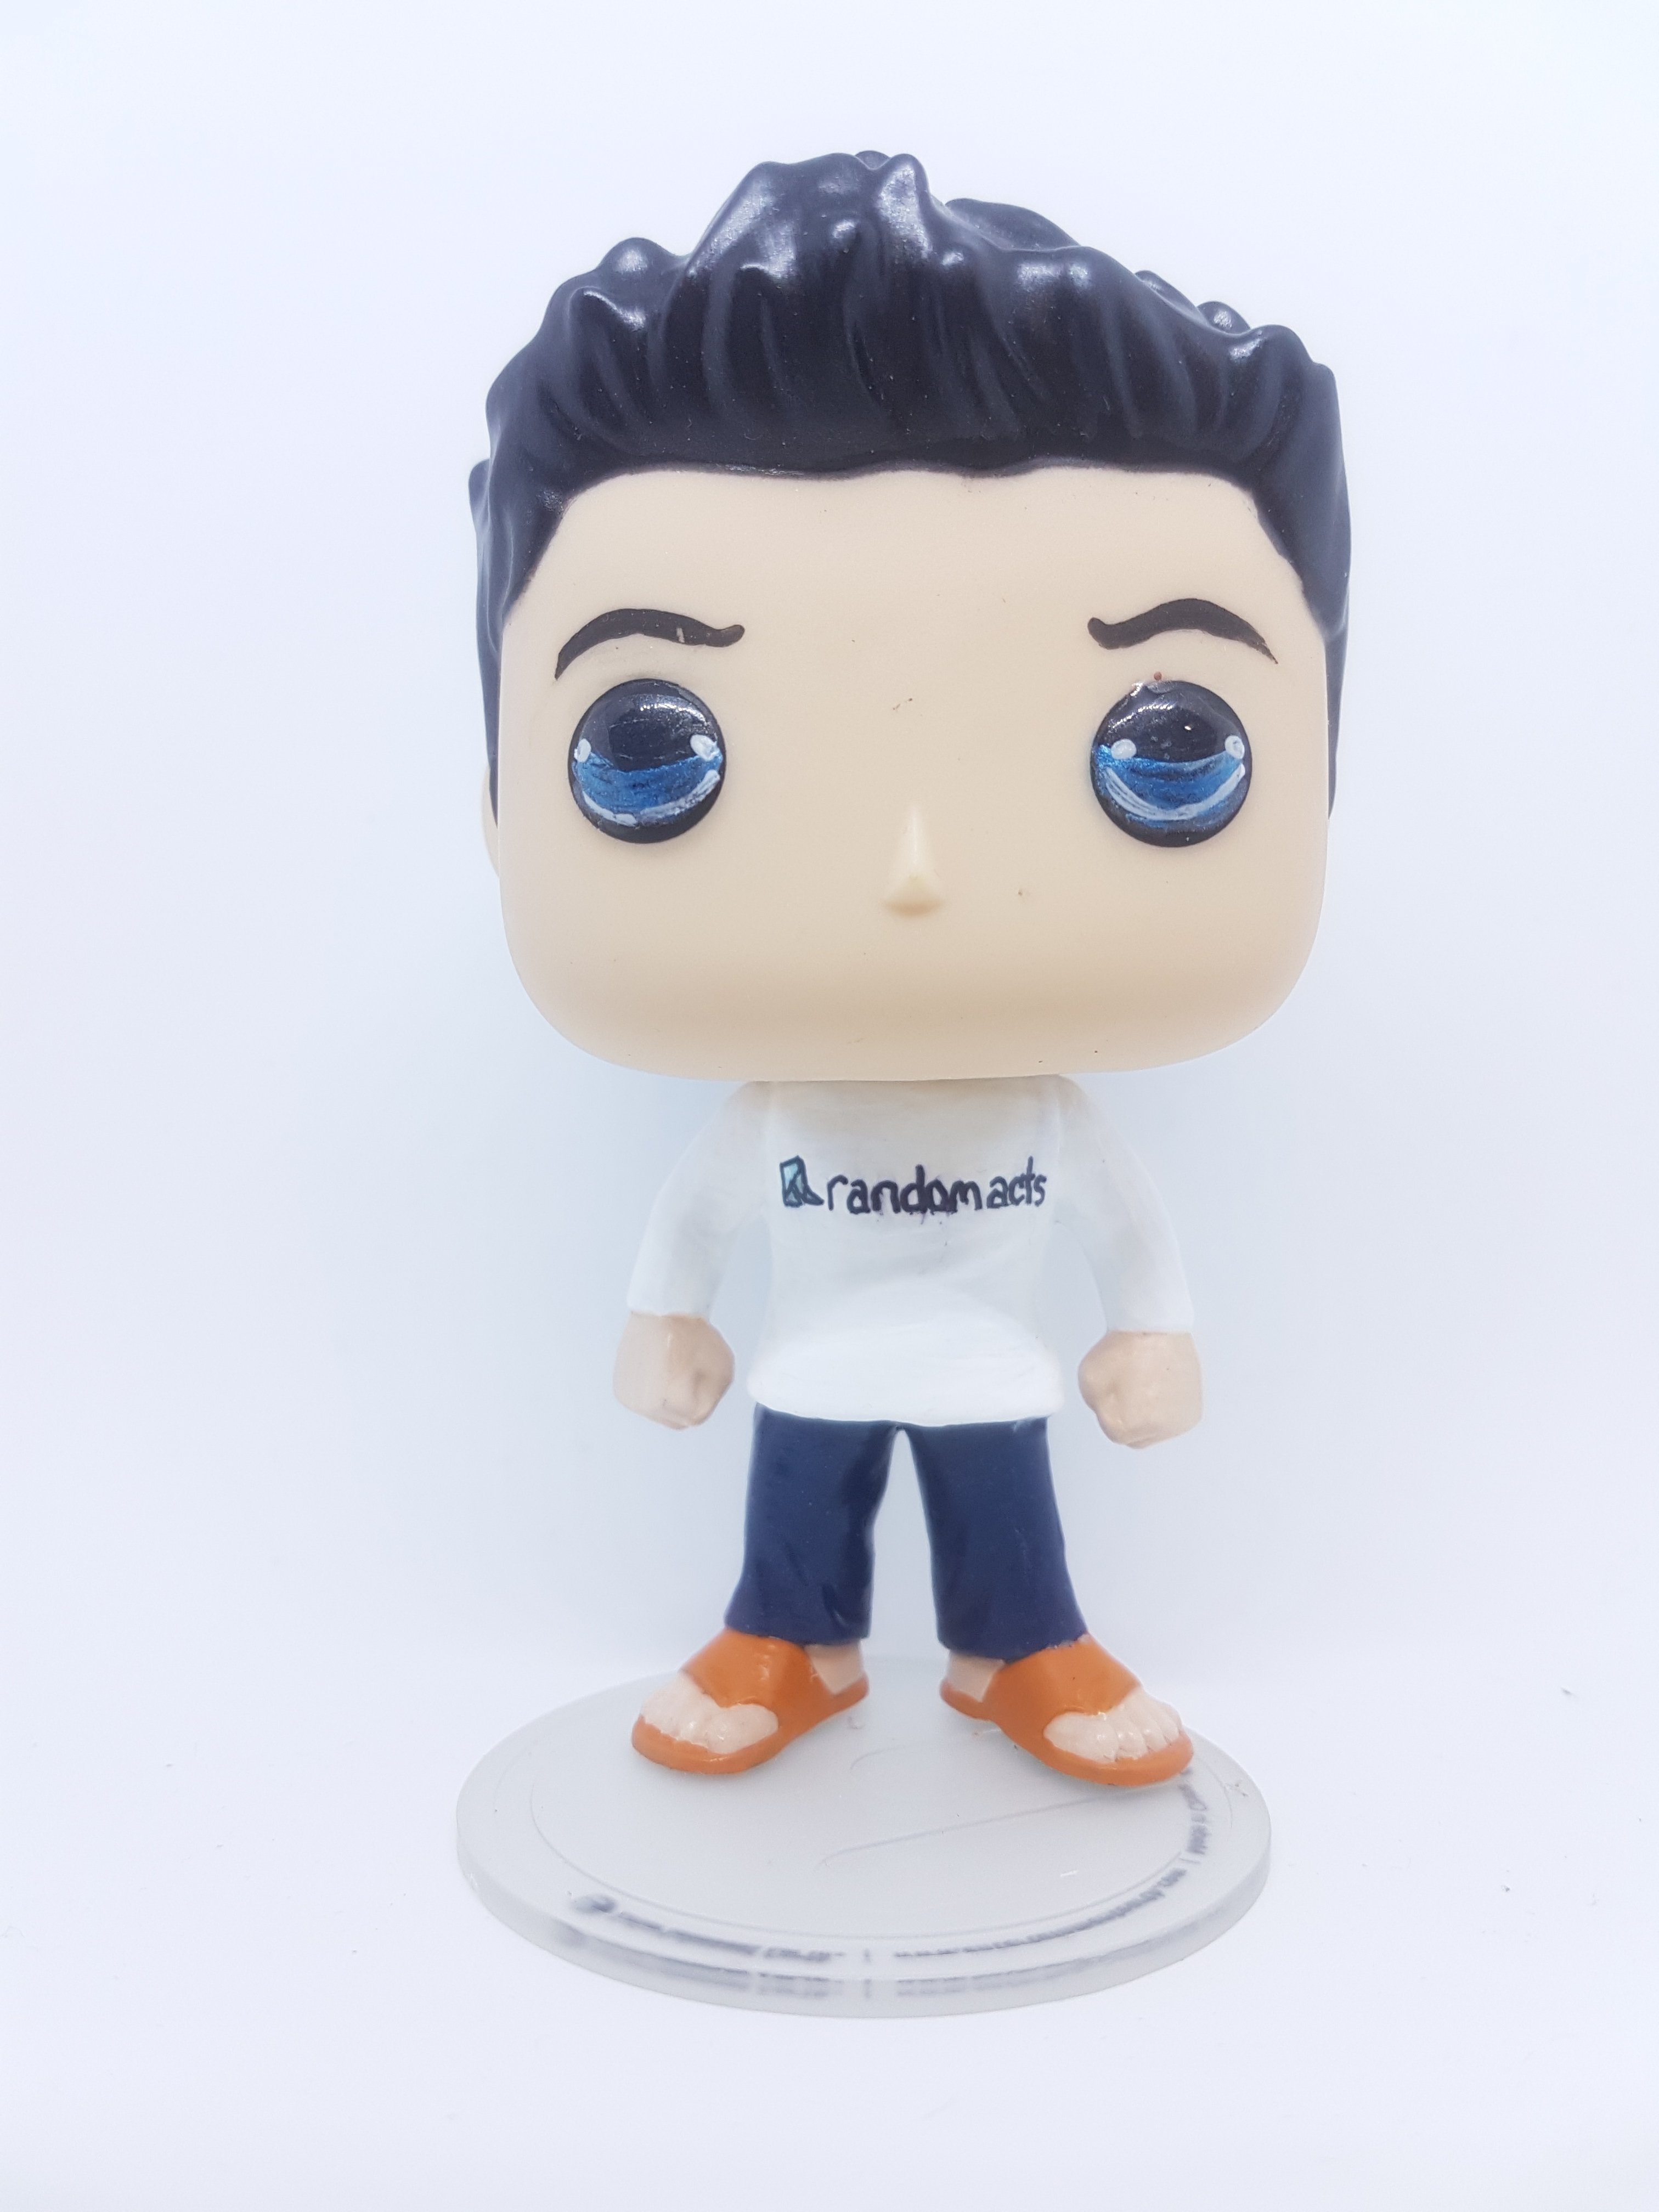
Step four, Paint.
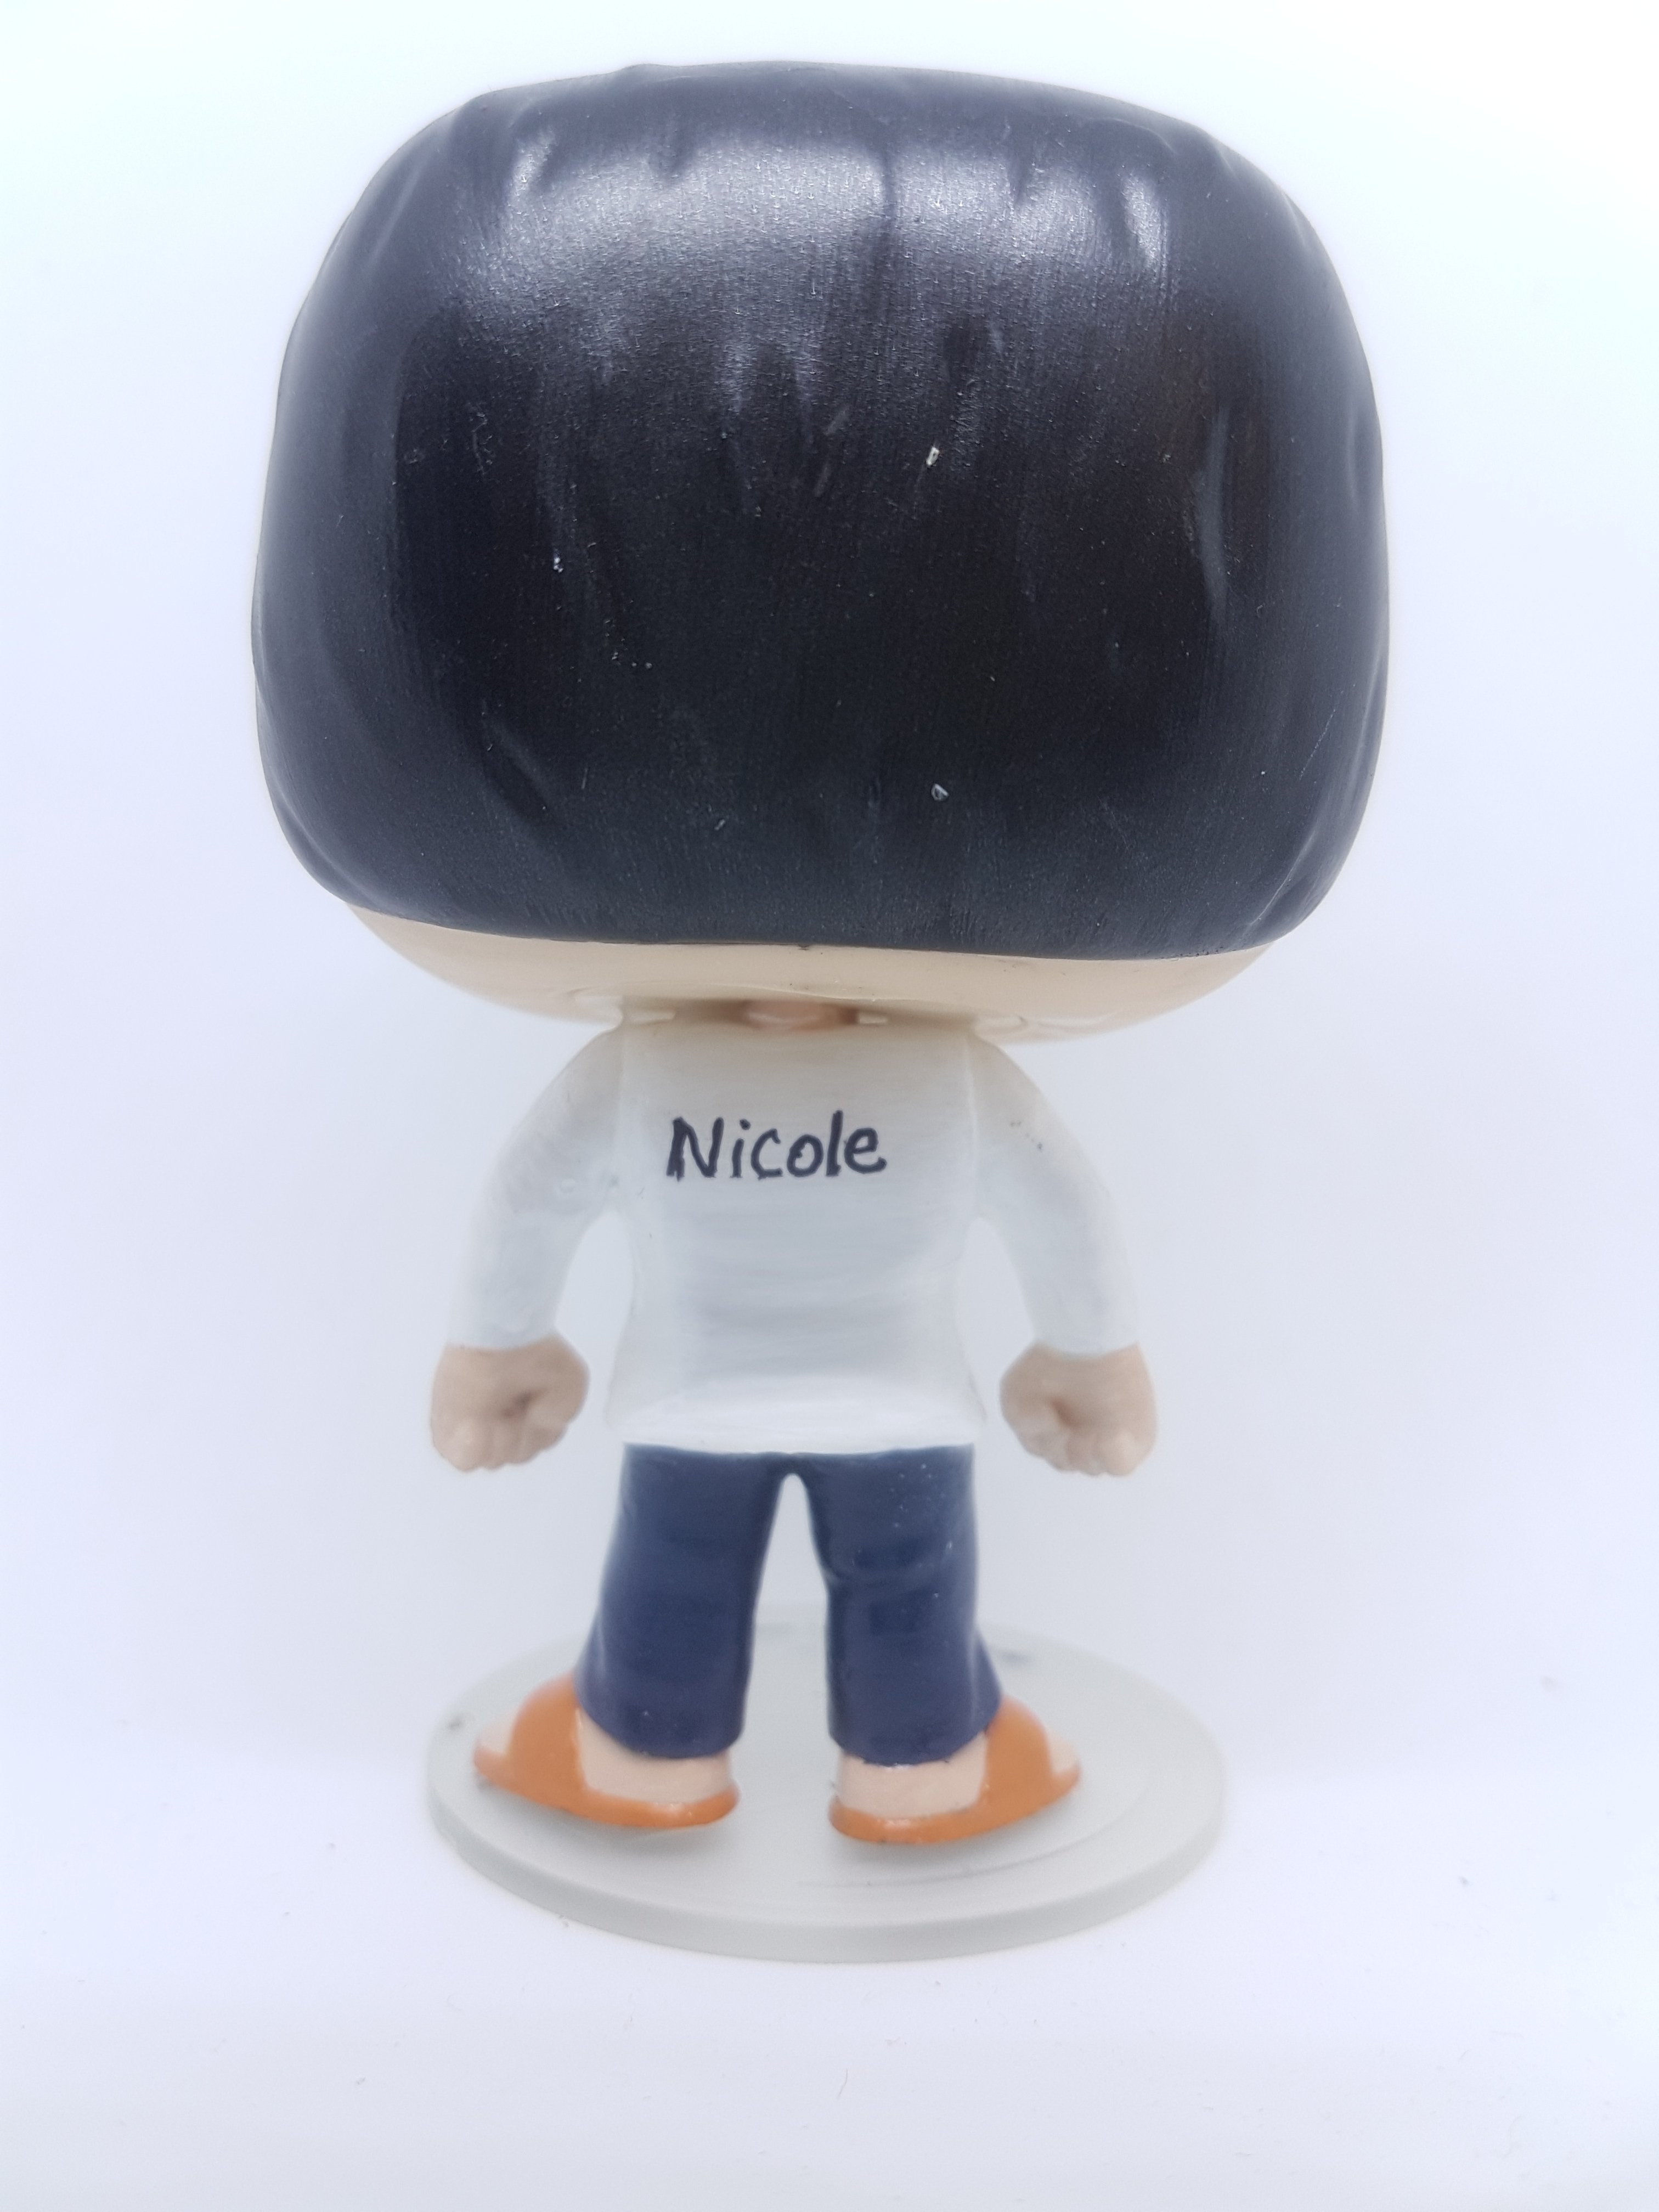
After gluing, smoothing and drying, he is put together and then painted. I went with a white shirt, jeans and orange sandals. The random acts was hand painted. The head, eyes and brows are all hand painted. The sealing, drying and Misha was ready to go home! A special, personalized gift for a special woman.
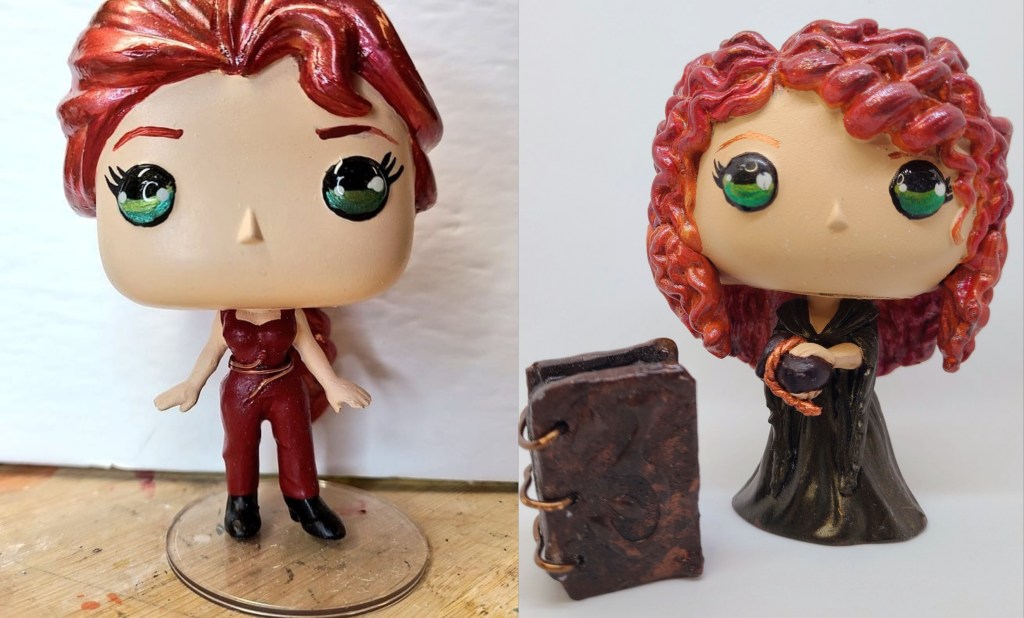
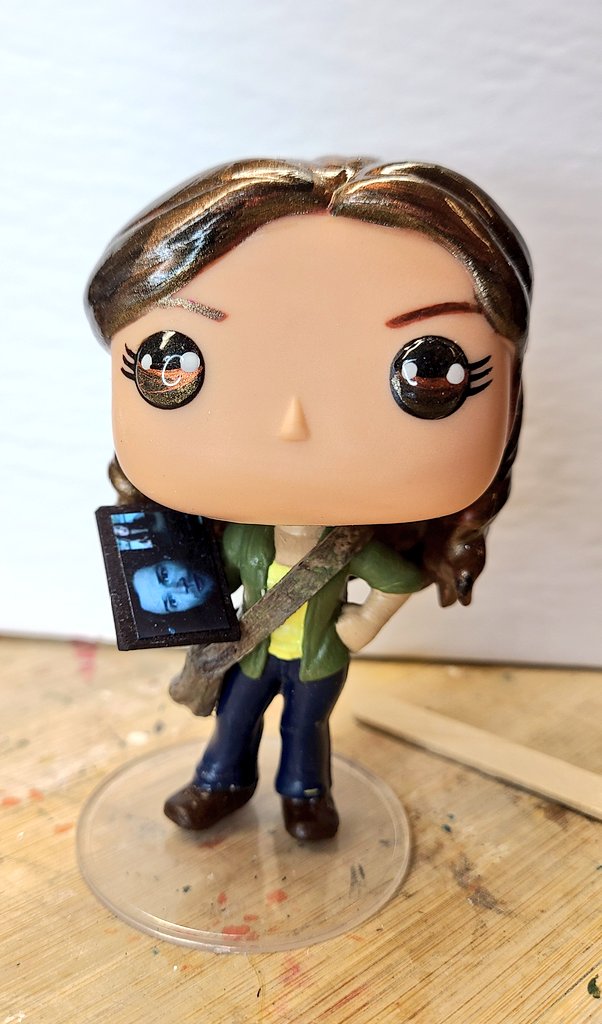
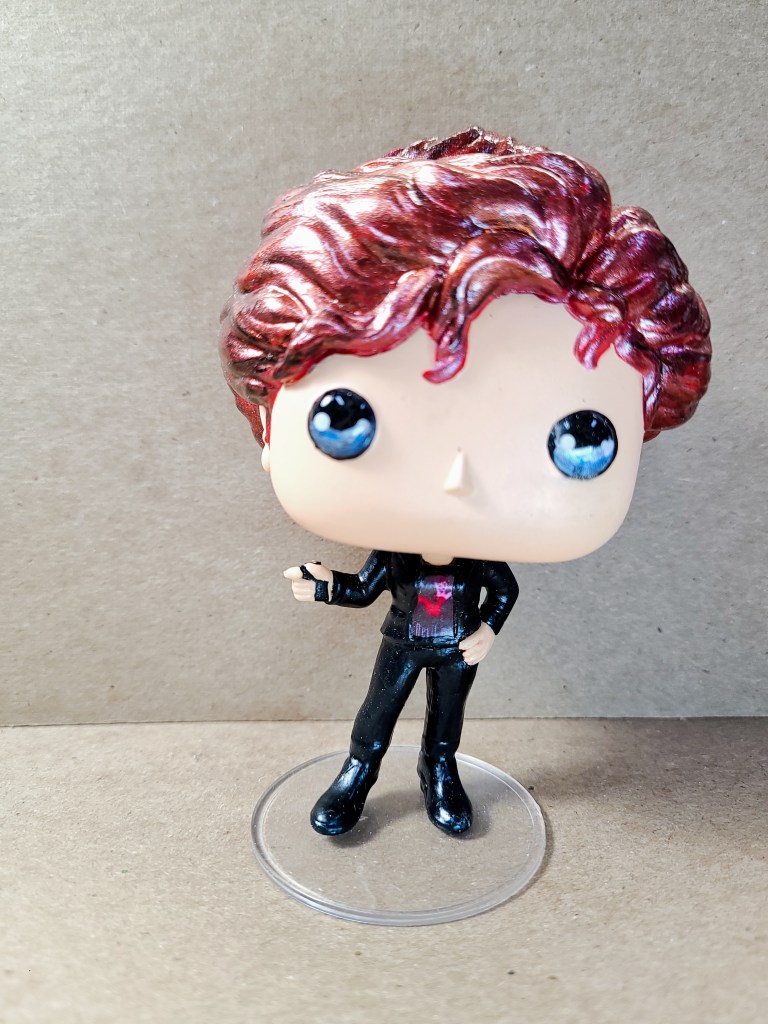
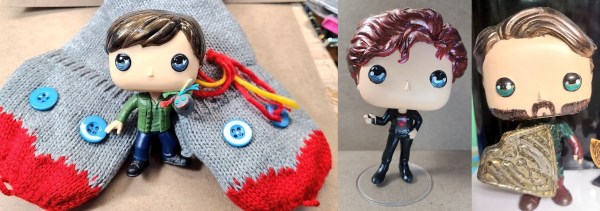
This post will walk you through the steps of making an AU Charlie pop. The process will be different for each one, even when you do more than one of the same character. Plastics will react differently, paints may not blend quite the same. But this gives you a glimpse behind the curtain… or gish flag .. I don’t really have curtains….
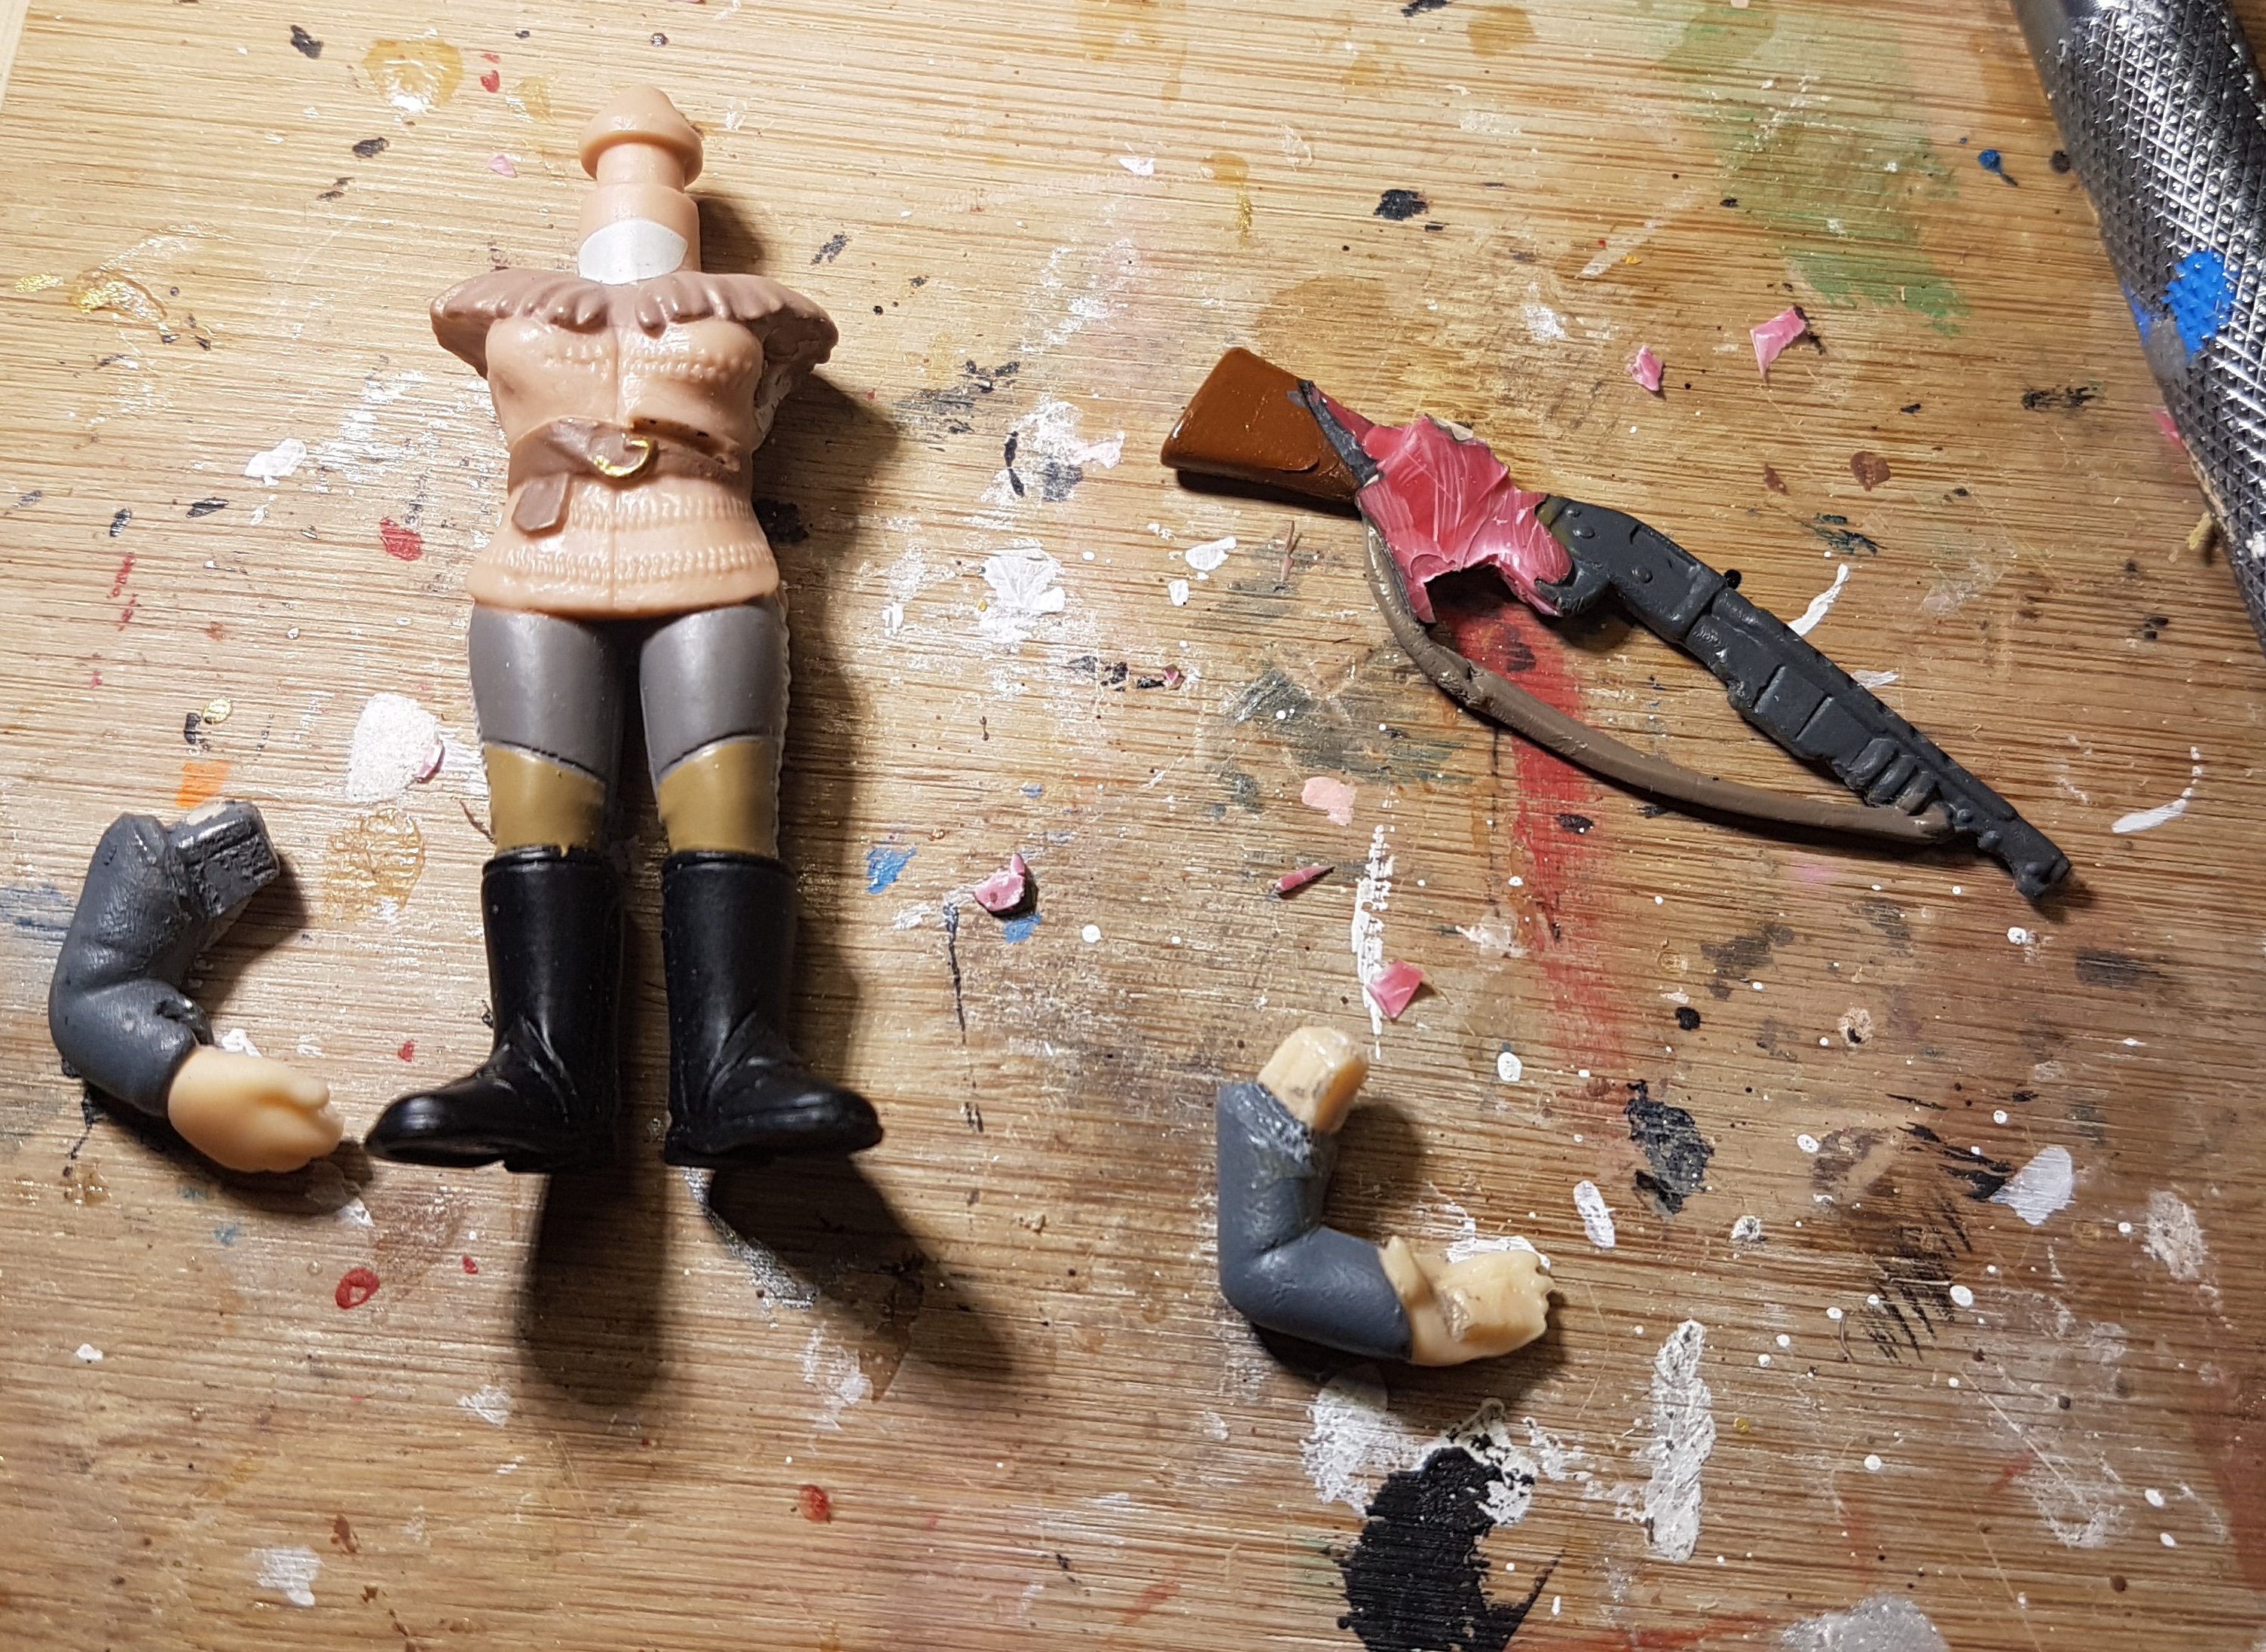
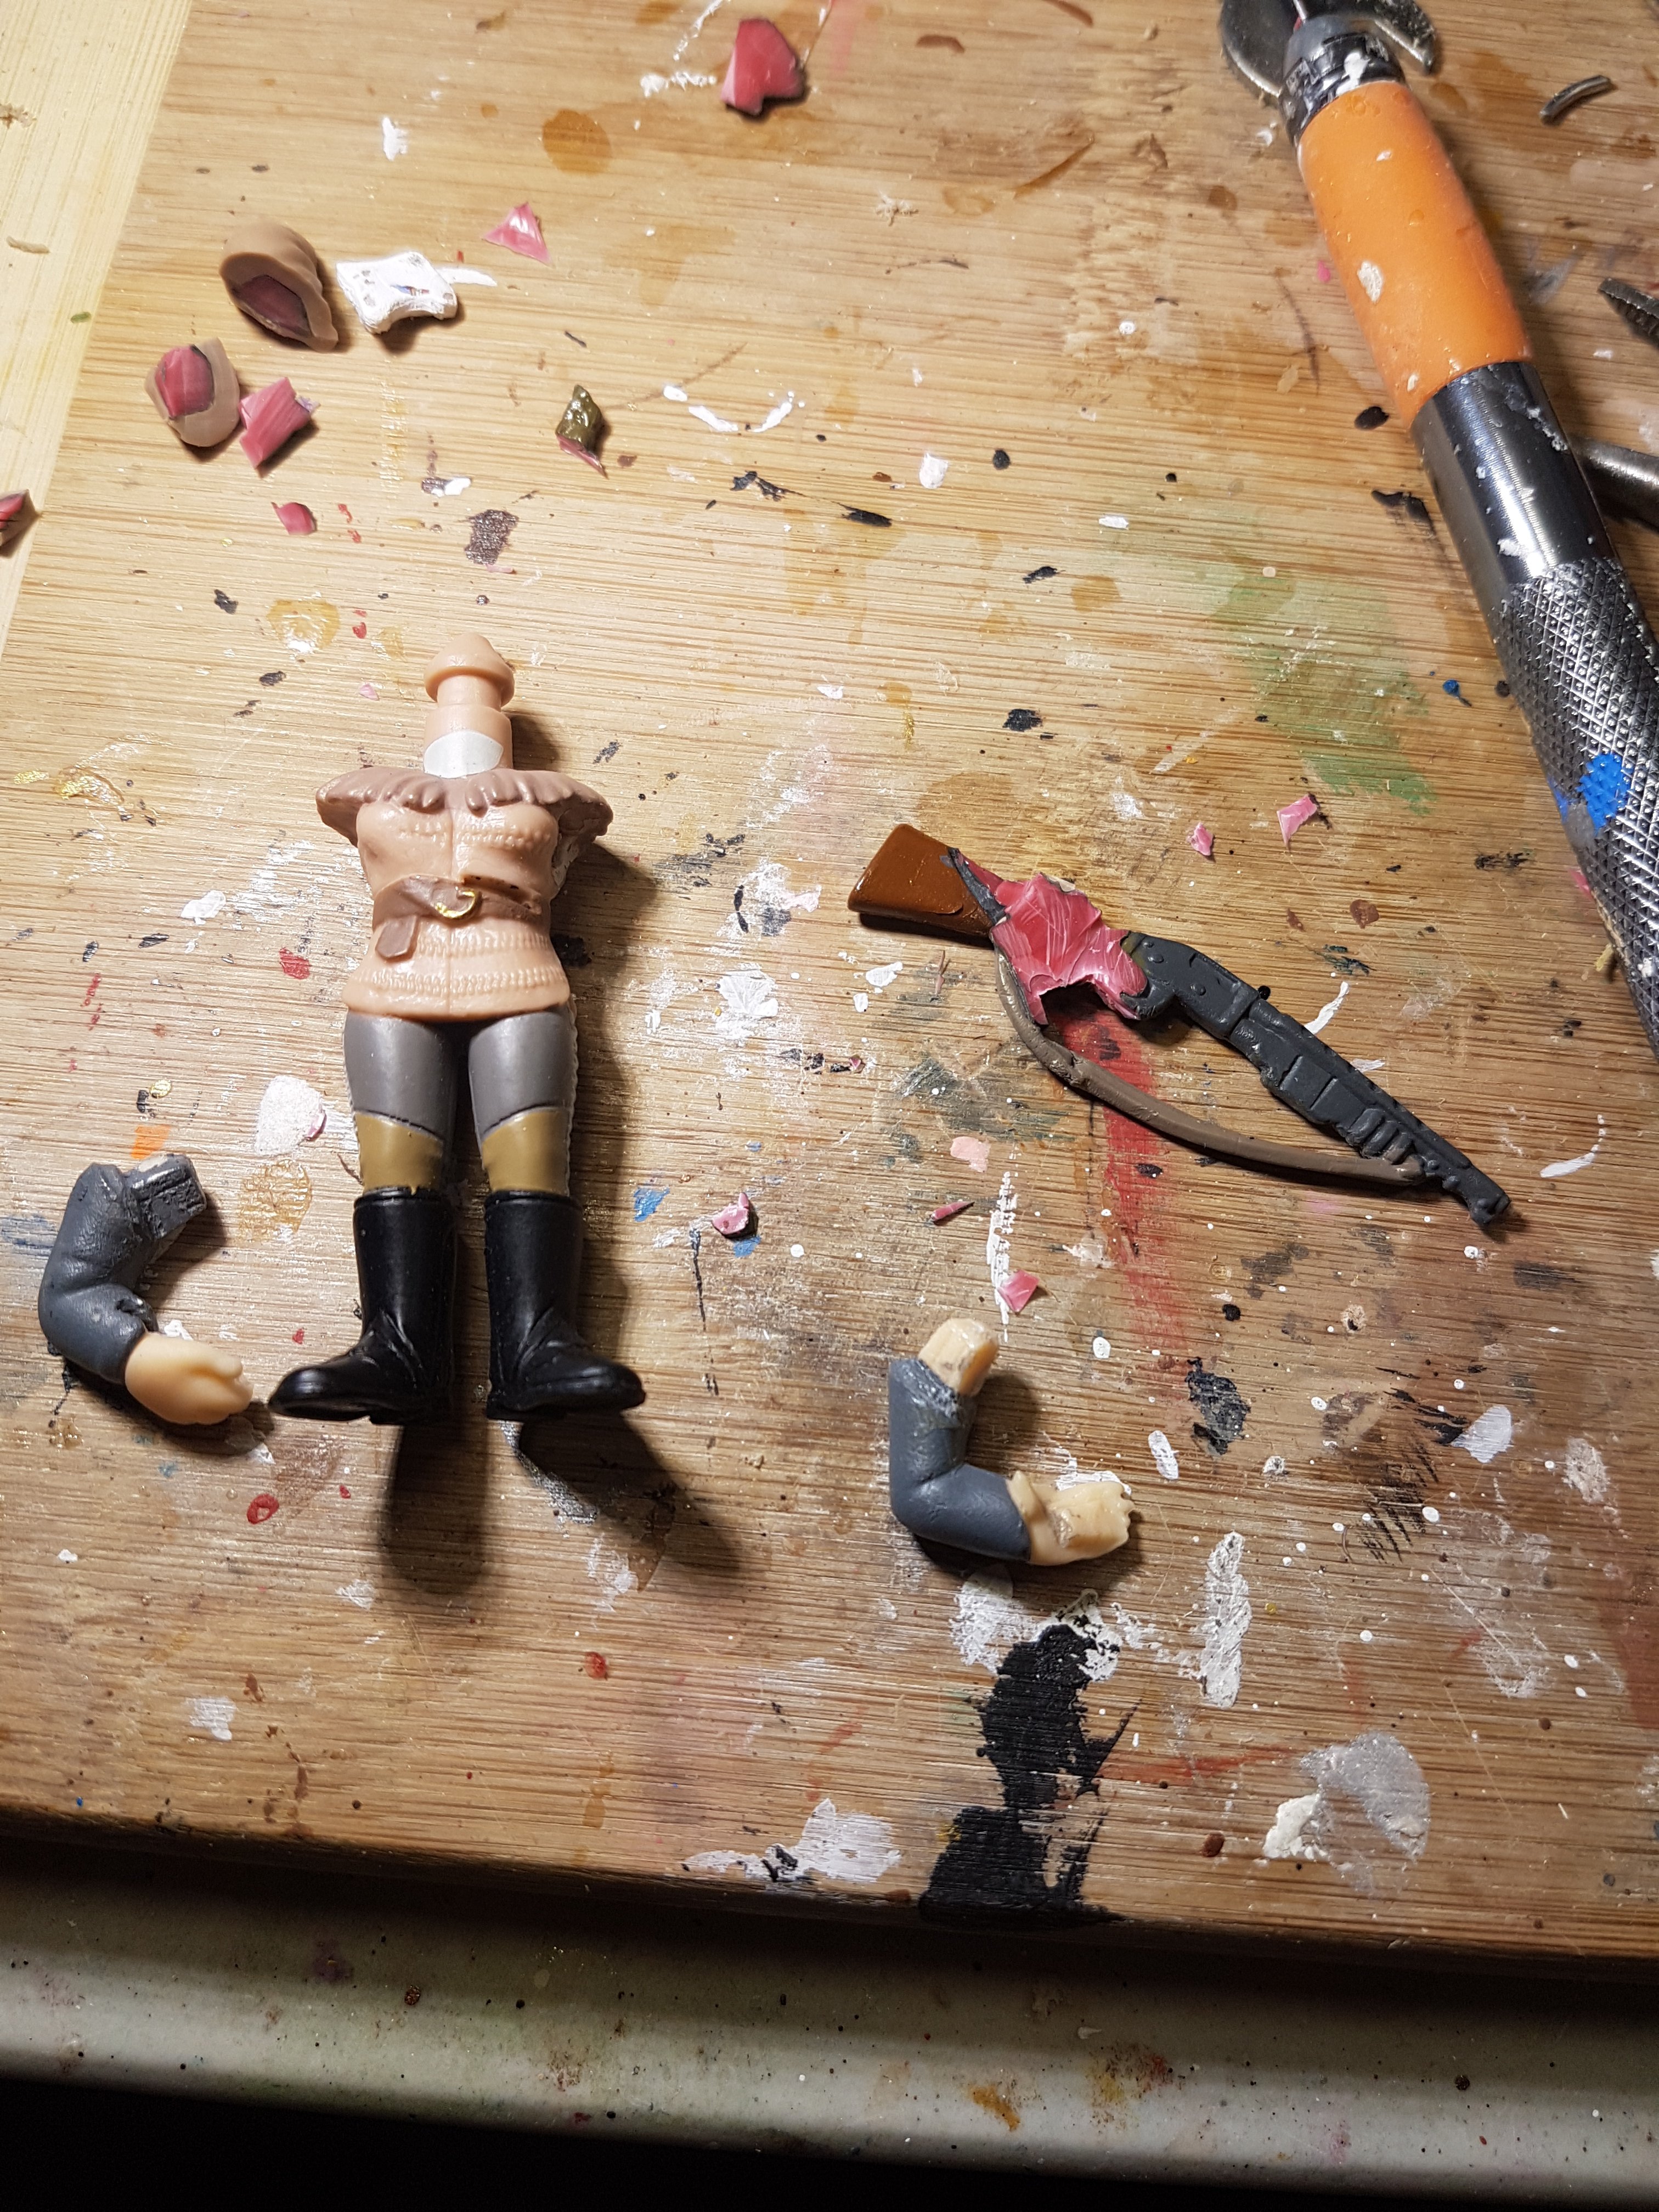
Step one. Finding the parts. Sometimes you can use one pop and with some paint and sculpting make it into what you want. Sometimes you need to use just swap a head or body to get the look you want. Sometimes you have to go full Dr Benton and take pieces and parts from a few pops to get close to what you need. For AU Charlie, I used 4 pops. 1 for the rifle, 1 for the arms, 1 for the body, and 1 for the head.
Parts selected. Fun fact… The silver in the upper right corner is my xacto knife, that I lost last week. If you see it, let me know….
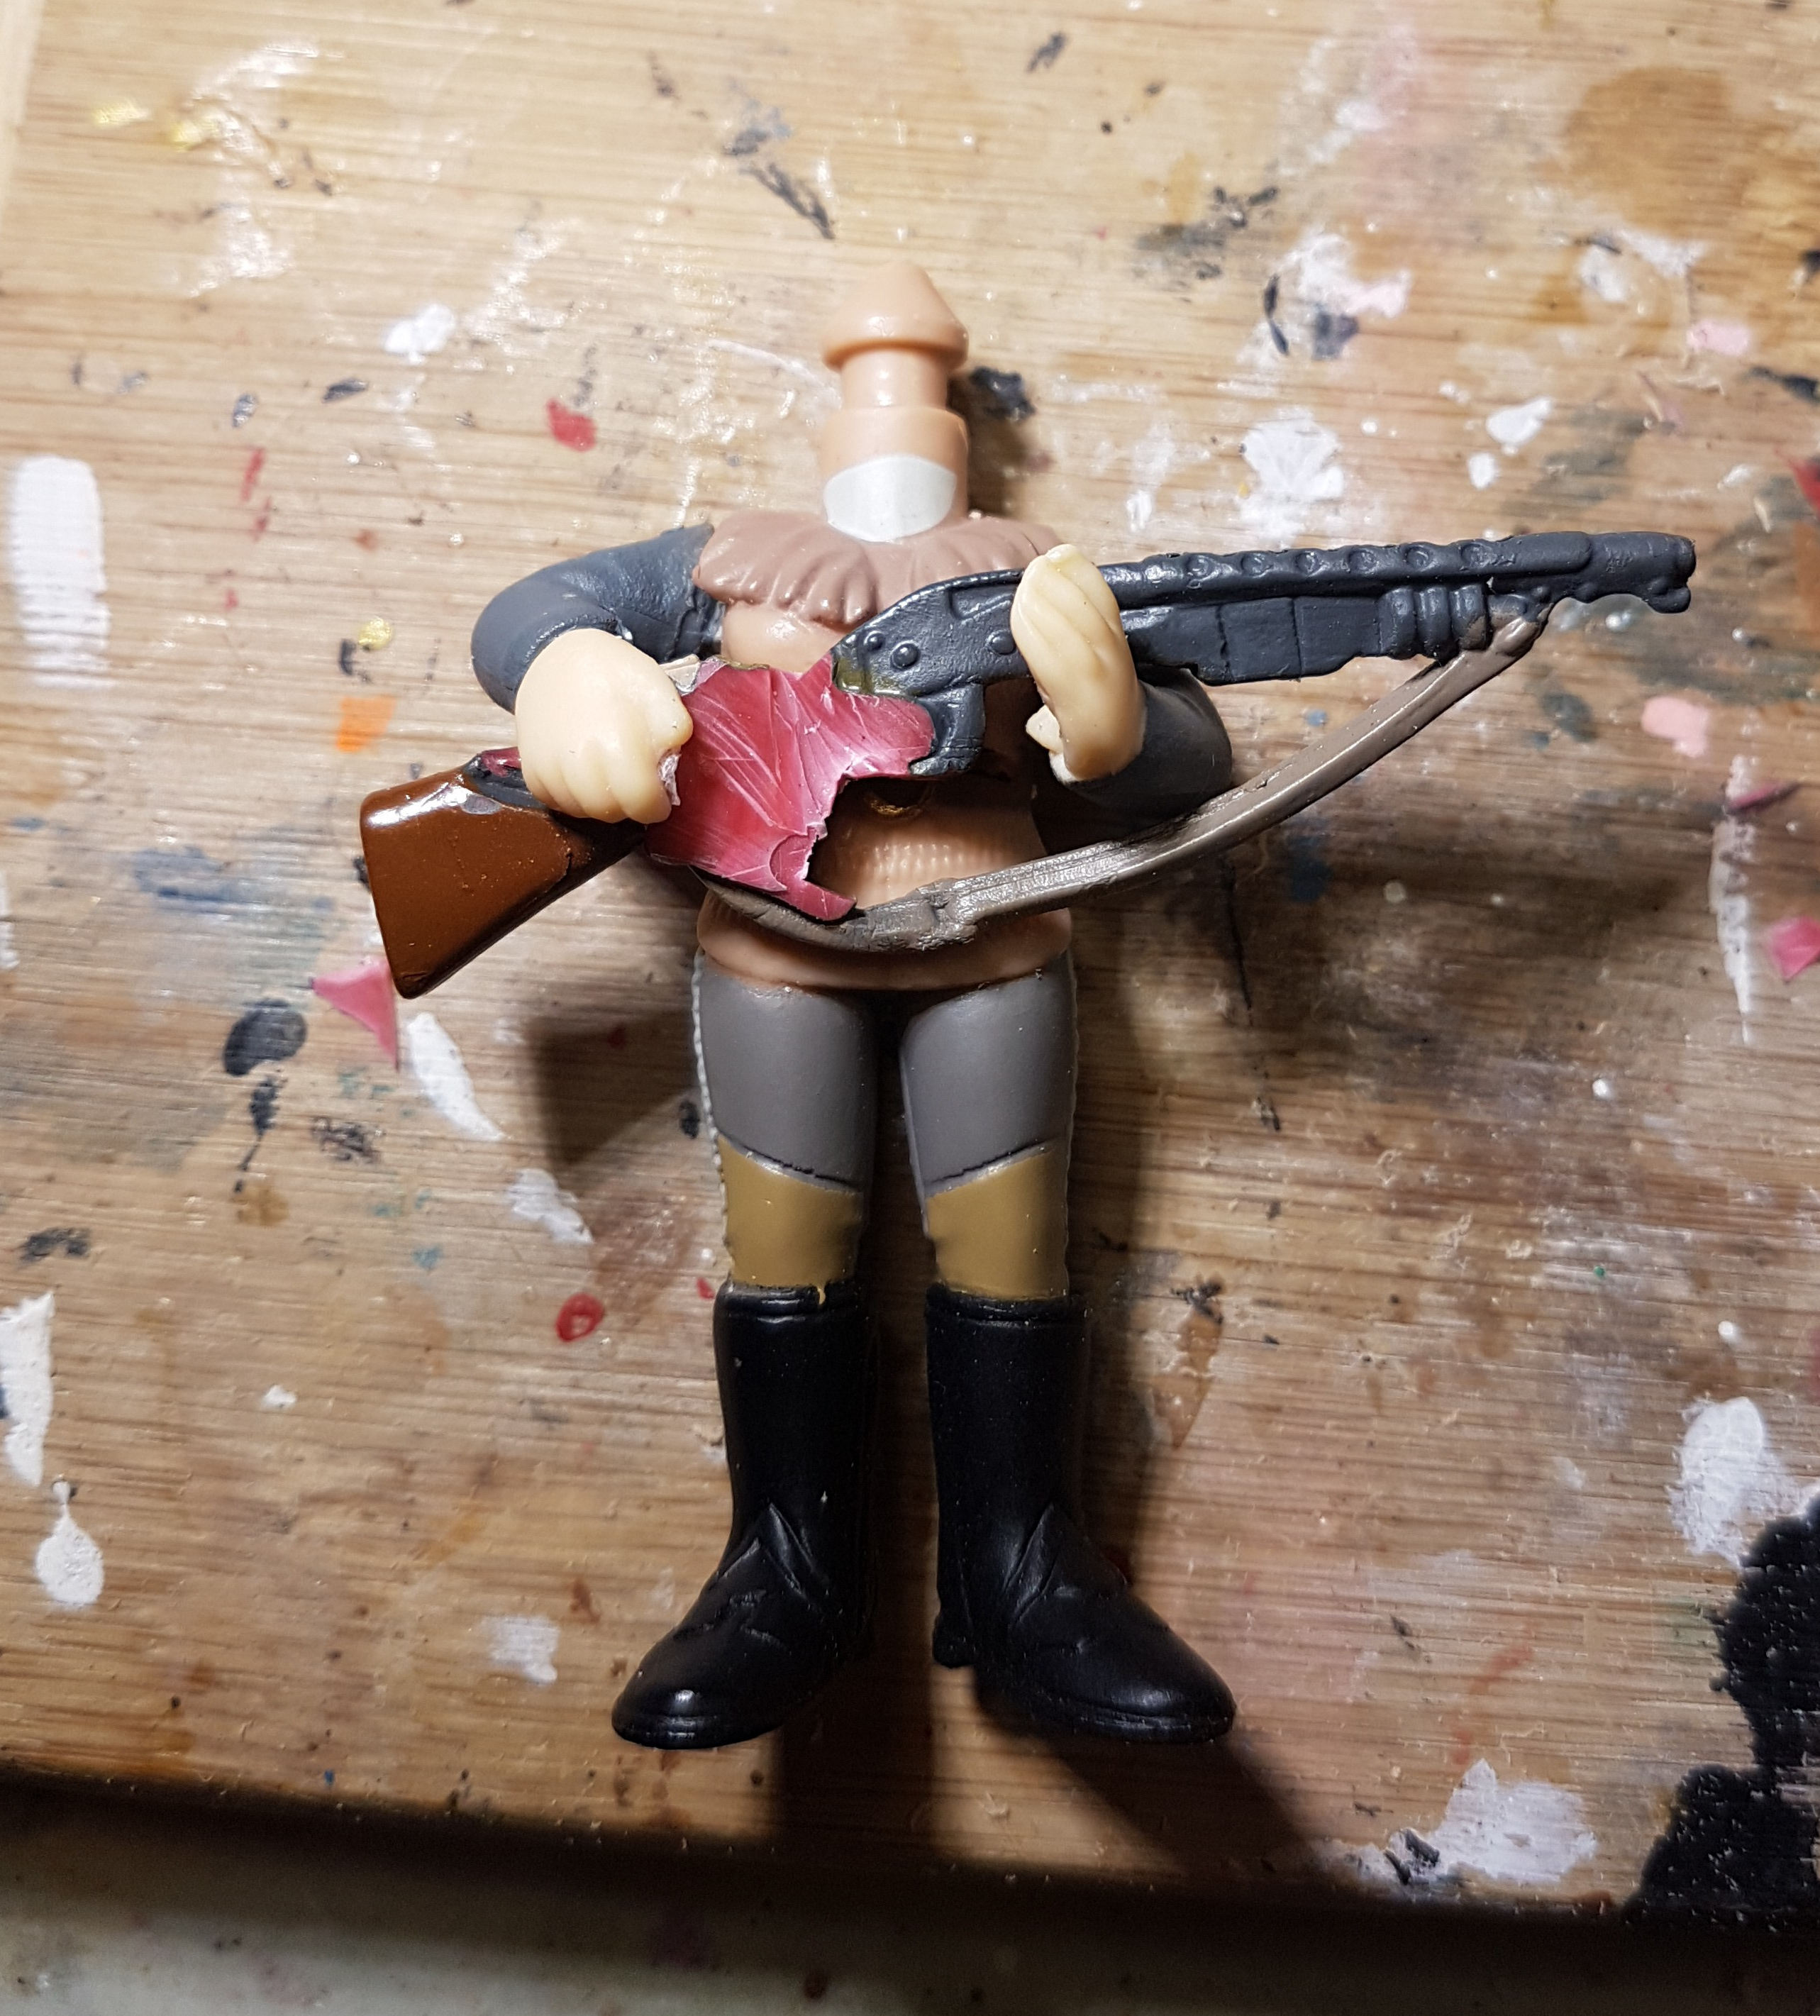
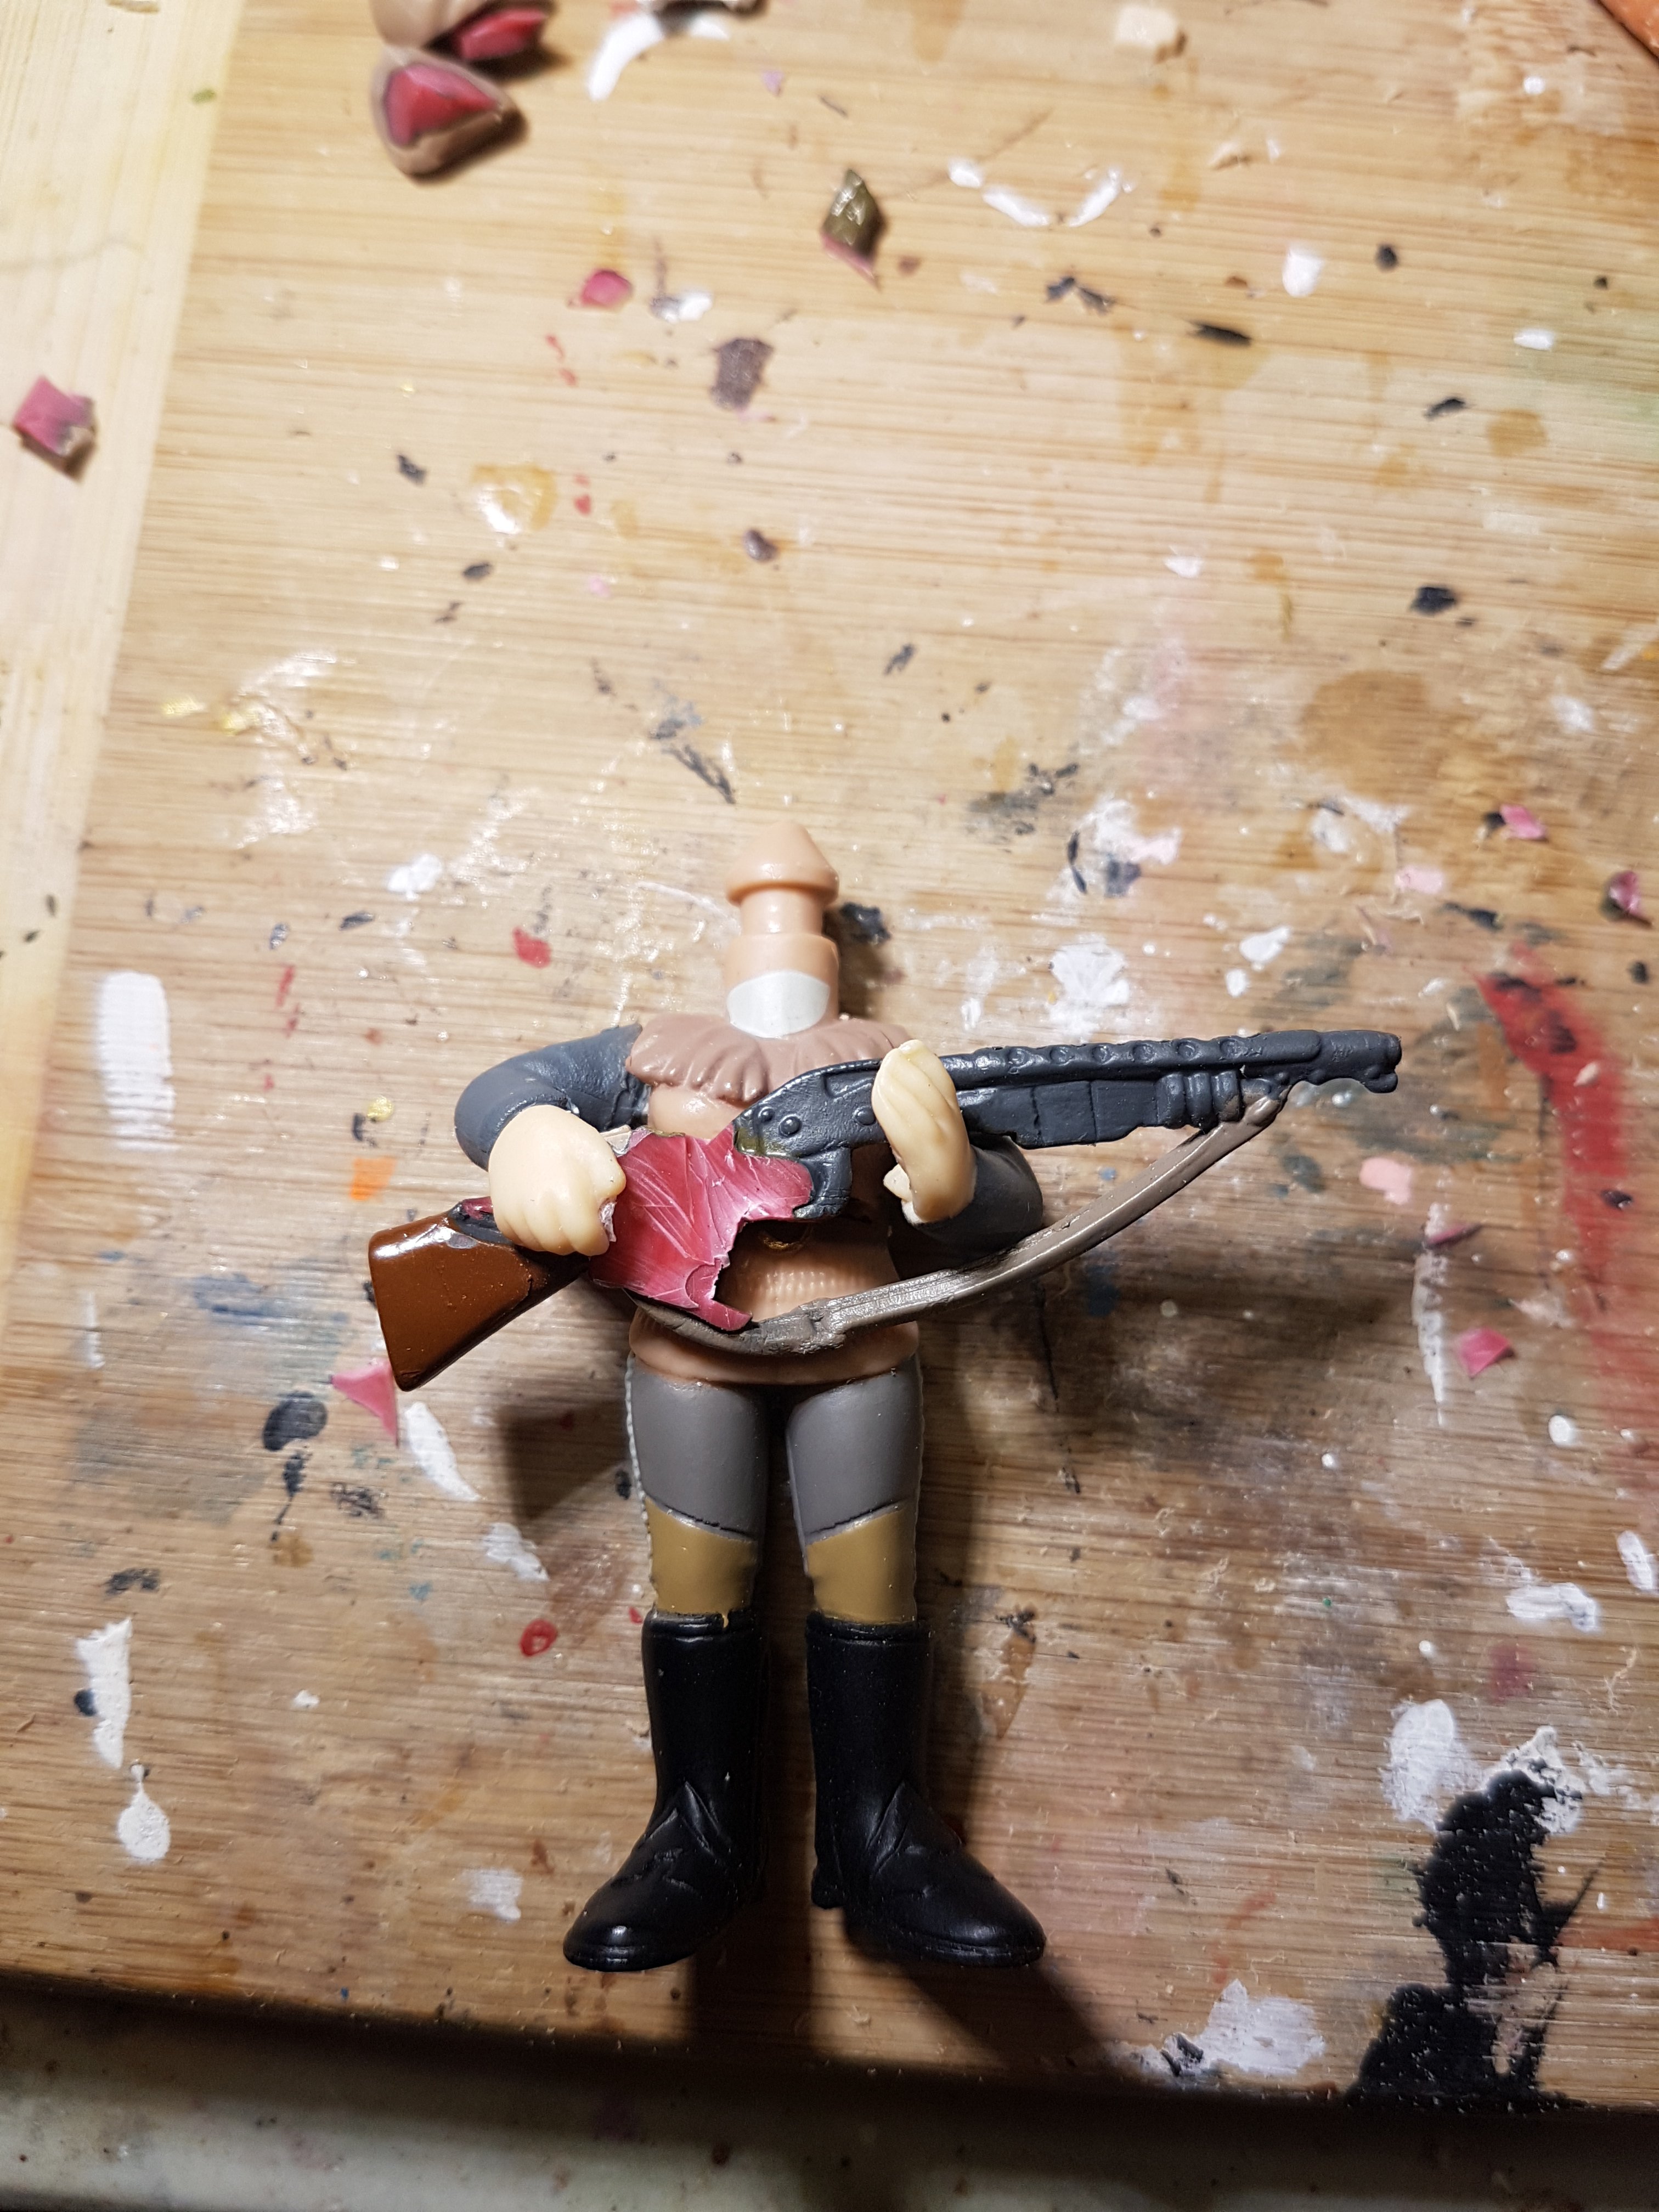
The next step is dry fitting so you can make any adjustments you need. The arms may not quite fit, or be in the exact position you want. The body may need some shaping. I’ve gone as far as to swap out feet for different (or no) shoes, so they need to be adjusted to look normal.
Put together for a test fit
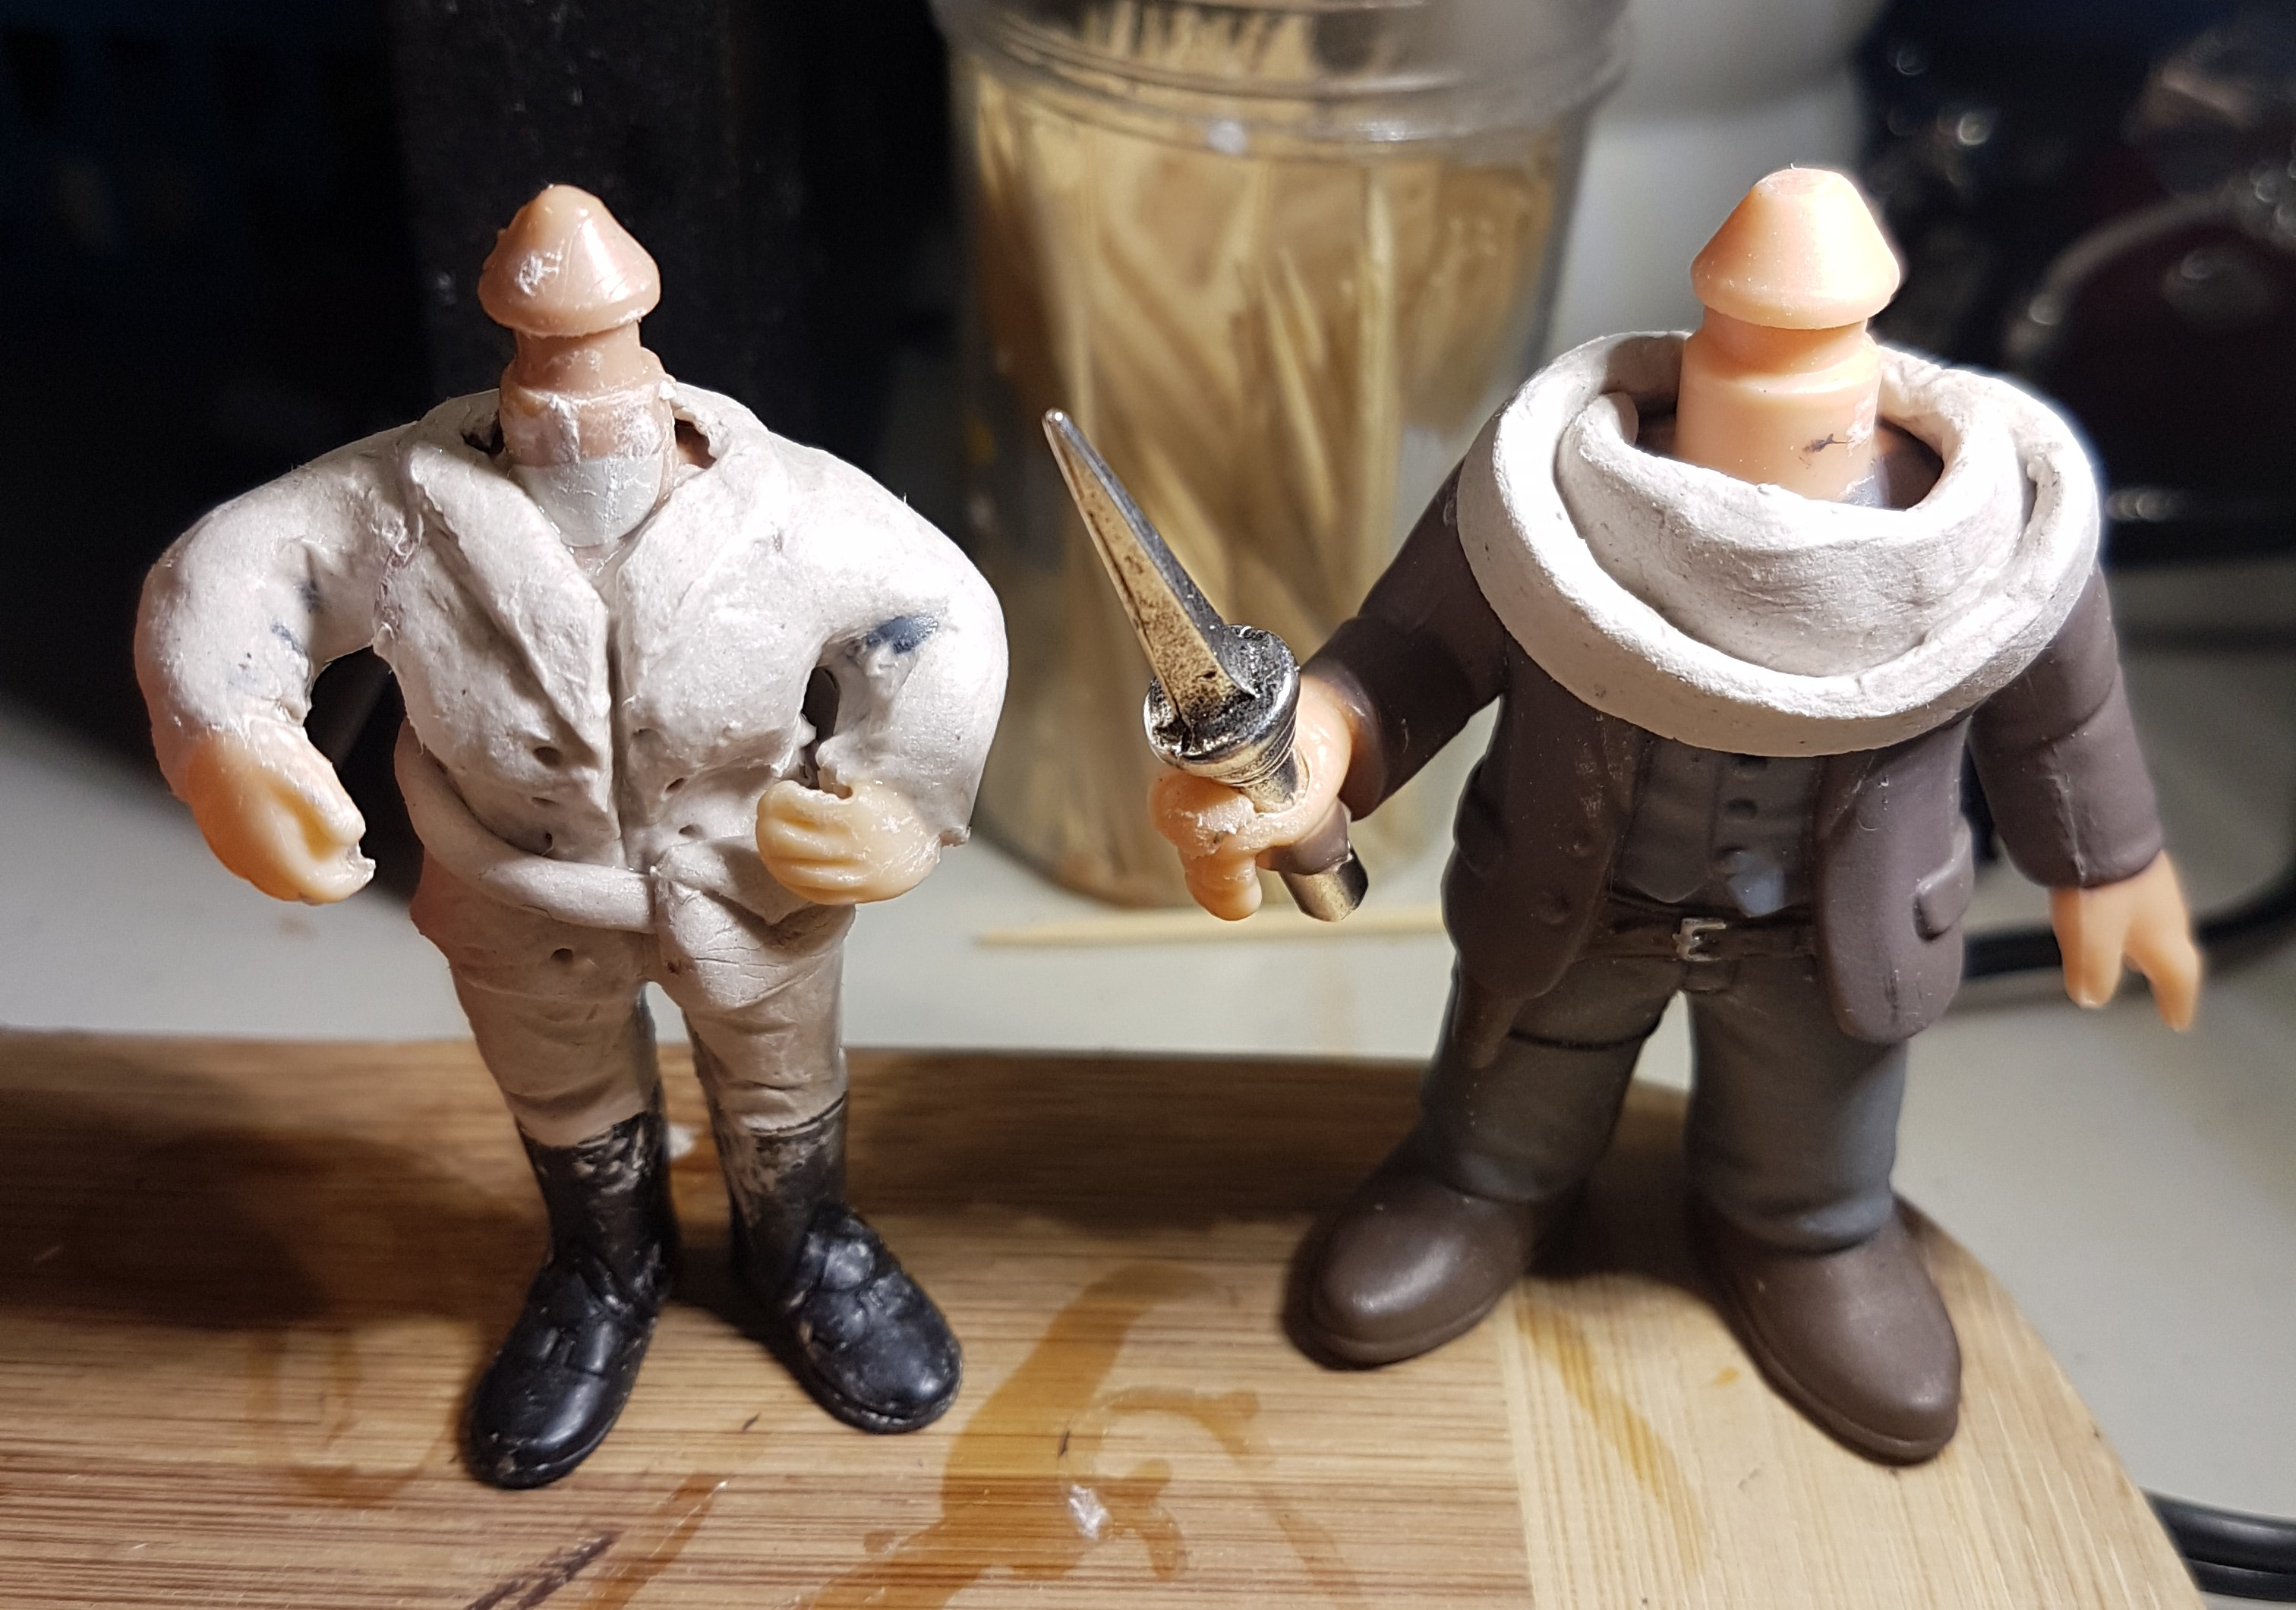
After that comes the preliminary sculpting. Sometimes it’s just filling in some holes or beefing up a part. In this case it’s adding a full jacket and waist pack. The medium for sculpting depends on a few factors. Texture, detail, availability, heat, use etc. For Charlie, there isn’t a lot of stress on the sculpture so I used air dry Das clay. I like it because it can be smoothed and give some great detail. you can also let it dry a bit and do some detail work, that cannot be done with sculpy. Scupy is a stronger and quick option. I use a heat gun to cure it. Third that I use is Milliput. It’s a combo of the two in that it is a mix like Sculpy, but air dries and is SUPER strong. It also can be smoothed and detailed like Das. It’s a bit harder for me as it requires a lot of kneading and my RA hands don’t always cooperate. Once dry, the pop gets sanded and sanded and sanded. I use different grits, as well as nail files, and small jeweler files to accent the smaller details.
Sculpting Charlies jacket. Bonus AU Bobby’s scarf
Now we’re onto the paint portion of our Pop. I’ve split this into 3 areas. Body, Eyes and Hair. Depending on the sculpting medium and the base it often takes a few coats. I tried getting “good” paint, with high pigment, but the best I’ve found is the simple bottles from any store. They adhere well to the pop and cover nicely. It’s generally a solid base coat, then the second coat with the shading and detail work. Next is the sealer/varnish. I like to use different finishes to add texture and to highlight. For AU Charlie, I used satin finish on her clothing, matte finish on her gun stock and skin and gloss on her gun barrel. This is the painting on the body
some shading
sealant. I use different finishes for a textured effect
some shading
The eyes are generally next. I work on a few pops at once to account for drying time. The eyes I do are my signature, of sorts. everyone has their own style. I love how they eyes can change the whole look. I use metallics for the eyes. Usually 2 or 3 colours. For AU Charlie, it’s bright green, copper and an ocean blue. they are slightly blended to fade into each other. I then use metallic black to fix the eyeline, and white to give a small line at the bottom, and the shine dots. Once that is dry, I use a thick sealer to provide a high shine and rounded finish. If you’ve followed my SM… Eyeshine means bedtime! It takes a while to dry and if you jostle the pops, the sealant will drip, so I usually do them, and head to bed (or out if it’s early) so I don’t jostle them.
Eye pallet for a few pops
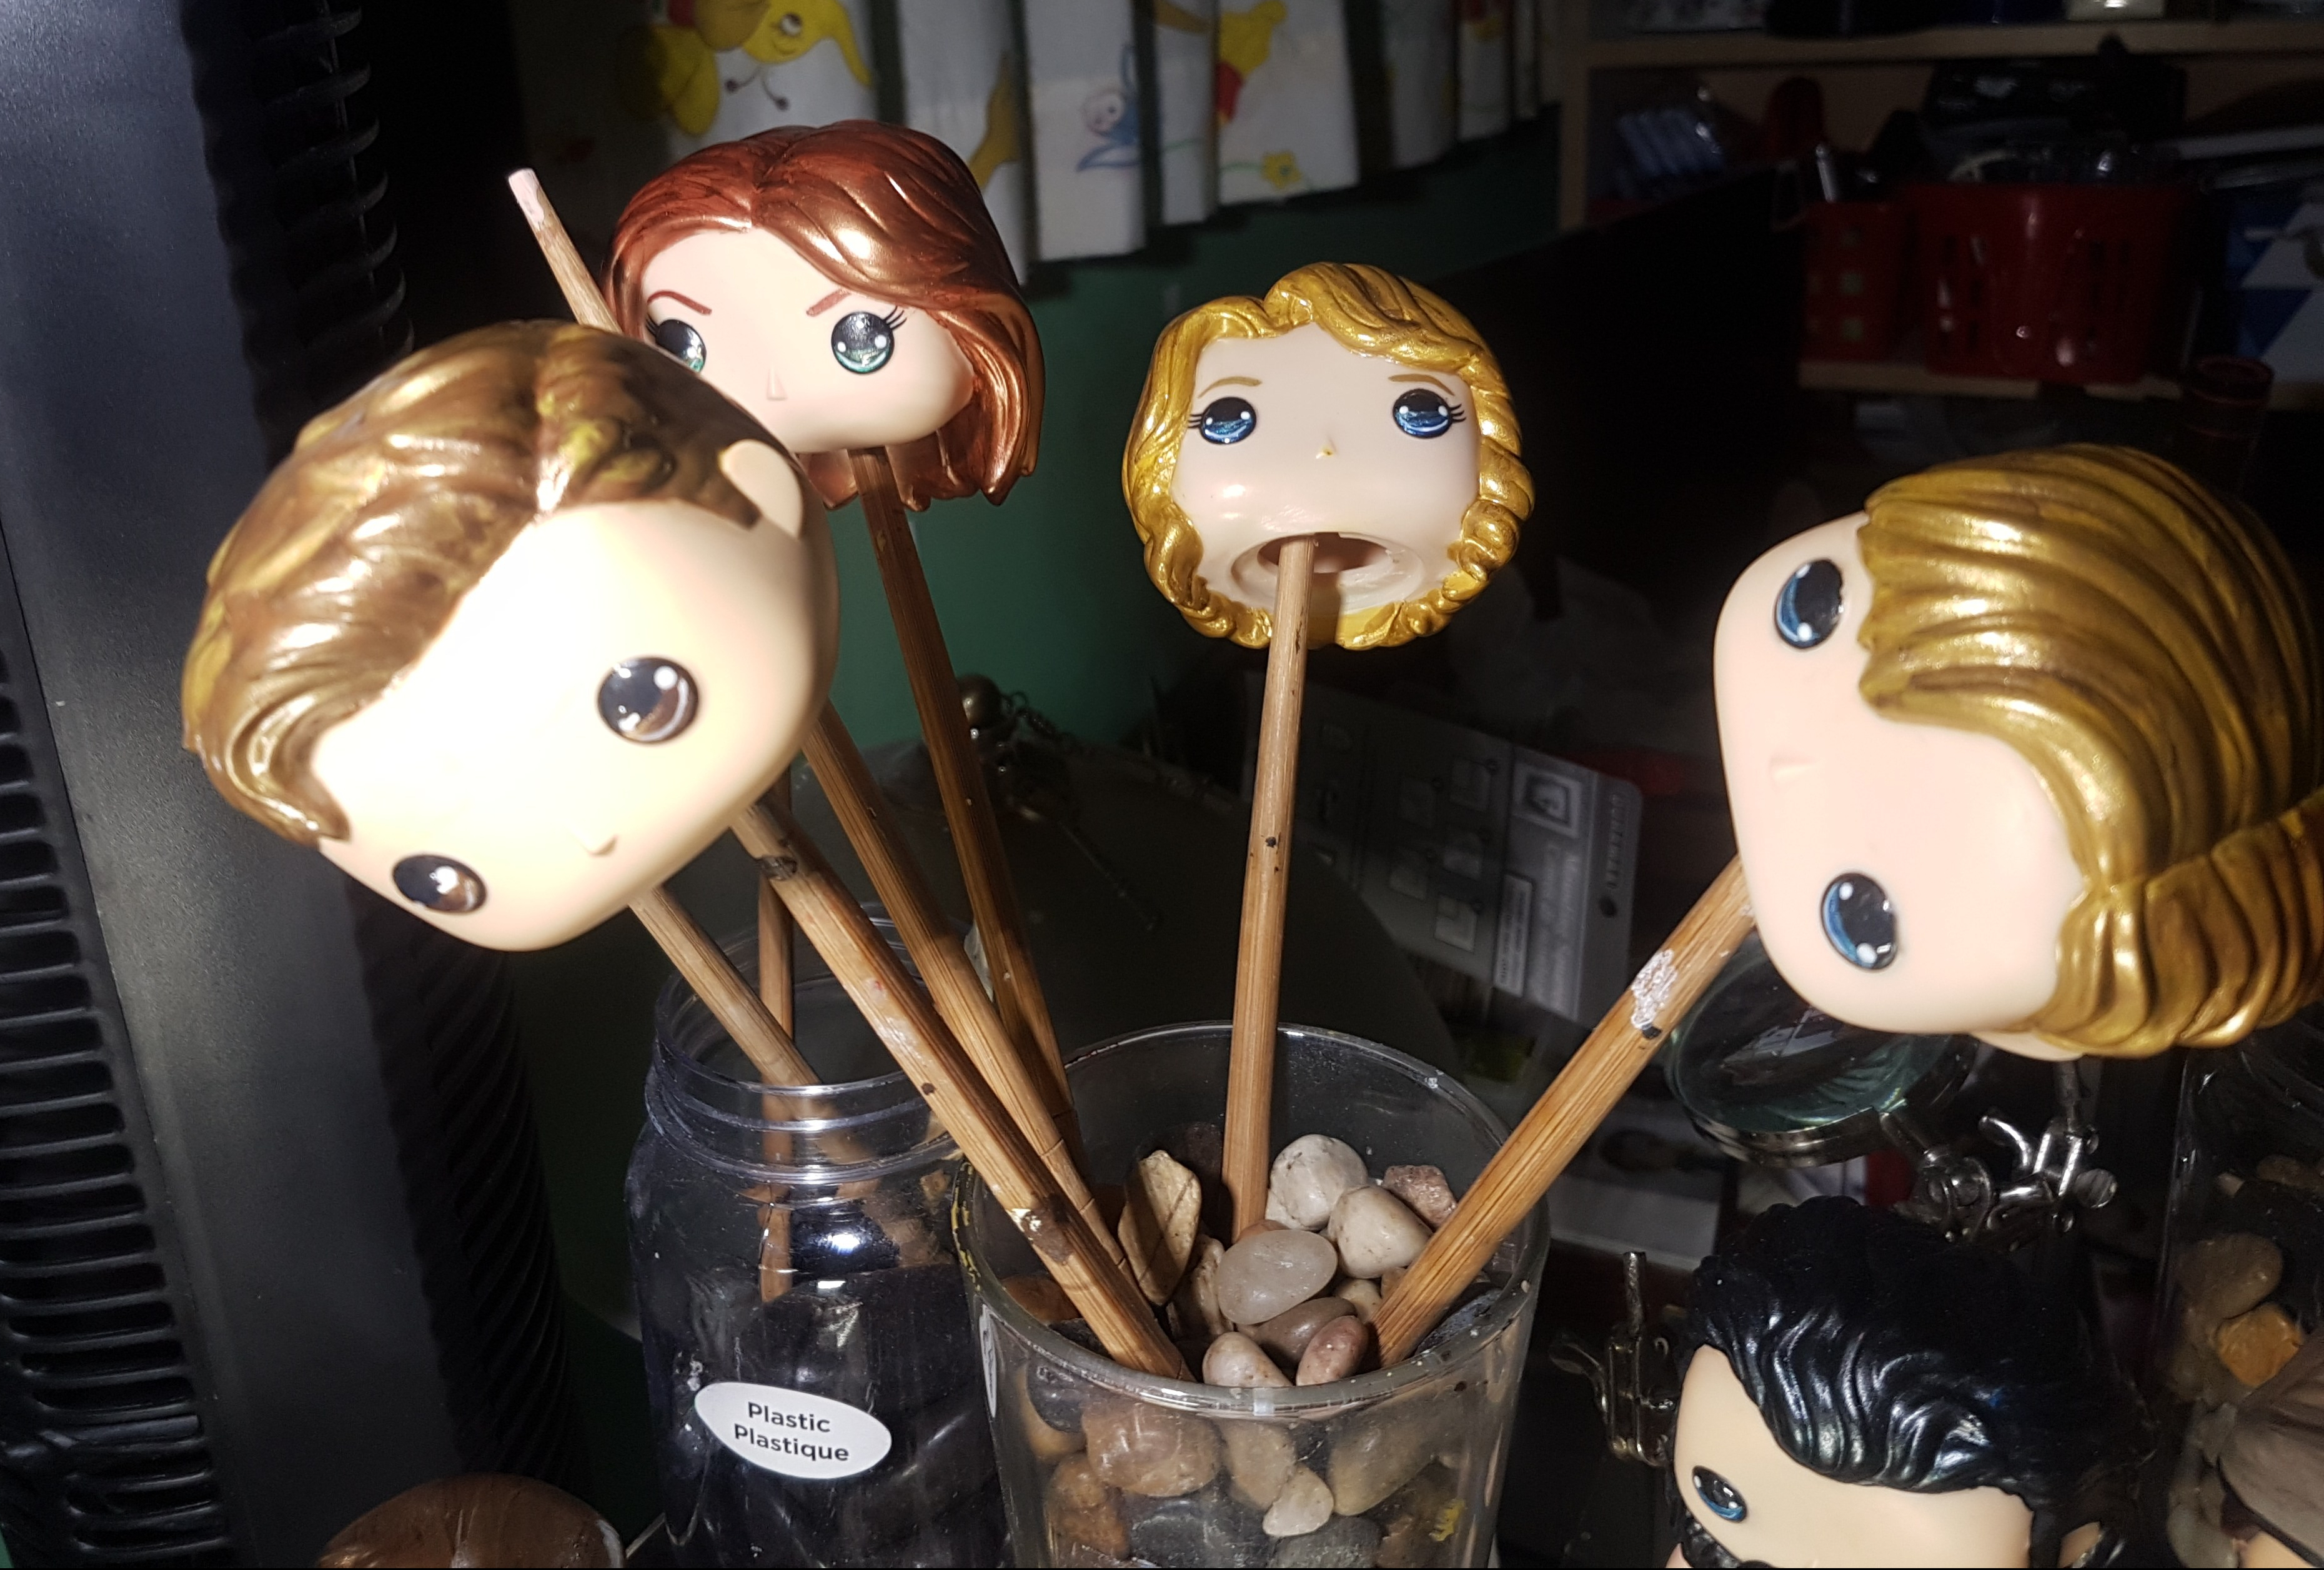
Here are the eyes drying
The hair comes next. I start with a base coat the colour I need. I add some irridescence to the paint to give some hair shine. Then I add highlights and low lights with metallics. For AU Charlie, I use paprika for the base, copper, gold and black/Dark brown metallics for the high and low lights. Then I use a wide dry brush to blend them together. This can get messy so after, I clean up the hairlines with pointed cotton swabs and acetone. If the face is painted, I’ll protect it with tape. Then it gets a high gloss varnish and a rest on the “bouquet of heads”.
Hair painting
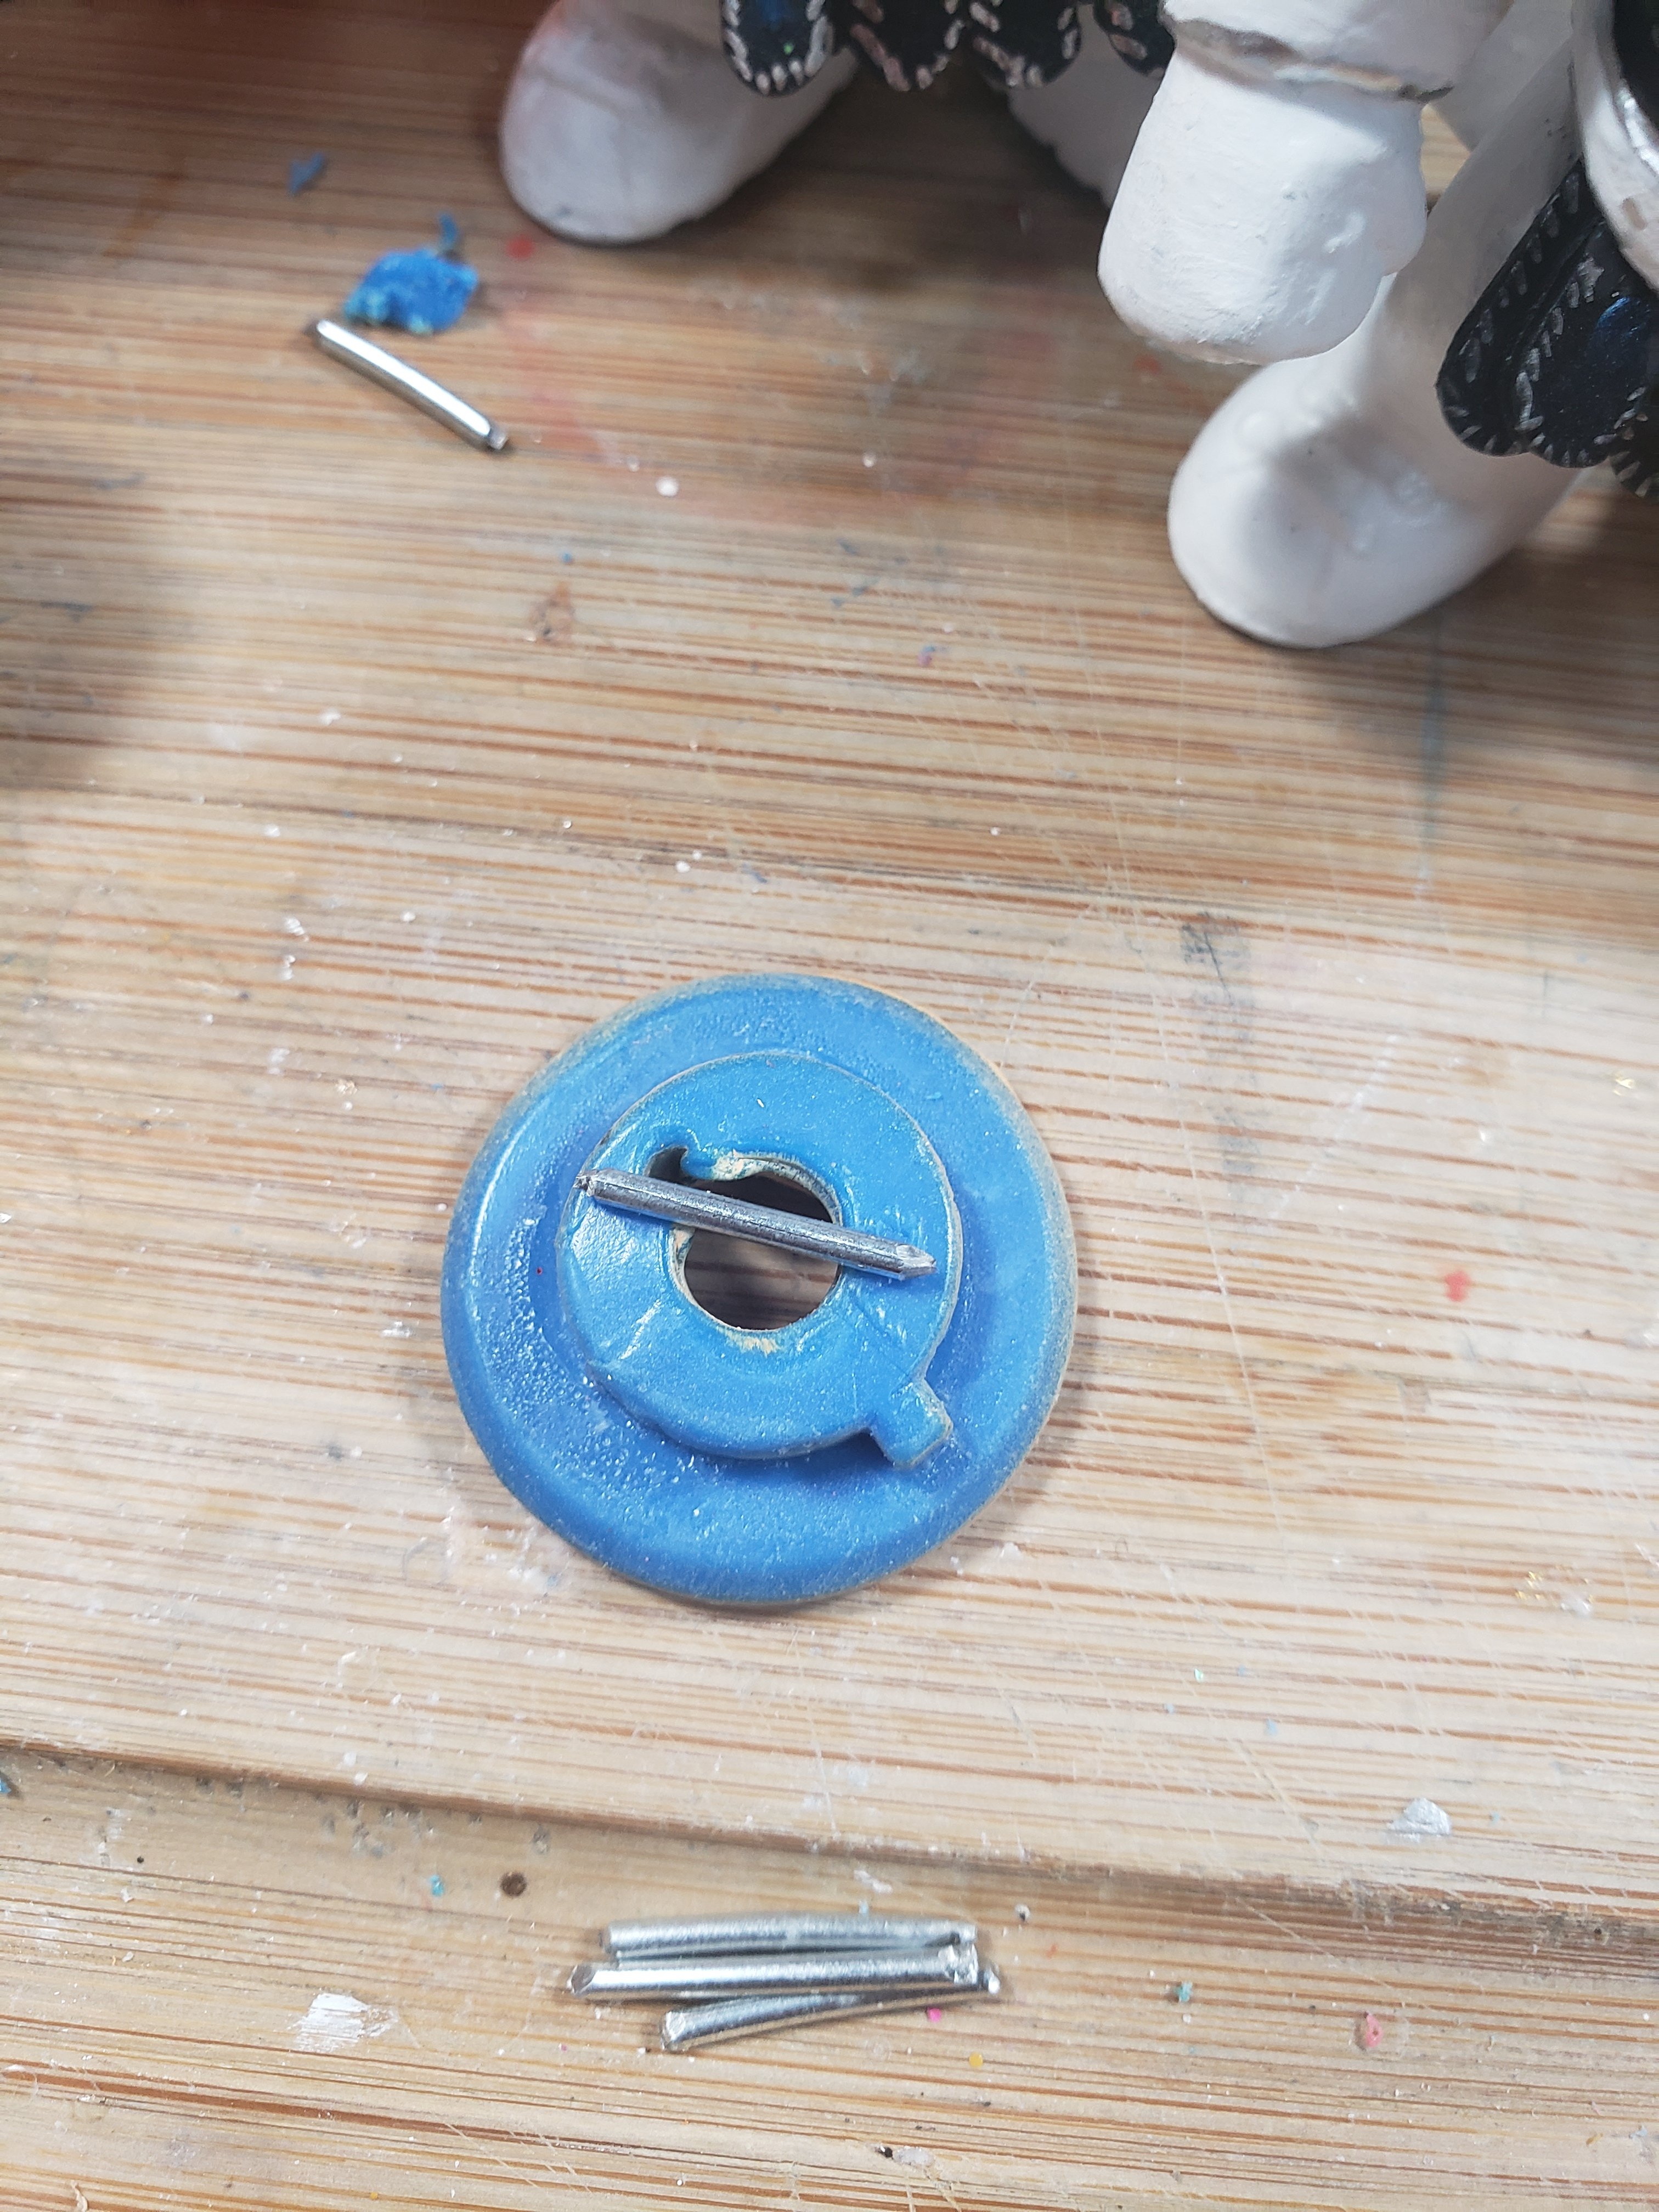
Now to assembly. Sometimes when you’ve used a different head, it doesn’t fit well onto the body. That’s when finagling comes in. Sometimes just heating to melt and reforming, sometimes shaving down, sometimes some swearing and banging. Sometimes the problem is the neck is too small. Sometimes I have no choice but to glue the head on, but it’s not ideal. I prefer when the head can still move. Other times I use a pin to secure the head, and still let it move.
Sometimes there are challenges…. This isn’t AU Charlie, but an example of how the neck/plug needs modification sometimes.
Finally it’s all together! Then it needs a few days for the paint, glue and sealant to cure, otherwise it sticks to the insert. Then it’s ready for it’s photo shoot and new family! (or staying in this family)
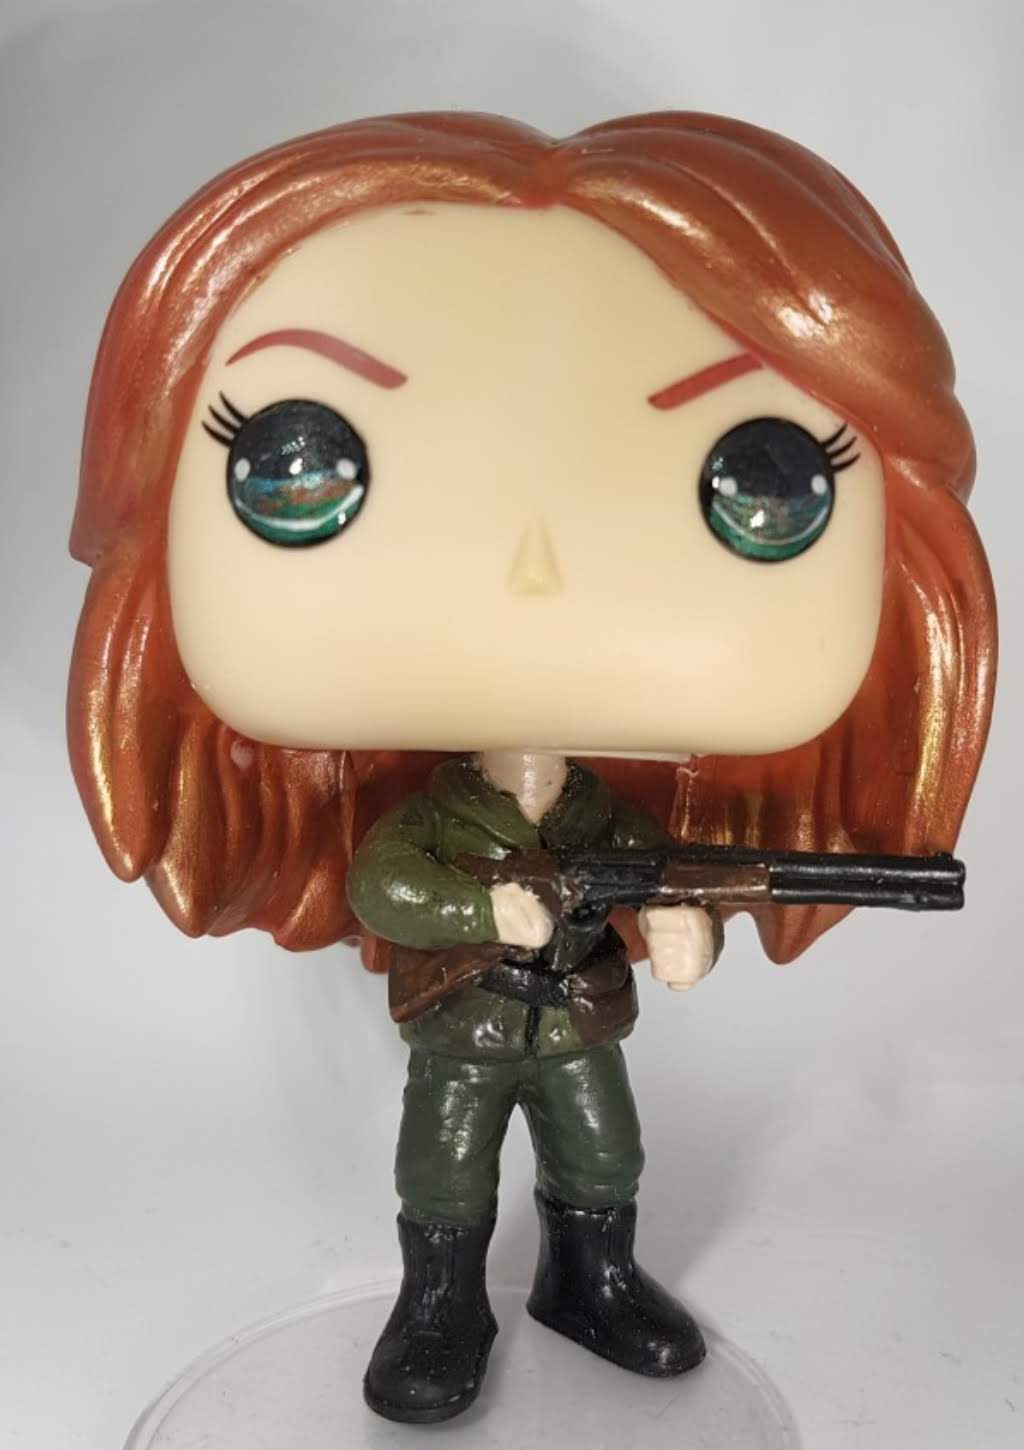
Finished AU Charlie. 4 separate Pops,
I hope this gave you an insight into what goes into these guys. They usually take a week or two, with drying time to complete. Some faster, some longer. Labours of love for sure! Some are harder to send to their new homes than others!


")