
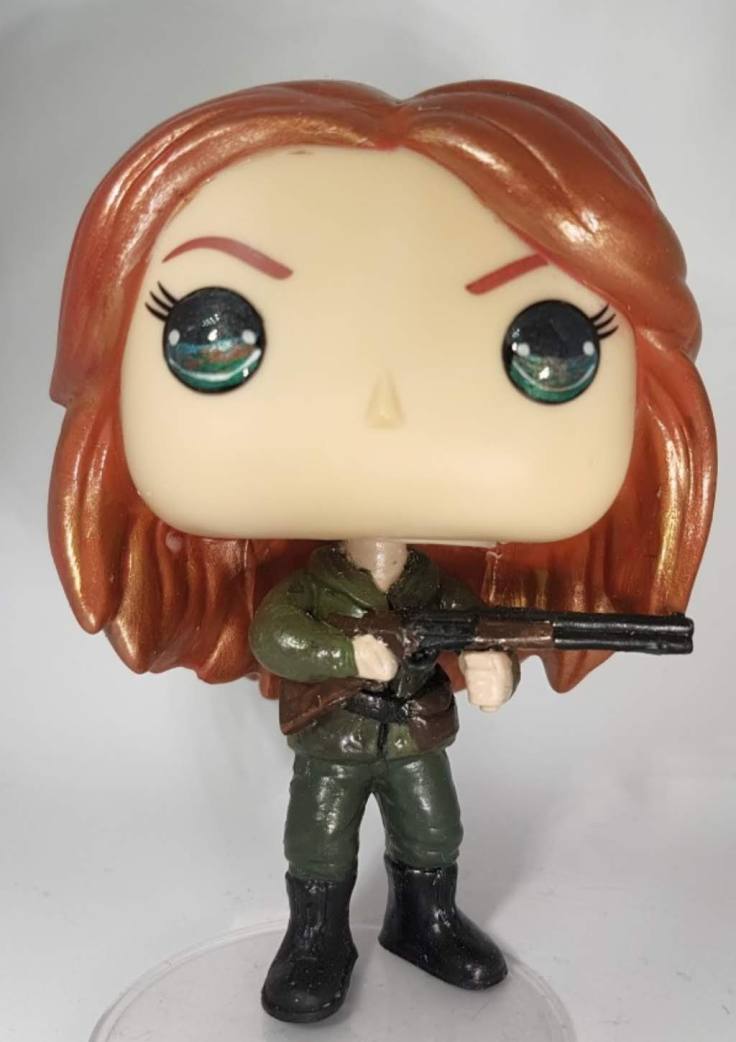
This post will walk you through the steps of making an AU Charlie pop. The process will be different for each one, even when you do more than one of the same character. Plastics will react differently, paints may not blend quite the same. But this gives you a glimpse behind the curtain… or gish flag .. I don’t really have curtains….
Step one. Finding the parts. Sometimes you can use one pop and with some paint and sculpting make it into what you want. Sometimes you need to use just swap a head or body to get the look you want. Sometimes you have to go full Dr Benton and take pieces and parts from a few pops to get close to what you need. For AU Charlie, I used 4 pops. 1 for the rifle, 1 for the arms, 1 for the body, and 1 for the head.
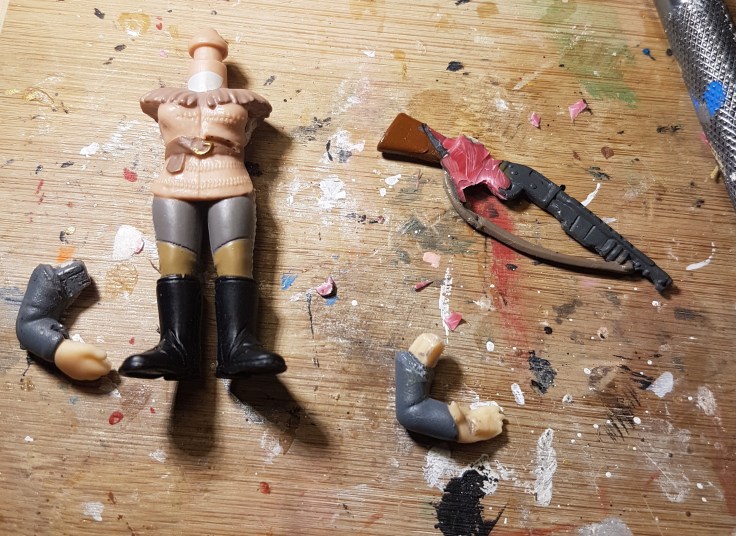
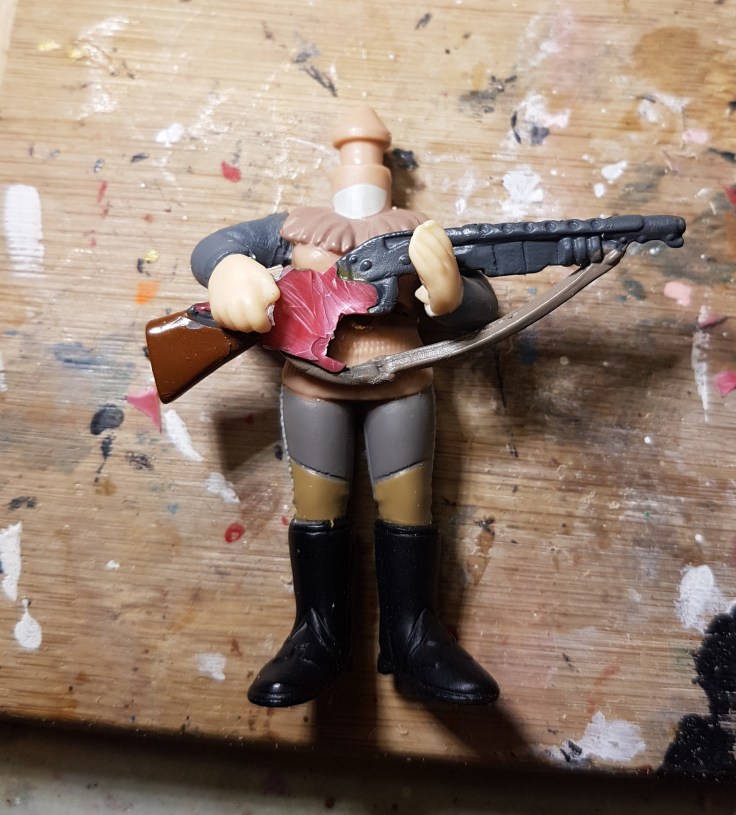
The next step is dry fitting so you can make any adjustments you need. The arms may not quite fit, or be in the exact position you want. The body may need some shaping. I’ve gone as far as to swap out feet for different (or no) shoes, so they need to be adjusted to look normal.
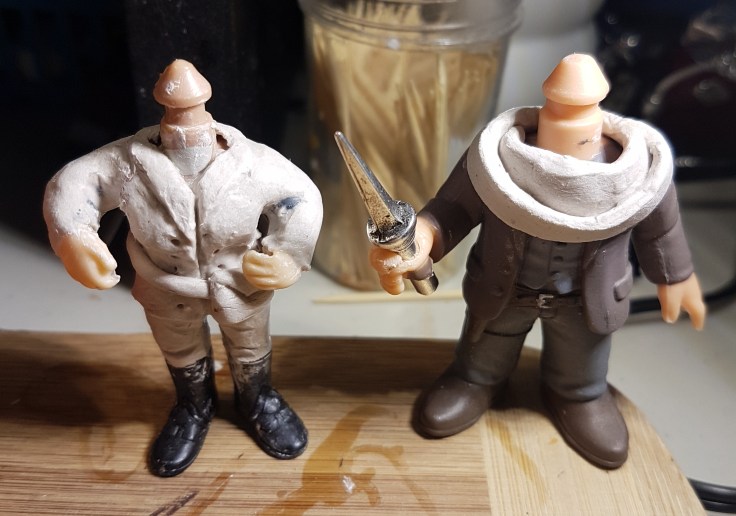
After that comes the preliminary sculpting. Sometimes it’s just filling in some holes or beefing up a part. In this case it’s adding a full jacket and waist pack. The medium for sculpting depends on a few factors. Texture, detail, availability, heat, use etc. For Charlie, there isn’t a lot of stress on the sculpture so I used air dry Das clay. I like it because it can be smoothed and give some great detail. you can also let it dry a bit and do some detail work, that cannot be done with sculpy. Scupy is a stronger and quick option. I use a heat gun to cure it. Third that I use is Milliput. It’s a combo of the two in that it is a mix like Sculpy, but air dries and is SUPER strong. It also can be smoothed and detailed like Das. It’s a bit harder for me as it requires a lot of kneading and my RA hands don’t always cooperate. Once dry, the pop gets sanded and sanded and sanded. I use different grits, as well as nail files, and small jeweler files to accent the smaller details.
Now we’re onto the paint portion of our Pop. I’ve split this into 3 areas. Body, Eyes and Hair. Depending on the sculpting medium and the base it often takes a few coats. I tried getting “good” paint, with high pigment, but the best I’ve found is the simple bottles from any store. They adhere well to the pop and cover nicely. It’s generally a solid base coat, then the second coat with the shading and detail work. Next is the sealer/varnish. I like to use different finishes to add texture and to highlight. For AU Charlie, I used satin finish on her clothing, matte finish on her gun stock and skin and gloss on her gun barrel. This is the painting on the body


The eyes are generally next. I work on a few pops at once to account for drying time. The eyes I do are my signature, of sorts. everyone has their own style. I love how they eyes can change the whole look. I use metallics for the eyes. Usually 2 or 3 colours. For AU Charlie, it’s bright green, copper and an ocean blue. they are slightly blended to fade into each other. I then use metallic black to fix the eyeline, and white to give a small line at the bottom, and the shine dots. Once that is dry, I use a thick sealer to provide a high shine and rounded finish. If you’ve followed my SM… Eyeshine means bedtime! It takes a while to dry and if you jostle the pops, the sealant will drip, so I usually do them, and head to bed (or out if it’s early) so I don’t jostle them.


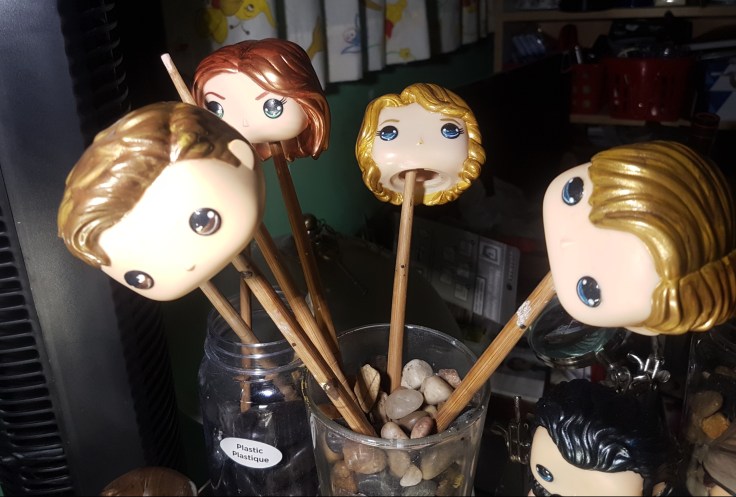
The hair comes next. I start with a base coat the colour I need. I add some irridescence to the paint to give some hair shine. Then I add highlights and low lights with metallics. For AU Charlie, I use paprika for the base, copper, gold and black/Dark brown metallics for the high and low lights. Then I use a wide dry brush to blend them together. This can get messy so after, I clean up the hairlines with pointed cotton swabs and acetone. If the face is painted, I’ll protect it with tape. Then it gets a high gloss varnish and a rest on the “bouquet of heads”.
Now to assembly. Sometimes when you’ve used a different head, it doesn’t fit well onto the body. That’s when finagling comes in. Sometimes just heating to melt and reforming, sometimes shaving down, sometimes some swearing and banging. Sometimes the problem is the neck is too small. Sometimes I have no choice but to glue the head on, but it’s not ideal. I prefer when the head can still move. Other times I use a pin to secure the head, and still let it move.

Finally it’s all together! Then it needs a few days for the paint, glue and sealant to cure, otherwise it sticks to the insert. Then it’s ready for it’s photo shoot and new family! (or staying in this family)
I hope this gave you an insight into what goes into these guys. They usually take a week or two, with drying time to complete. Some faster, some longer. Labours of love for sure! Some are harder to send to their new homes than others!

Leave a comment